Gardens · narrow side yard foliage access
Design a Narrow Side-Yard Garden with Layered Foliage, Access, and Borrowed Light
Turn a narrow side yard into a usable foliage garden by protecting circulation and utilities, mapping reflected and seasonal light, and layering plants without closing the passage.
Published Last updated
In this guide
- Begin with the passage the household needs
- Draw the usable corridor before the garden
- Map direct, reflected, and borrowed light
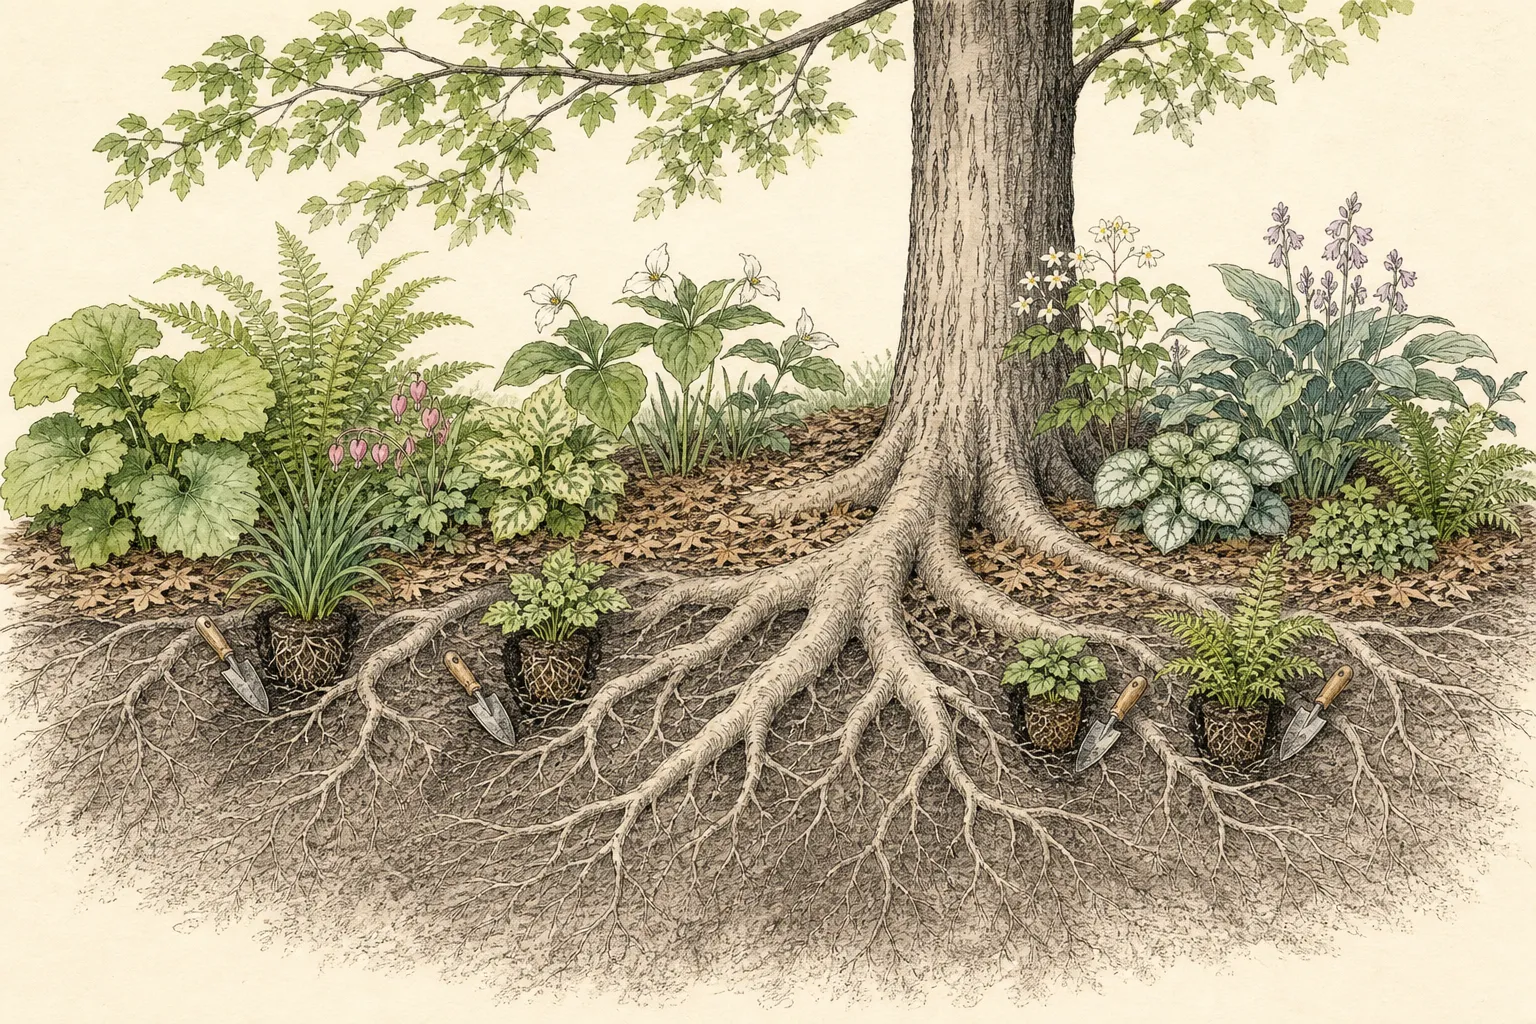
- Read the wall-side root zone
- Use the path as the broadest design plane
- Layer foliage in planes, not ranks
- Create depth with overlap and release
- Select plants by mature behavior
- Install a small framework and observe it
- Audit the corridor as plants mature
- Fit six low plants beside a measured passage
- Design ideas
Begin with the passage the household needs
A side yard is rarely an empty strip awaiting plants. It may be the route for bins, bicycles, deliveries, a hose, maintenance equipment, emergency egress, or access to a rear garden. List every recurring movement and the largest ordinary object that must pass. Note gate swings, door arcs, steps, taps, meters, drains, vents, utility equipment, and the places where a person needs to turn or set something down.
Walk the route carrying the widest common item and record where shoulders, hands, or wheels already brush a wall or fence. Repeat the test from both ends because turning and approach angles can expose different conflicts. Check local code and utility requirements before setting dimensions; there is no universal path width that can replace them. The useful corridor must remain open at mature plant spread, not only while young plants are tied back. Include seasonal arching, wet foliage, and snow or storm debris where locally relevant.
Decide whether the space is primarily a route with a garden, a place to pause, or a view from indoors. One side yard can support more than one function, but the hierarchy must be clear. A route used daily should not become a sequence of stepping negotiations, while a window view can hold denser planting in a pocket outside circulation. Let actual use determine where richness can safely accumulate.
Draw the usable corridor before the garden
Make a measured base plan of both boundaries, building projections, thresholds, utilities, drainage features, and established roots. Draw the continuous travel envelope and all service clearances first. NC State's landscape-design guidance treats circulation as an organizing system; in a narrow side yard it is the structure that decides what remains plantable. The leftover pockets, not the full property strip, are the honest planting area.
Show turning bays and task positions, not just a line down the center. A meter may be visible from the path but still impossible to service without standing in a crown. A drain needs room for inspection and cleaning. A gate requires an approach from both sides. Keep these task volumes unplanted or use only a surface that can tolerate the work. Do not plan to lift pots or cut back foliage every time routine access is required.
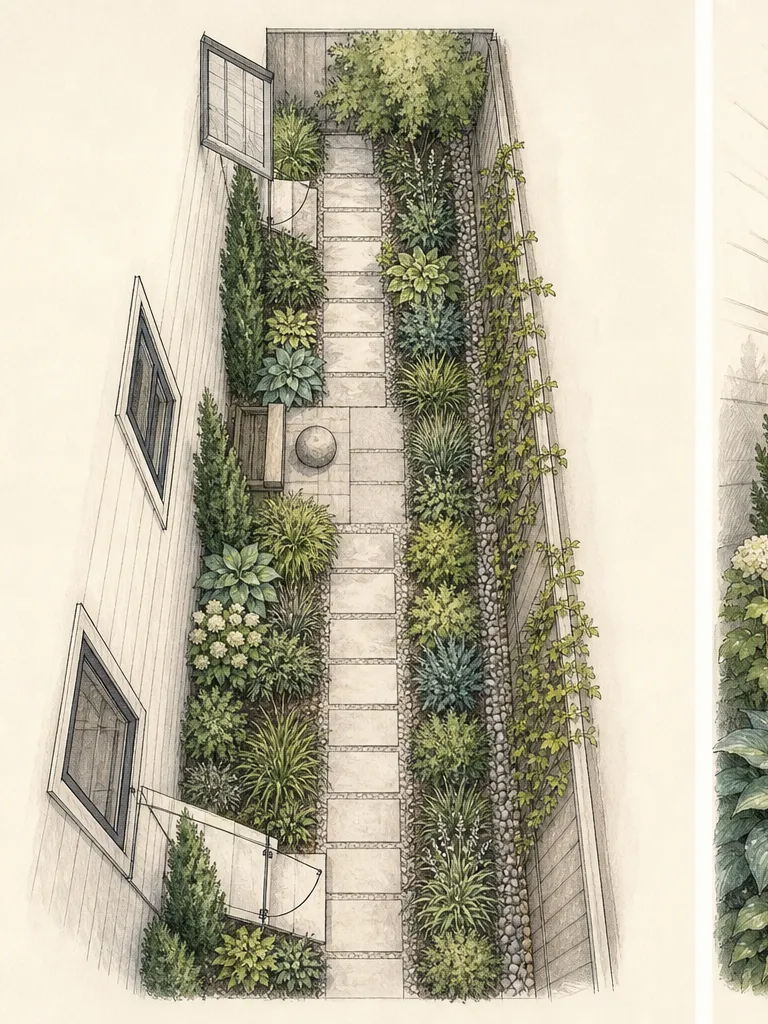
Test the plan with mature outlines. Use documented species or cultivar spread from sources suitable to the region, then add the direction of arching stems. A plant whose label width fits a pocket may still lean into shoulder space after rain. Shift broad forms into recesses, choose narrower habits, or reduce the number of layers. The corridor is complete only when it works through the plants' normal seasonal posture.
Map direct, reflected, and borrowed light
Observe the side yard at several times of day and in more than one season. Record direct sun, bright open shade, deep shade, and short moving bands created by roofs, fences, and deciduous canopies. A compass direction alone is not enough: building height, boundary material, neighboring vegetation, latitude, and season alter the actual pattern. Photograph from fixed points so the light map can be compared over time.
Notice the sky visible above the passage and pale surfaces that return diffuse light. This borrowed light can make foliage legible even where direct sun is brief, but do not assume a wall increases usable plant light by a measurable universal amount. Observe leaf color, stem extension, and flowering on existing plants, and use locally appropriate shade categories. A glossy or pale leaf may catch available light visually without changing the site's horticultural exposure.
Mark light at plant height. The top of a wall-trained plant may receive sun while its base remains shaded; a neighboring shrub may intercept the narrow bright band before it reaches a low perennial. Repeat observations after leaf-out and after a new fence or paint color changes the scene. Select plants for the mature, seasonal pattern rather than the unusually open condition before the garden is installed.
Read the wall-side root zone
Walls and eaves can create conditions unlike the rest of the garden. Some pockets remain dry because rain is intercepted, while downspouts or paving can concentrate water elsewhere. Heat may build near a sunlit surface; an enclosed shaded passage may stay cool and damp. RHS wall-side guidance emphasizes matching plants to aspect and conditions. Map these variations along the route rather than assigning one moisture label to the whole side yard.
Inspect where water enters and leaves during safe rainfall or irrigation. Keep grading, drains, damp-proofing, foundations, and utility lines within professional and local requirements. Do not raise soil against a building or block ventilation to create deeper beds. If drainage or foundation conditions are uncertain, resolve them with a qualified local professional before planting. Ornamental design should not conceal a building problem.
Where soil volume is limited, reduce plant size and competition instead of compensating with frequent rescue watering. Containers can provide controlled pockets only if their load, drainage, safe placement, and routine access are suitable. A container that narrows the path or drains against a wall is not a flexible solution. Every root zone must have a realistic source of water and a way to be checked.
Use the path as the broadest design plane
In a narrow garden the path occupies much of the view, so its material, joints, direction, and edges carry more visual weight than another row of plants. Preserve safe, code-compliant footing and drainage. A simple surface with a quiet rhythm can make the space feel intentional before planting. Avoid a restless collection of small materials that amplifies the corridor's length or creates joints that are difficult to keep clear.
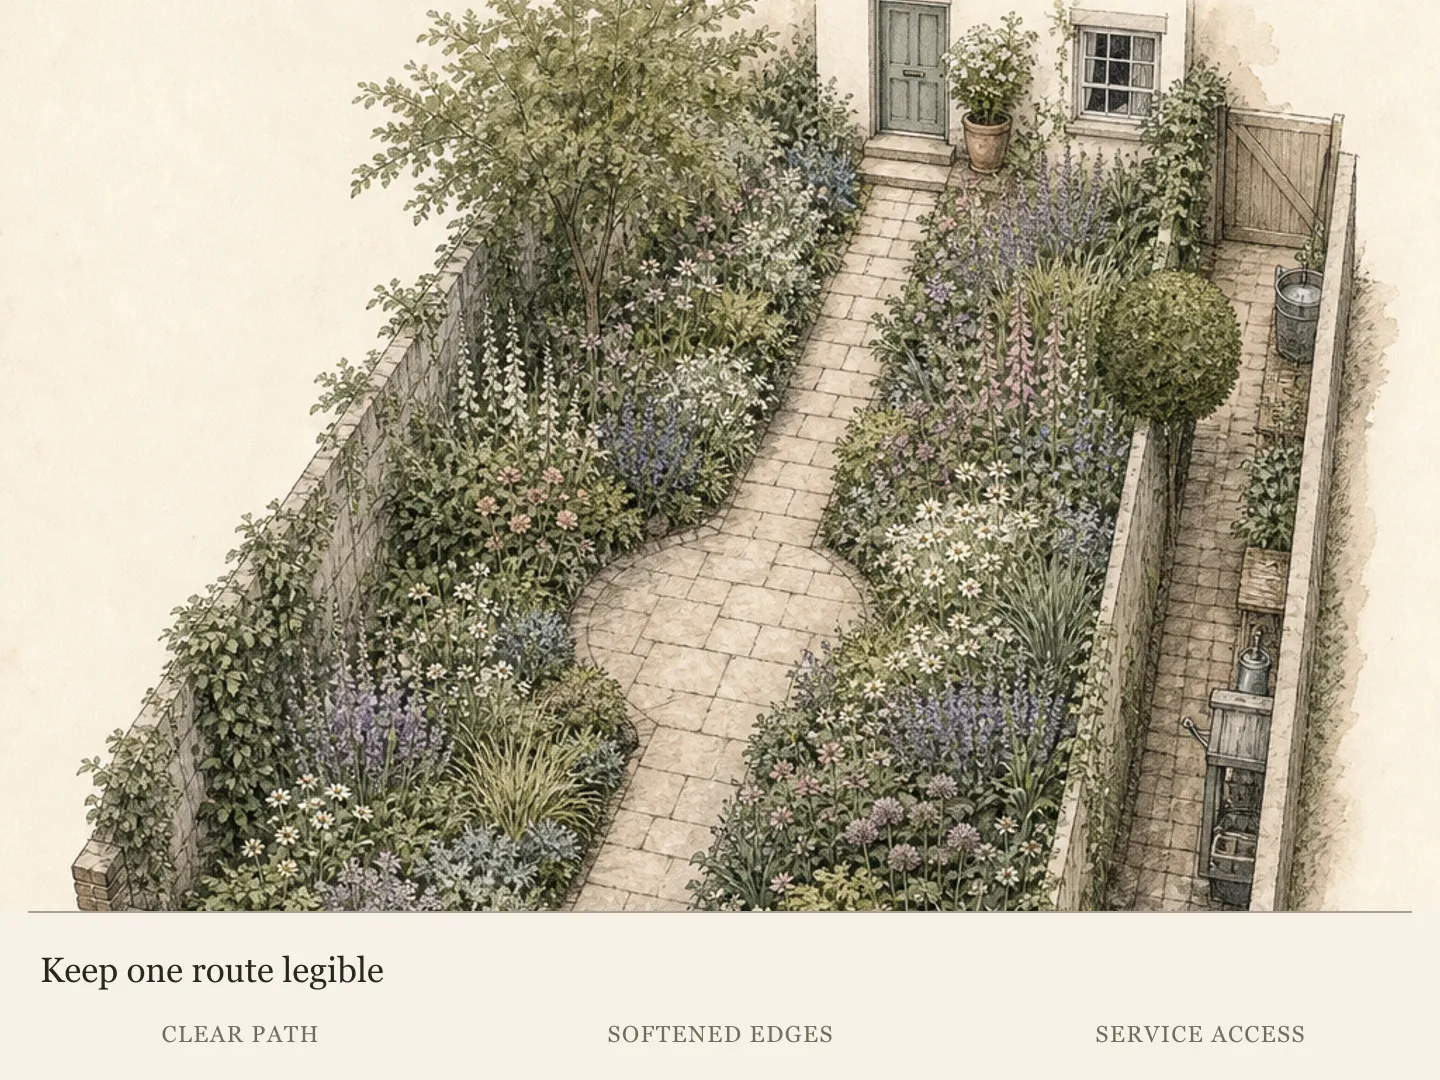
Decide whether to emphasize the long axis or break it gently. A continuous line leads efficiently to the rear; a subtle offset around one generous planting pocket can slow the view without blocking movement. Keep any turn legible from both ends. Do not use dense foliage to create mystery at a place where a person needs visibility, stable footing, or security around a gate.
Treat the edge as a maintenance detail. Plants should not repeatedly flop across walking surfaces, conceal trip changes, or root into drainage joints. A slightly raised or clearly defined border may help where local construction and accessibility allow, but it must not trap water against structures. The strongest edge is one that can be swept, inspected, and approached without damaging crowns.
Layer foliage in planes, not ranks
Organize plants as shallow planes: low foliage at selected path edges, a restrained middle layer within wider pockets, and one vertical plane on a suitable support. Avoid placing a low, medium, and tall row along the entire passage. Full-length ranks consume width and can turn the garden into a green tunnel. Concentrate depth where the plan permits and let other sections remain spare.
Use leaf scale and finish to create depth. A few broad matte leaves can form a calm foreground; finer foliage can recede; a glossy or pale accent can catch borrowed light at a turn. Repeat these characteristics rather than collecting one of every shade plant. Missouri Botanical Garden's design guidance emphasizes unity and repetition alongside variety. In a constrained passage, repeated foliage is especially useful because it creates coherence without requiring many specimens.
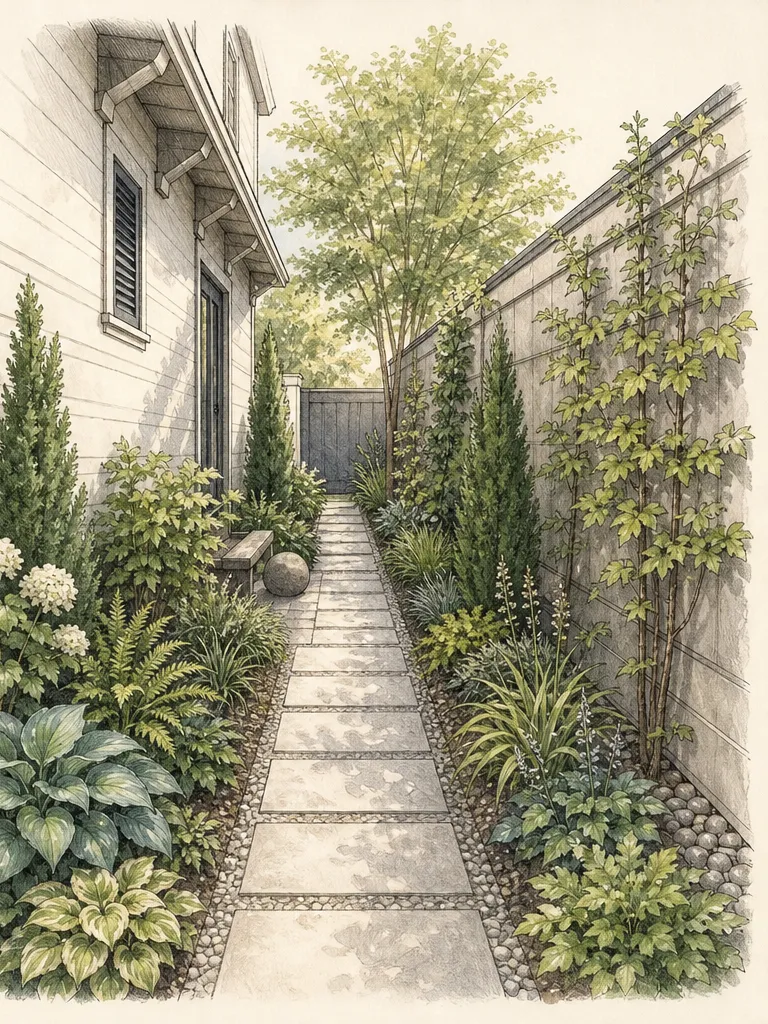
Keep the upper opening visually and physically clear. One trained climber or narrow vertical plant can animate a blank wall where fixing methods, mature weight, root space, and building maintenance allow, but it should not bridge both boundaries or close the sky. Confirm that attachment and pruning can be performed from safe ground. Avoid vigorous plants whose scale demands continual cutting in an inaccessible vertical slot.
Create depth with overlap and release
A narrow side yard feels deeper when the view alternates between modest enclosure and visual release. Pull one low group slightly toward the path in a generous pocket, let a middle form overlap it from the principal viewpoint, then open the next section to wall, sky, or a distant plant. The overlap should occur in the view, not by crowding root balls or passage space.
Preserve a borrowed destination beyond the side yard when one exists: a tree canopy, a rear border, a gate, or a light-filled wall. Frame it with foliage instead of filling the end with the largest available shrub. If the existing destination is unattractive, create a small focal point outside required circulation and service zones. Its mature scale should stop the eye without consuming the turning space at the end.
Use controlled asymmetry. If one wall has doors and utilities, keep it nearly clear and place most planting on the opposite side, then echo color or texture with a few shallow elements rather than matching bed widths. Symmetry is not worth losing functional access. A balanced composition can have unequal physical mass when visual weight, repetition, and the end view are considered together.
Select plants by mature behavior
Create a candidate table with mature height and spread, seasonal arching, evergreen or deciduous habit, growth rate, pruning needs, root behavior, light, moisture, hardiness, heat tolerance, and regional invasive status. Verify named cultivars where size matters; species-level descriptions may not represent them. Reject any candidate that only fits through routine clipping into a shape it would not naturally hold.
Favor durable foliage and a limited number of seasonal accents. Flowering may be lighter in shade and can vary with climate, so the composition should not depend on a promised bloom count. Use flowers where the site's observed light supports them, and let leaf form, branching, bark, and seasonal color carry the design elsewhere. Check toxicity when children or pets use the narrow route, where contact may be difficult to avoid.
Place higher-touch plants near the broadest access and low-intervention plants in tighter pockets. A perennial that needs division, a shrub that requires renewal pruning, or a climber that needs tying must have a stable work position. Final choices should come from local Extension, botanic-garden, invasive-plant, and utility guidance. A plant recommended for a wall in one climate may be tender, invasive, heat-stressed, or overly vigorous in another.
Install a small framework and observe it
Set out path edges, task clearances, and mature plant outlines with removable markers before digging. Walk the route with bins, a watering can, and any mobility aid regularly used. View it at night if the passage serves an entrance, considering safe code-compliant lighting without creating glare. Move the markers until circulation works. Plants should be the last layer to confirm, not the first objects that force compromises.
Install the structural foliage and one trial group in each distinct light and moisture pocket. Prepare the soil and plant at appropriate depth according to current plant-specific and regional guidance, keeping crowns and woody bases visible. Use surface mulch conservatively without blocking drains or touching living bases. Establish each root ball as an individual zone rather than assuming the narrow bed receives uniform moisture.
Live with the framework through an active season before filling every gap. Watch reflected heat, wind, roof runoff, shade movement, and the way wet leaves occupy the path. Temporary open ground is useful evidence. If a plant leans into circulation, grows weakly toward light, or requires constant water, revise early. A smaller palette that fits can create more depth than a fully planted corridor under repeated correction.
Audit the corridor as plants mature
Review the side yard at leaf-out, peak growth, autumn decline, and the least leafy season. Carry the widest routine object each time. Check gates, doors, utility labels, drainage, lights, and every turning bay. Photograph the long view and cross-sections from fixed points. The maintenance test is not whether a person can squeeze through, but whether ordinary use remains comfortable without brushing, breaking, or tying back plants.
Edit by removing or relocating a conflicting plant before shearing the entire passage into two flat walls. Preserve the foliage planes and the open sky. Prune only with species-appropriate timing and technique, and keep access to branch origins. If a vertical plant repeatedly enters eaves, vents, or neighboring property, it exceeds the role regardless of how attractive its leaves are.
A successful narrow side-yard garden feels composed because it protects what the space must do. The path remains obvious, utilities and drainage remain available, layered foliage occupies real pockets, and borrowed light reaches enough surfaces to reveal texture. The passage becomes a garden through measured restraint, repeated leaves, and a strong destination—not through filling every linear foot.
Fit six low plants beside a measured passage
Imagine a partly shaded Zone 6 Pennsylvania side yard with a 12-foot-long, 3-foot-wide planting strip alongside an already approved clear passage. Use six Carex pensylvanica as a low, dry-to-moderate-shade trial, allocating each an initial 18-inch footprint. Put centers 1, 3, 5, 7, 9 and 11 feet along the strip, all 1.5 feet from the path-side boundary. The initial circles leave 6 inches between plants and 9 inches on either side of the strip.
Measure the actual required passage separately; none of its width belongs to those plant circles. Keep doors, service equipment and drain outlets outside the six proposed positions, omitting plants wherever access takes priority. Inspect the rhizomatous sedge edge as it spreads. This modest initial count suits a trial corridor; it does not certify a path width or promise that an unmanaged colony will remain inside the original footprints.
Design ideas
- Style
- Quiet foliage-led passage with asymmetrical pockets, repeated textures, and a framed destination
- Space
- Narrow residential side yard between buildings, walls, or fences with regular circulation and service needs
- Climate
- Final choices must follow observed seasonal light, wall aspect, reflected heat, roof rain shadow, drainage, available soil volume, local hardiness and heat, toxicity exposure, invasive status, utility clearance, and building requirements
- 1Keep one wall almost clear
Where doors, meters, drains, or vents occupy one side, preserve that wall as the service plane and concentrate planting in measured pockets opposite it. Echo the planted side with one repeated pot or shallow foliage accent only where circulation and drainage remain safe. Unequal planting can feel balanced through color and rhythm while giving every utility a stable working position.
- 2Frame a bright destination
Preserve the view toward a rear tree, pale wall, gate, or small focal object and use restrained foliage to frame it. Keep the turning bay open at the destination. A low group can mask the base while a narrow vertical form marks one side. Avoid a broad shrub centered at the end if its mature spread would close access or erase the borrowed light.
- 3Repeat one leaf in three light zones
Carry a similar leaf shape or muted color through three pockets using different locally suitable plants where light or moisture changes. The repeated visual idea unifies the passage without pretending the horticultural conditions are uniform. Confirm each plant's mature behavior and invasive status, and leave the darkest or driest pocket unplanted if no responsible match can perform there without rescue care.
- 4Create one generous planting bay
Instead of a narrow bed along the full route, widen one naturally available recess and concentrate a broad foliage group there. Keep the remaining edge shallow and simple. The bay gives the eye a moment of depth while preserving daily movement elsewhere. Draw mature arching and maintenance access so the generous moment remains a pocket rather than becoming a pinch point.
- 5Train one vertical plane
Where building condition and fixing guidance allow, use one appropriately scaled wall-trained ornamental to lift foliage above the narrow root zone. Keep the sky opening and opposite wall free. Select for regional suitability and realistic pruning access, confirm mature weight and attachment needs, and avoid vigorous species that depend on repeated high-level cutting or enter roofs, vents, and neighboring property.
- 6Use path joints as a quiet rhythm
Align a simple repeating joint or stepping rhythm with the main view and let planting pockets respond to it. Preserve stable, accessible footing and drainage rather than loosening the path merely for ornament. A calm ground plane can unify several foliage textures and make open service areas feel intentional. Keep plants and roots out of joints that must remain clear and inspectable.
- 7Place pale foliage at the turn
Use a locally suitable plant with a pale, matte, or subtly glossy leaf at one wider turn where available diffuse light can reveal it. Repeat the tone lightly toward the destination. Treat the effect as visual, not as proof that the site has more horticultural light. If the plant stretches or loses color, reassess exposure rather than moving it farther into circulation.
- 8Leave a deliberate open interval
Expose a clean section of wall, fence, or surface between two planted pockets. The interval gives the eye and passage room, preserves a task zone, and makes adjacent foliage outlines more distinct. Repeat a color from one pocket in the other to bridge the space. Keep the opening genuinely serviceable instead of filling it later with temporary containers that gradually become permanent obstacles.
Plants in this guide
Related reading
Sources
- Plants for a Wall-Side Border. Royal Horticultural Society. Source record · Accessed 2026-08-19.
- Landscape Design. NC State Extension Publications. Source record · Accessed 2026-08-19.
- Garden Design. Missouri Botanical Garden. Source record · Accessed 2026-08-19.
- Carex pensylvanica. North Carolina Extension Gardener Plant Toolbox. Source record · Accessed 2026-09-09.