Tools · ornamental seedling cold frame selection siting
Choose and Site a Cold Frame for Ornamental Seedlings
Match a cold frame to crop stage, drainage, sun, wind, lid access, venting, thermal mass, and safe daily monitoring rather than treating it as an unheated miniature greenhouse.
Published Last updated
In this guide
- Define the exact crop job
- Map the site before comparing frames
- Compare frame volume, wall, and glazing
- Treat the lid and venting system as the main control
- Plan the base, thermal mass, and water
- Operate the frame with measured thresholds
- Maintain structure and seasonal hygiene
- Compare portable, kit, and site-built frames by the same test
- Record the frame trial before increasing the crop
- Tool notes
Define the exact crop job
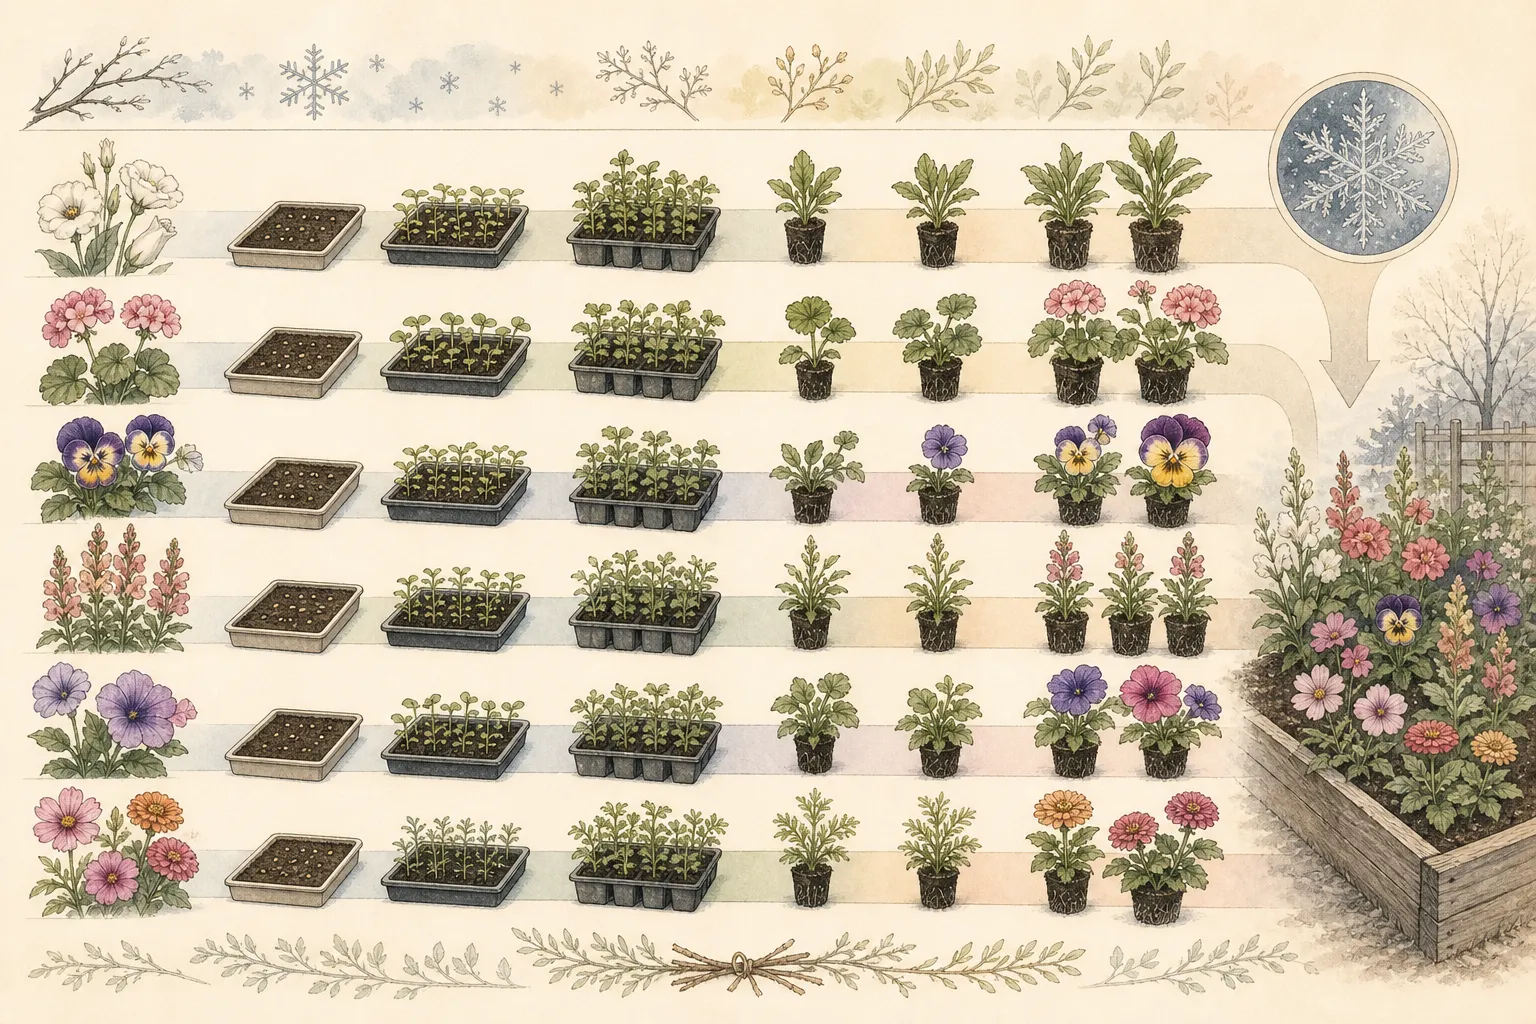
A cold frame can protect hardy seedlings, acclimate indoor-grown flowers, shelter autumn cuttings, or extend cool-season growth. These jobs use different timing, temperature, light, and daily handling. Write the crop, stage, number of trays, local weather range, and intended entry and exit dates. Do not buy a frame because it looks like a small greenhouse and decide later what living material can survive inside it.
Separate frost protection from active heating. A traditional cold frame captures solar warmth and moderates exposure but has no automatic heat supply. Night temperature can approach outdoor conditions during prolonged cold, while a sunny day can become dangerously hot. If the crop requires a minimum the frame cannot maintain, use another protected system or a professionally designed supplemental heat method rather than assuming the lid creates warmth.
Choose the final pot footprint, not only a seed flat. Potted pansies, rooted cuttings, and hardening annuals differ in height and area. Draw tray count, air gaps, watering access, and lid clearance at the largest stage. Plants should not touch glazing or prevent the lid from closing safely. Reserve room for a thermometer and a hand to reach every container without leaning on the frame.
Set a monitoring agreement. Someone must open, vent, close, water, and respond to forecast changes. A frame at the far end of a wet or icy garden can be horticulturally promising and operationally neglected. If daily access cannot be provided during rapid weather shifts, reduce the crop or choose a system with suitable automatic venting and fail-safe control.
Map the site before comparing frames
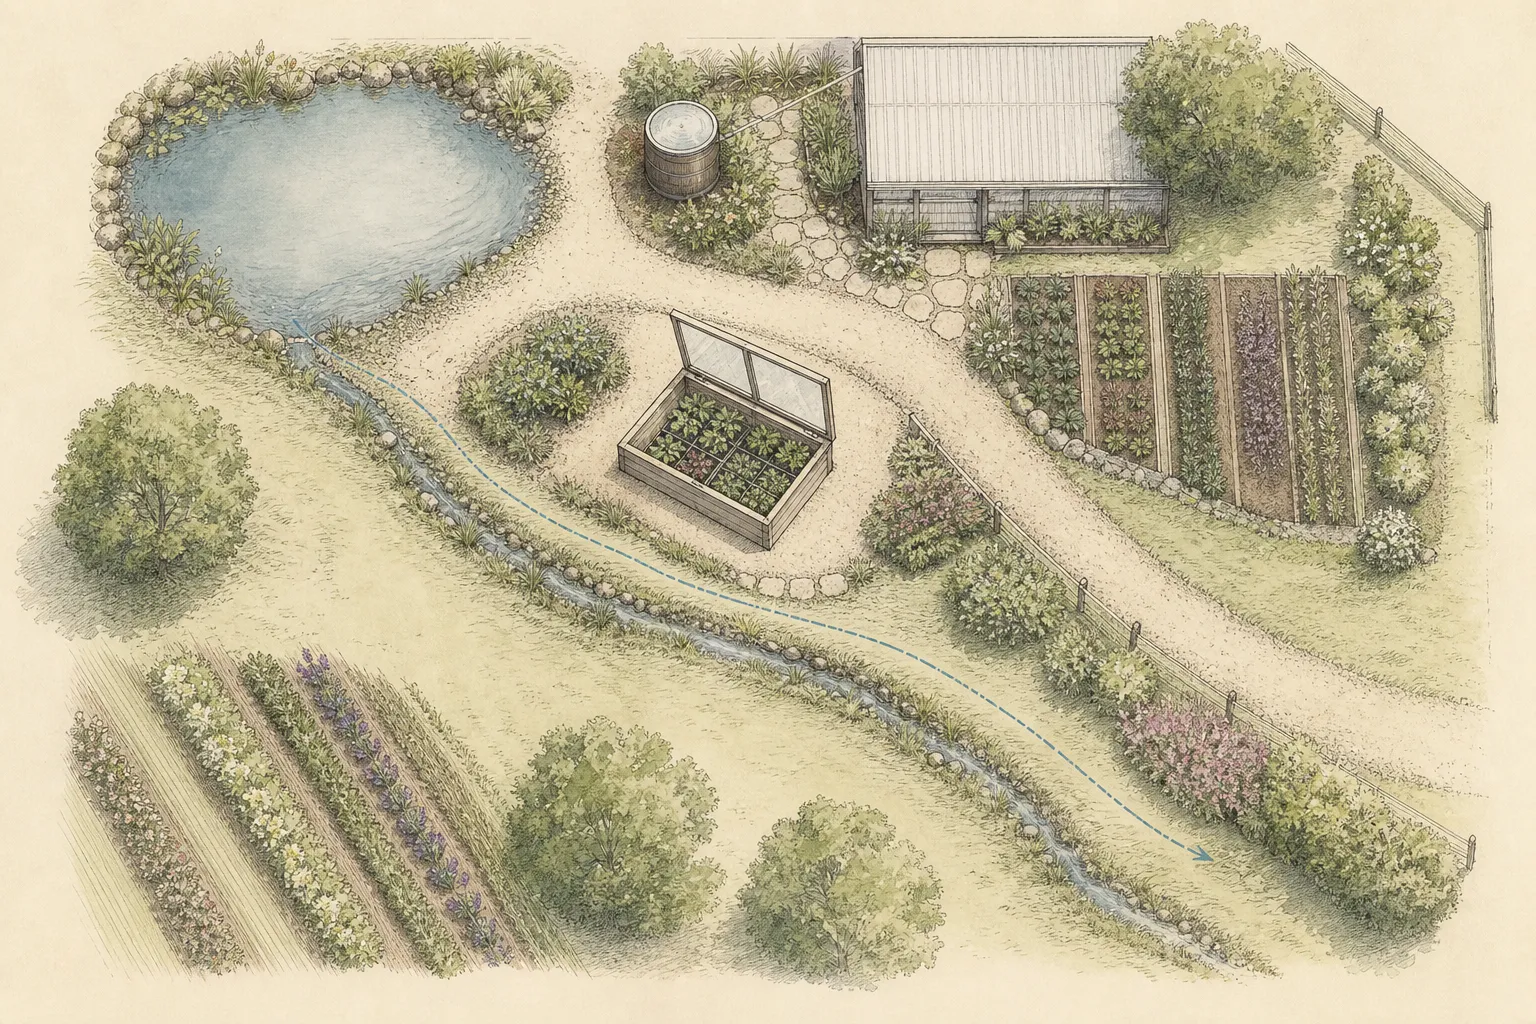
Observe low-season sun from morning through afternoon. A south-facing sloped lid is traditional in northern temperate settings, but buildings, trees, and fences can shade it when the sun is low. Mark reflective walls that add heat and deciduous canopies that close later. Site decisions need the actual months of use, not a summer sun map copied from the vegetable garden.
Check drainage after rain, snowmelt, and irrigation. The frame should stand level and stable while the surrounding route remains safe. Water must leave the base and not run from a roof or slope into it. A sunken frame gains soil insulation but requires careful drainage and access; a wet pit around seedling roots is not useful thermal mass.
Map wind. Shelter can reduce heat loss and protect an open lid, but a sealed corner can stay damp and overheat. Keep enough space around the frame for air, hinge service, glazing cleaning, and snow removal. Do not place it where a fence gate, falling branch, roof slide, plow, or deer route can strike the lid. Confirm property boundaries and structure rules. Walk the route carrying a loaded tray and watering can. Preserve stable footing, hand clearance, and a place to set the tray while opening the lid. Avoid steps and narrow turns where possible. Keep the frame close enough to water and observation without placing it in a children’s play route or beside electrical equipment. Daily usability is a design requirement.
Compare frame volume, wall, and glazing
Internal height determines which plants fit and how quickly air temperature changes. A very shallow frame warms rapidly and can press foliage against glazing; a tall volume is slower but may offer less soil warmth to small trays and can be harder to reach. Match front and back height to the crop and lid slope. Measure clear interior dimensions, not the seller’s exterior footprint.
Wood offers insulation and familiar construction but can rot without appropriate durable material and detailing. Masonry stores heat but is permanent and can intensify summer heat. Metal or plastic frames vary in strength and thermal bridging. Evaluate material, anchoring, local wind and snow load, repairability, and contact with soil. Avoid treated or salvaged material whose suitability near plants is unknown.
Glass transmits light well but is heavy and can break; polycarbonate is lighter and insulating but varies in durability, clarity, and ultraviolet resistance. Reused windows introduce old paint, unknown glass safety, failing putty, and heavy hinges. Use materials intended for the structure and maintain safe edges. A cheap lid that cannot be lifted or secured safely is not a bargain. Inspect seals without seeking an airtight box. Large uncontrolled gaps lose heat, but ventilation is essential. The lid should close evenly, shed water, and open through useful stages. Replaceable glazing and accessible fasteners extend service life. Ask how condensation drains and whether channels fill with algae. The frame must be cleanable without disassembly that exposes sharp edges.
Treat the lid and venting system as the main control
The lid needs a secure handle, smooth hinge, positive fully open restraint, and several vent positions. A loose stick is an unreliable prop in wind. Use purpose-built notched props, locking stays, or an automatic opener rated for the lid. Test with the frame empty. The lid must not fall if a hand is inside or twist the frame when opened from one side.
Vent before internal heat damages plants. A cool sunny day can raise temperature quickly under glazing, while clouds and wind can reverse it. Keep a minimum-maximum thermometer at canopy height and learn how the frame responds at different vent positions. Do not use outdoor air temperature alone. Automatic vents reduce risk but still require inspection and can fail.
Open gradually when wind is strong and secure the lid. Venting also reduces prolonged condensation and allows seedlings to acclimate to air movement. Do not leave the frame fully open overnight by accident after a warm afternoon. Create a closing routine tied to forecast and measured internal temperature, with a visible reminder near the house.
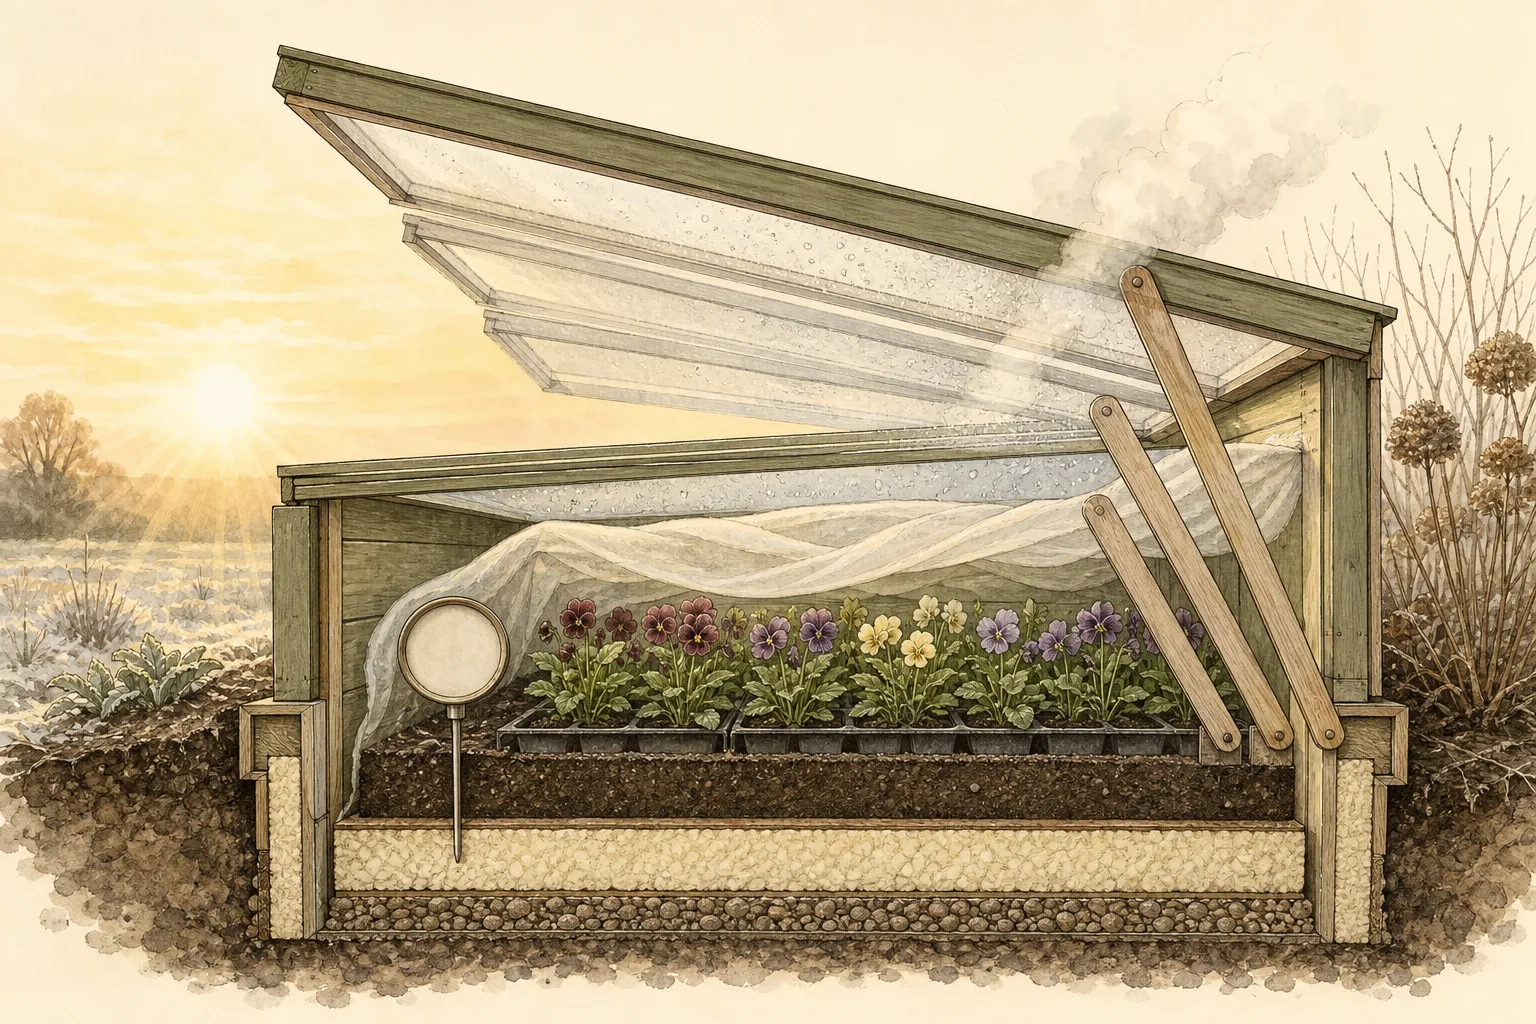
Keep foliage below glazing. Condensation can drip, leaves can freeze against the lid, and contact can scorch during sun. Use stable low risers or reorganize crop height rather than pressing plants down. Remove pots that outgrow the frame. The available volume is reduced by the safety clearance needed for lid movement and leaf separation.
Plan the base, thermal mass, and water
A frame can sit over prepared free-draining soil, gravel, pavers, or another stable base suited to the crop and local construction. Avoid impermeable bowls that hold water. Level the rim so the lid closes, while grading the surrounding area away. If pots sit on soil, prevent roots from escaping unnoticed into the base and keep slugs or weeds from hiding beneath trays.
Dark water containers or masonry can add thermal mass, absorbing some daytime heat and releasing it later, but they occupy crop volume and do not guarantee frost protection. Secure containers against tipping and algae, keep them outside paths, and measure the effect. Do not use unlabeled chemicals or open water where children, pets, or mosquitoes create risk.
Watering frequency changes with sun, venting, pot size, and cold roots. Check container weight and medium, water early enough for foliage and surfaces to dry where appropriate, and drain excess. Do not leave trays immersed overnight. A closed frame can retain humidity while individual edge pots dry, so inspect representative center and perimeter plants. Keep a clean water route and avoid lifting a can over the open lid hardware. Remove pots to water when access is poor, but protect roots from cold wind and return them in the same labeled arrangement. A frame is not permission to abandon labels. Similar hardy seedlings can require different exit dates and spacing.
Operate the frame with measured thresholds
Place the thermometer before plants and record several empty-frame sunny and cloudy cycles with vents closed and staged. Compare internal and external minimum and maximum. This commissioning period reveals a reflective hot spot, lid leak, drainage issue, or wind problem without risking seedlings. Repeat after moving the frame or changing glazing.
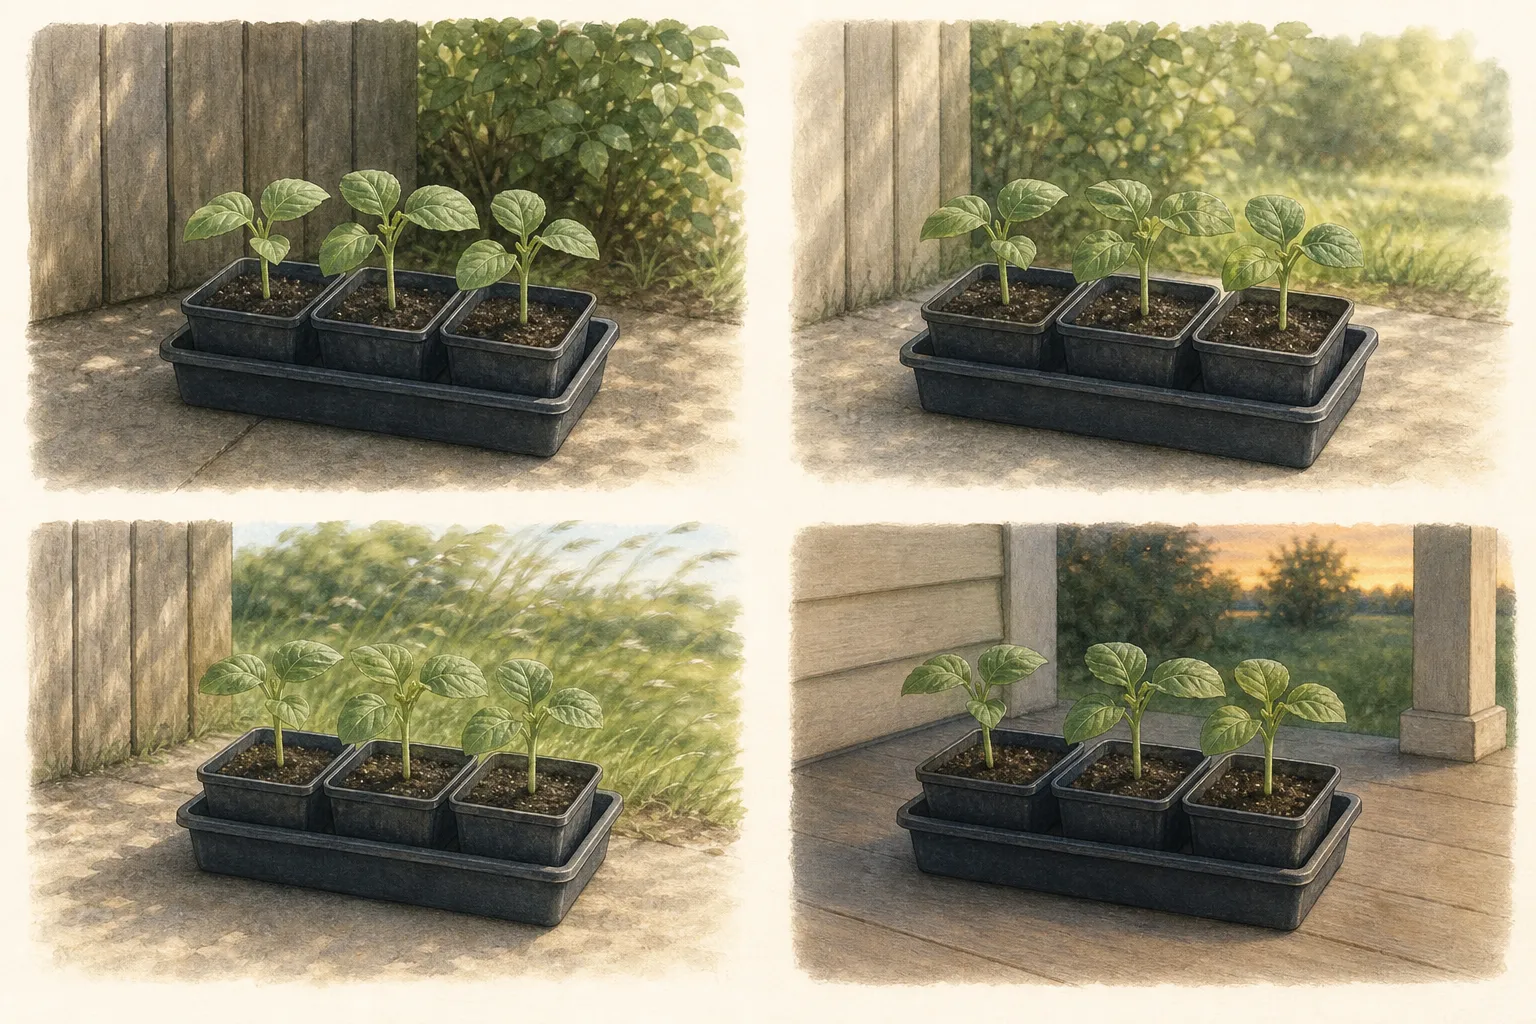
Introduce a small hardy trial group before filling the frame. Keep indoor-grown seedlings acclimating gradually; glazing still reduces wind and can alter light. Increase open-lid exposure as plants tolerate it and local weather permits. A cold frame supports hardening but does not eliminate it. Full outdoor exposure and root-zone temperature remain different from a protected closed night.
Use frost covers inside only when compatible, supported above foliage, dry enough, and removed promptly. They can add protection but also reduce light and trap moisture. Keep material away from hinges and heating devices. Do not pile blankets on glass or weak plastic without confirming structural load, especially under rain or snow.
Set stop thresholds: forecast below crop tolerance, internal temperature rising despite full venting, hinge or vent failure, flooding, glazing damage, or inability to monitor. Move plants to the backup location. The backup must exist before a cold night. A frame is successful when it supports decisions, not when plants remain inside despite equipment failure.
Maintain structure and seasonal hygiene
Clean glazing when transmission declines, using the manufacturer-compatible method. Remove algae, leaves, and soil from channels and corners. Disconnect and protect any automatic or electrical component as directed. Avoid standing on the frame or reaching across an unsupported lid. Replace cracked glazing and sharp seals before plants return.
Inspect hinges, screws, anchors, lid stay, automatic opener, weather seals, rot, corrosion, and frame level. Test every vent position. Tighten or replace parts with compatible hardware and retain the manual. Snow and wind capacity should follow the manufacturer or structural design; clear loads safely from outside rather than entering beneath a stressed lid.
Between crops, remove roots and medium, wash trays and surfaces, and apply any disinfection step only after cleaning and under current label and Extension guidance. Dry the frame with vents open. Quarantine diseased seedlings and do not let their drainage return to the base. Sanitation cannot compensate for chronic condensation and poor airflow.
At season end, compare crop survival, overheating events, minimum temperature, vent labor, water, and access. The frame may be too small, too remote, too sunny, or poorly drained even if no plant died. Change the site or operation before adding automation. A simple frame monitored well is more dependable than a complex structure whose controls are not checked.
Compare portable, kit, and site-built frames by the same test
A lightweight portable frame can follow seasonal sun and store compactly, but it may need careful anchoring and can offer limited thermal mass. A manufactured kit can provide matched hinges, vents, and replacement glazing when parts support is credible. A site-built frame can fit a wall and crop exactly, but the builder owns structural load, drainage, material safety, lid balance, and repair details. Compare all three against the same measured crop and site brief rather than assuming one category is inherently better.
Inspect the assembled structure, not only product photographs. Check clear internal dimensions, lid weight, hinge alignment, vent positions, threshold height, corner sharpness, glazing retention, frame racking, and whether a full tray can be lifted without scraping plants. Read snow, wind, ultraviolet, warranty, and replacement-part information. Decorative timber trim does not compensate for a lid that cannot remain safely open during watering.
Calculate the complete operational cost: stable base, anchors, thermometer, vent props or automatic opener, replacement panels, safe handle, shade material if regionally needed, and the backup space for extreme weather. Include daily walking and monitoring. A cheap remote frame that overheats twice each week is more expensive in plants and attention than a smaller unit beside the normal garden route.
Trial the empty frame and one hardy crop before expansion. If temperature, lid operation, drainage, or access remains difficult, change the location or structure while little is invested. Do not add automatic heat, more glazing layers, and multiple sensors to compensate for an unsuitable site. The best frame is the simplest one that holds the intended plants, can be vented safely, and is checked as often as weather demands.
Record the frame trial before increasing the crop
Keep one row per frame and site: crop and largest pot stage; usable internal dimensions; observed minimum and maximum temperature; lid and vent operation; drainage; watering reach; backup action; purchase and repair cost. Enter observations from the small trial described above. Leave untested fields blank. A frame that fits the pots but cannot be vented or reached safely remains unsuitable, regardless of its price.
Tool notes
- Type
- Unheated glazed cold frame with manual or automatic ventilation
- Purpose
- Provide a measured intermediate environment for suitable ornamental seedlings, rooted cuttings, and cool-season plants by moderating wind, rain, and temperature while preserving natural light and daily outdoor exposure. The frame must fit the crop’s largest stage, local low-season sun, drainage, wind and snow, safe lid operation, venting response, watering route, and a monitoring and backup plan; it is not assumed to remain frost-free.
- Affiliate
- No commercial links
Maintenance
- Clean glazing and channels by the manufacturer’s compatible method, remove algae and debris, keep drainage open, and dry the frame between crop cycles. Replace cracked panels, degraded seals, and sharp or loose edges before use.
- Inspect hinges, handles, anchors, lid stays, vent props, automatic openers, fasteners, rot, corrosion, and frame level. Operate every moving part empty and retain model, parts, and load information.
- Keep a canopy-height minimum-maximum thermometer in the frame, verify it periodically, and record closed and vented behavior through sunny, cloudy, windy, and cold cycles. Recommission after relocation or glazing changes.
- Remove standing water, prevent pots from rooting into the base, inspect edge and center moisture, and keep watering hardware outside hinge and walking zones. Clean trays separately and quarantine diseased material.
- Manage snow and storm preparation within the frame’s rated capacity. Secure or close the lid, move plants to backup when thresholds are exceeded, and clear loads safely from outside without striking brittle glazing.
- At season end, review overheating, cold minimum, vent labor, access, disease, crop height, and survival. Repair the evidenced weak point or relocate the frame before increasing crop count or adding controls.
Related reading
Sources
- Extending the Growing Season. University of Minnesota Extension. Source record · Accessed 2026-08-19.
- Sowing Annual Seeds. Penn State Extension. Source record · Accessed 2026-08-19.
- Coldframes and Mini-Greenhouses. Royal Horticultural Society. Source record · Accessed 2026-08-19.