Grow · test spring soil workability
Check Whether Spring Border Soil Is Ready to Work
Use a hand test, surface evidence, and drainage pattern to postpone cultivation while soil still smears, ribbons, or compacts under pressure.
Published Last updated
In this guide
- Use the biological cue for spring soil workability in an ornamental border
- Read the site and the whole plant together
- Set a visible finish line before beginning
- Prepare the work while every part is still identifiable
- Carry out the central operation in a controlled sequence
- Protect roots, crowns, and new growth after the work
- Diagnose a weak response before adding another treatment
- Leave a record for the next seasonal decision
- Steps
Use the biological cue for spring soil workability in an ornamental border
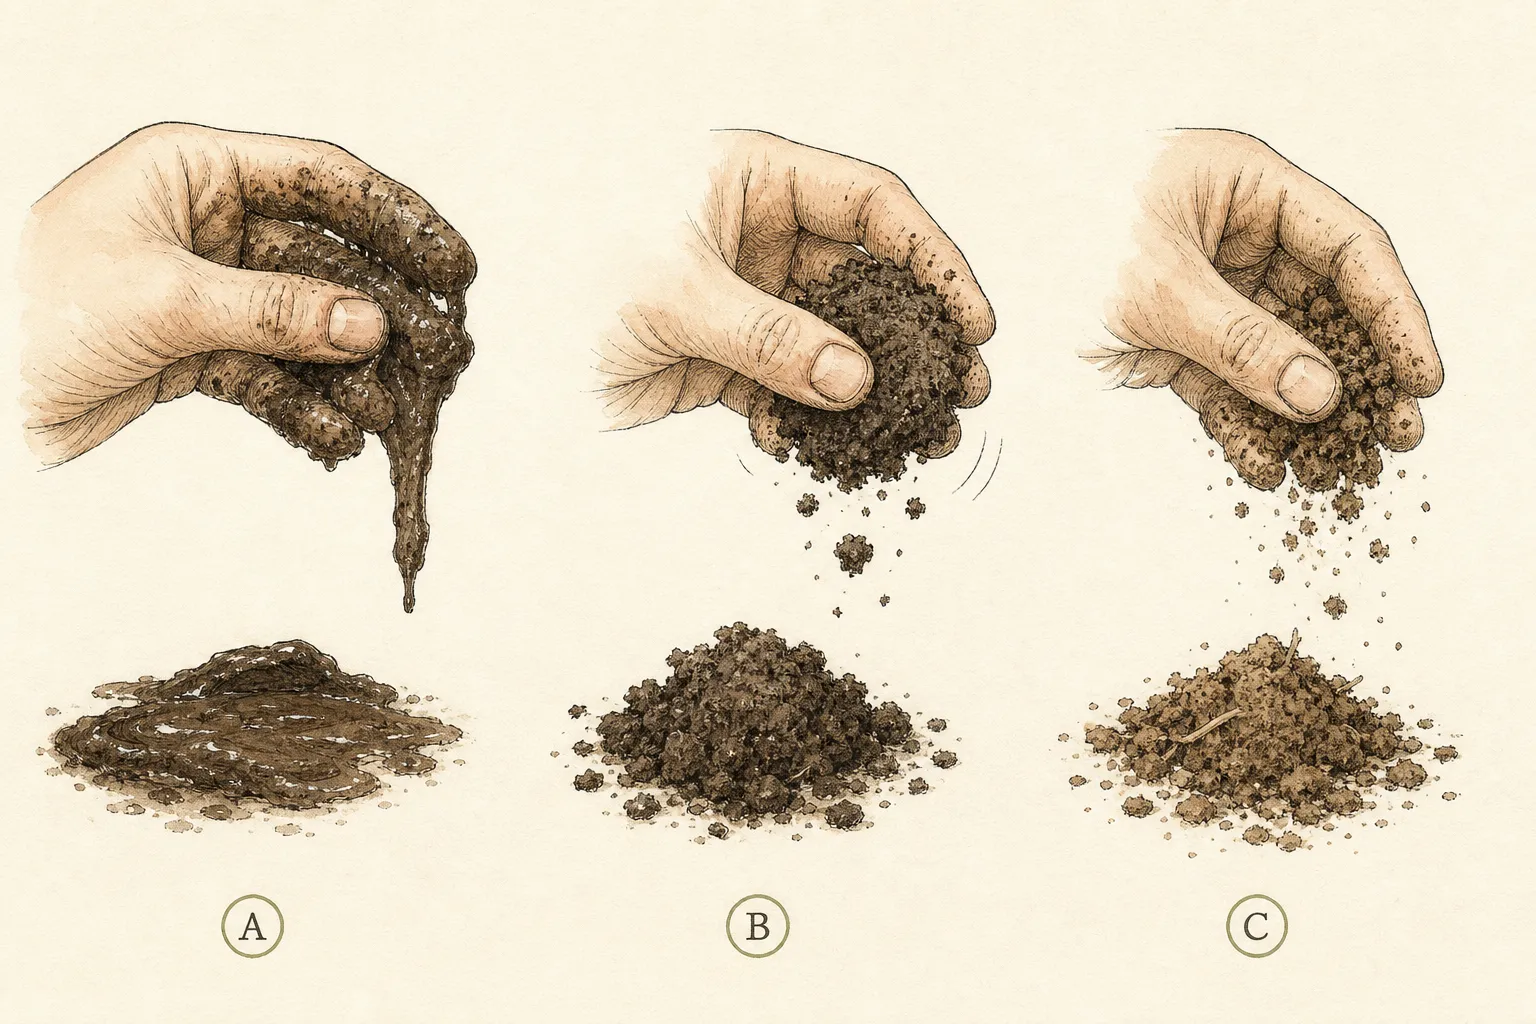
Judge spring soil at the depth you intend to dig. After the profile has thawed and drained, take a small handful, form a ball, and press or strike it once. University of Missouri's field test calls soil too wet when the compressed ball leaves a hand imprint; soil that breaks apart is ready for cultivation. A glossy smear, plastic ribbon, released water, or deep footprint confirms a failed result.
The top centimetre can look pale and friable while planting depth remains saturated, so one surface pinch cannot clear the border. Sample a typical central point, the wettest low pocket, a sunny or raised edge, and any site influenced by a downspout, path, or old amended planting hole. Mark each result. Workability can differ inside one bed on the same afternoon.
Interpret the hand response through texture. RHS describes clay as slow-draining, cold in spring, and easily compacted under wet traffic; sandy soil drains and warms faster and may remain too loose to form a strong ball. A clay sample may hold together yet still be workable if it fractures into aggregates without shine or smearing. A sandy sample needs supporting evidence from moisture, footprint depth, and tool drag because weak ball formation alone is normal.
Read the site and the whole plant together
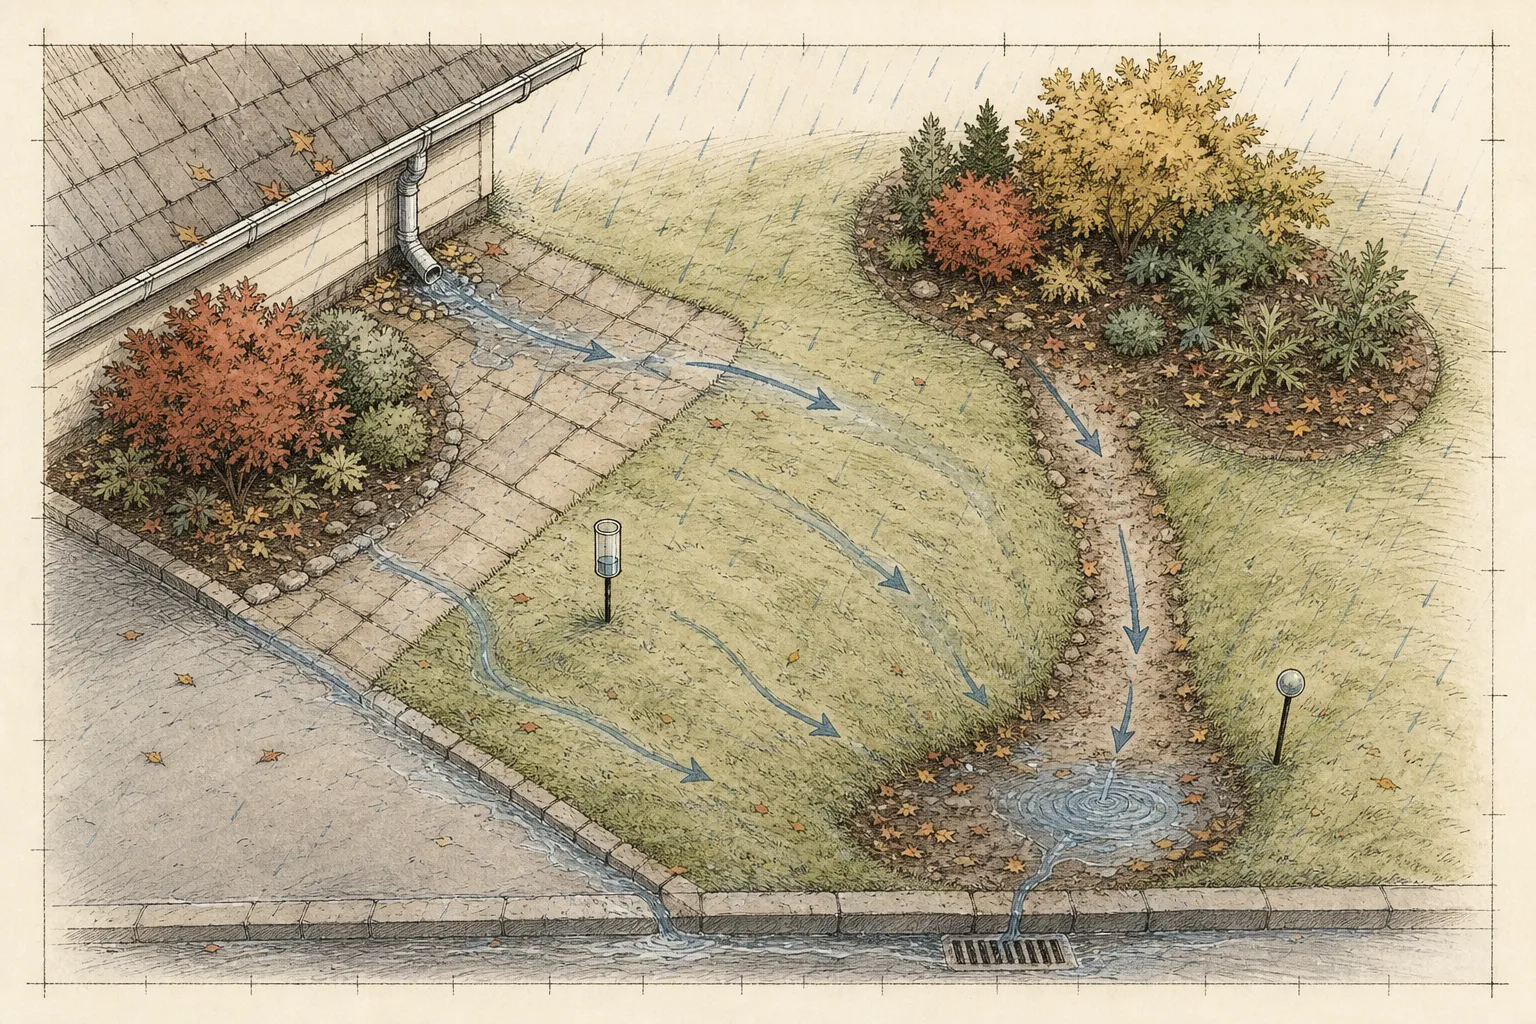
Sketch the border from a firm path before entering it. Mark slope breaks, compacted edges, shade, roof and downspout discharge, irrigation outlets, perennial crowns, bulb foliage, and places where snow lingered. Water collects and leaves by those routes, so they explain why two nearby samples differ. The access line matters as much as the planting pocket: crossing mud to reach a dry island compresses the wet soil between them.
Take samples from the actual planting or cultivation depth with a narrow trowel. Note the surface and subsoil separately when they contrast. A dry crust over sticky, shiny soil means the operation is still premature. A stable aggregate structure below a damp surface can pass. Record odor, standing water, mottling, tool smearing, and the force needed to enter the soil; each observation helps distinguish simple moisture from poor drainage or an existing compacted layer.
Protect living anchors during the survey. Flag emerging crowns and known bulb positions, then approach every sample from the path or one board. Shallow roots often occupy the same depth being tested. A small vertical slice beside a crown provides the needed evidence with less disturbance than repeated probing across the root zone. Return loose sample soil to its hole and leave failed pockets closed.
Set a visible finish line before beginning
Set a physical finish line for the job: the spade enters without polishing the sides of the cut, lifted soil separates along existing aggregates, clods break with modest hand pressure, and the route remains firm. Minnesota Extension explains why this matters: compaction presses particles together, reduces pore space, slows infiltration and drainage, restricts gas exchange, and increases the force roots need to penetrate soil.
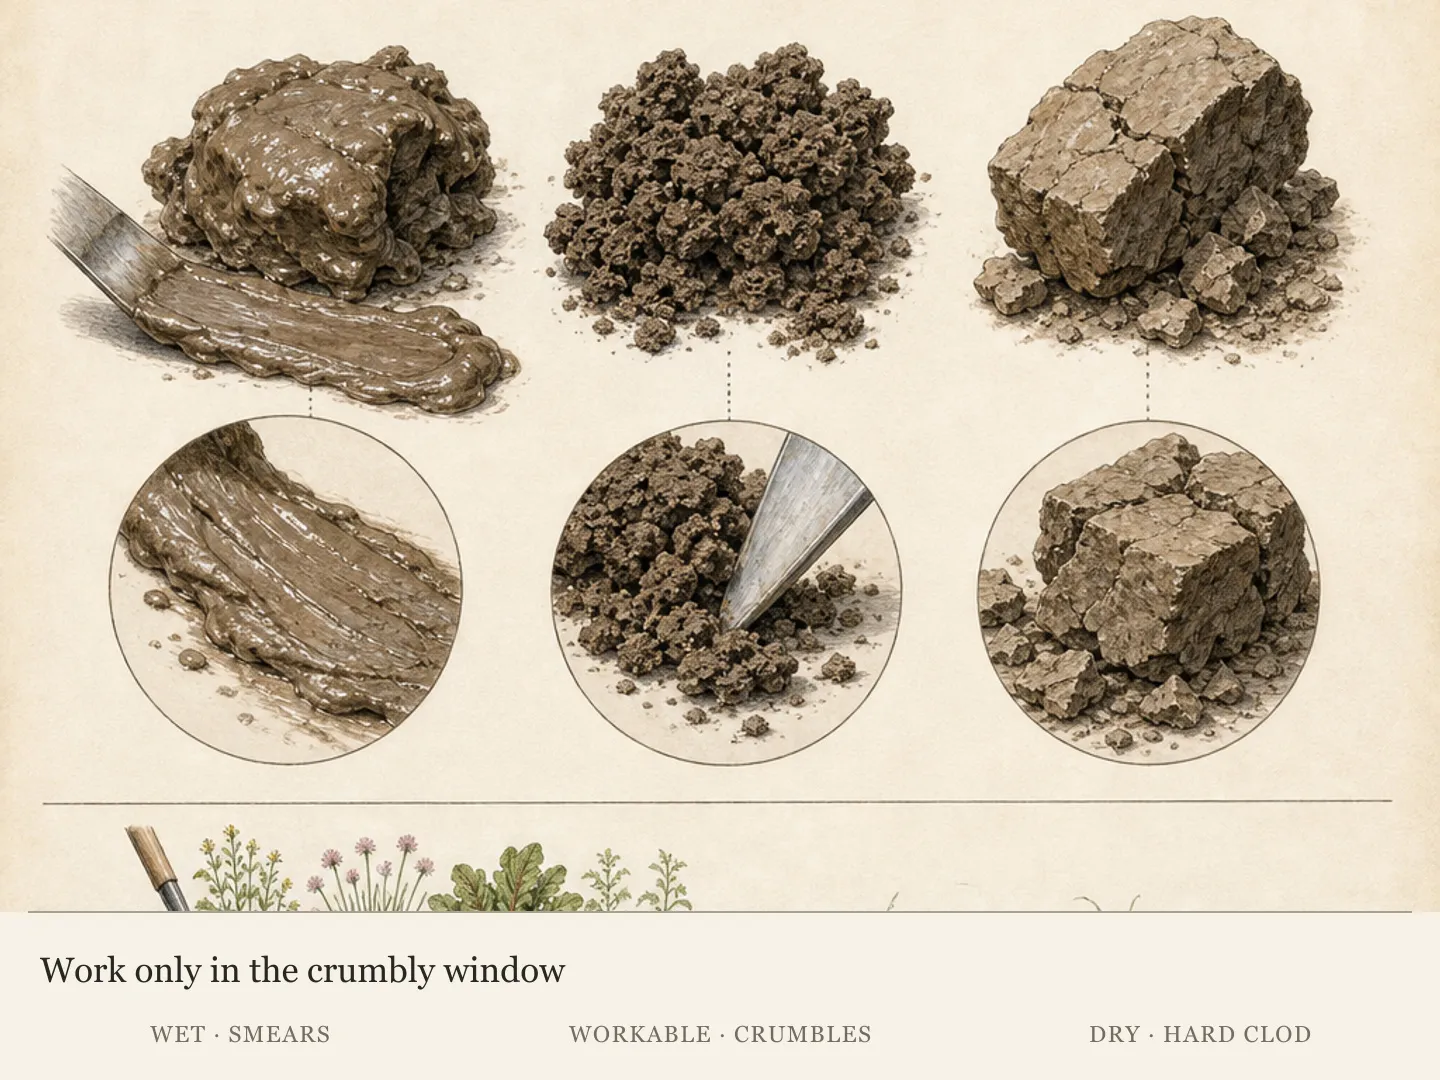
Classify every mapped point as ready, marginal, or wet. Ready soil fractures cleanly and leaves the tool mostly clean. Marginal soil holds a ball but breaks without shine; open only a small trial cut and stop if the walls smear. Wet soil deforms plastically, sticks heavily, releases water, or takes a deep print. Leave that point and its access route untouched for another drying interval.
Allow a partial start only when a stable path reaches the passing area. A sunny raised margin can be planted while a low clay pocket remains marked and closed. Uniform cultivation is not the goal; preserving structure is. Boards spread a gardener's weight for observation, yet they are not permission to carry heavy loads across saturated ground.
End the test if the board sinks, the path pumps water, a trowel encounters an unmarked utility, or debris creates a hand hazard. A shallow workability sample answers only whether light garden cultivation is timely. Drain installation, deep soil replacement, mechanized tillage, and suspected contamination require separate planning, utility location, and appropriate professional advice.
Prepare the work while every part is still identifiable
Prepare a numbered sketch, flags, a clean narrow trowel, a board long enough to bridge soft ground, gloves, and separate containers if a laboratory sample is also planned. Mark the intended planting depth and recent rain or irrigation date. Clear loose debris from the test point while leaving mulch and surface structure around it undisturbed.
Assign sample points before stepping into the bed: low and high positions, shade and sun, path edge and interior, plus any downspout or amended hole. Use the same approximate depth and sample size at each. Variation then reflects the site more faithfully, while a convenient shallow pinch from one dry corner cannot overrule a saturated planting zone.
Lay one access board from a firm edge and flag crowns before inserting the trowel. Lift a small intact section, observe its natural aggregates, and remove one handful. Repeated kneading changes the sample, and repeated walking changes the bed. One controlled footprint at the edge can document softness; further traffic adds the compaction the test is meant to prevent.
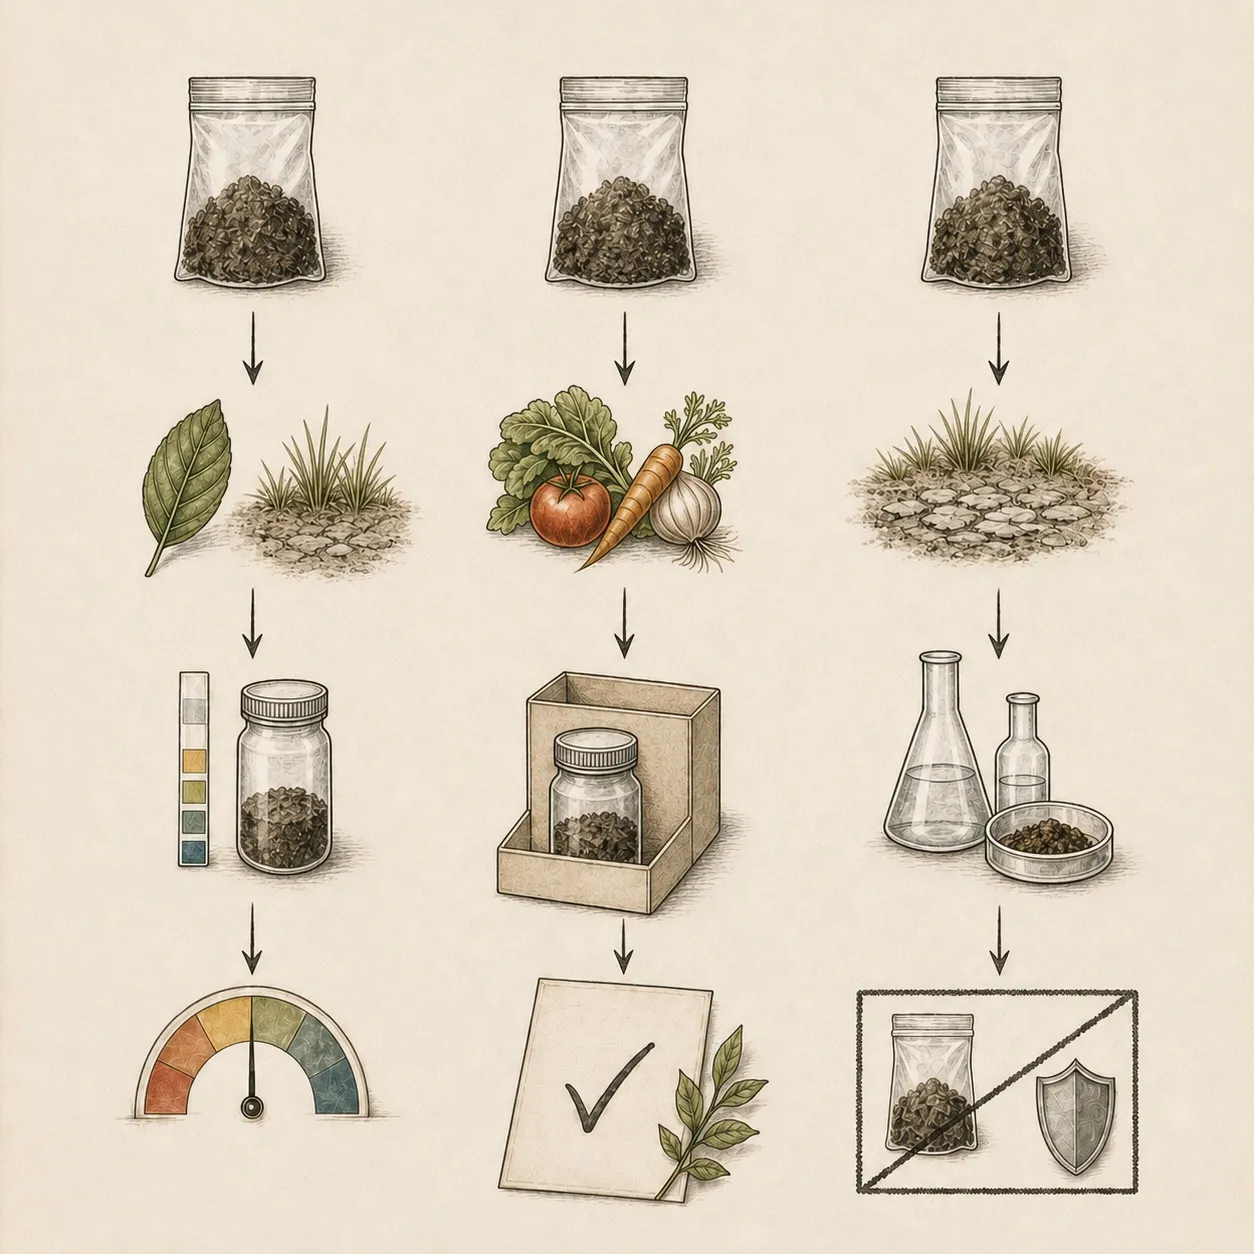
Keep the workability check distinct from laboratory sampling. A hand test measures current physical readiness. A laboratory submission answers pH, organic matter, nutrients, and selected contaminant questions. Minnesota recommends garden soil testing every three to five years and when changing land use. Collect and label that composite sample according to the laboratory's directions, not from only the wettest pocket.
Carry out the central operation in a controlled sequence
Observe the unsqueezed sample first, then form one ball. Press it once with the heel of the other hand or break it with light finger pressure. A result that shatters into aggregates supports work at that point. An imprint, glossy face, sticky ribbon, plastic shape, or free water sends that location back to the waiting map. Discard conclusions from a sample that has been rolled and warmed repeatedly.
Check the trowel cut as a second test. Crumbly walls and a mostly clean blade support the hand result. Polished sides, a smeared blade, or clods that bend before breaking reveal excess water even when the ball's behavior looked ambiguous. In sand, rely more on tool drag and standing moisture; in clay, give extra weight to shine, ribboning, and the force required to fracture the ball.
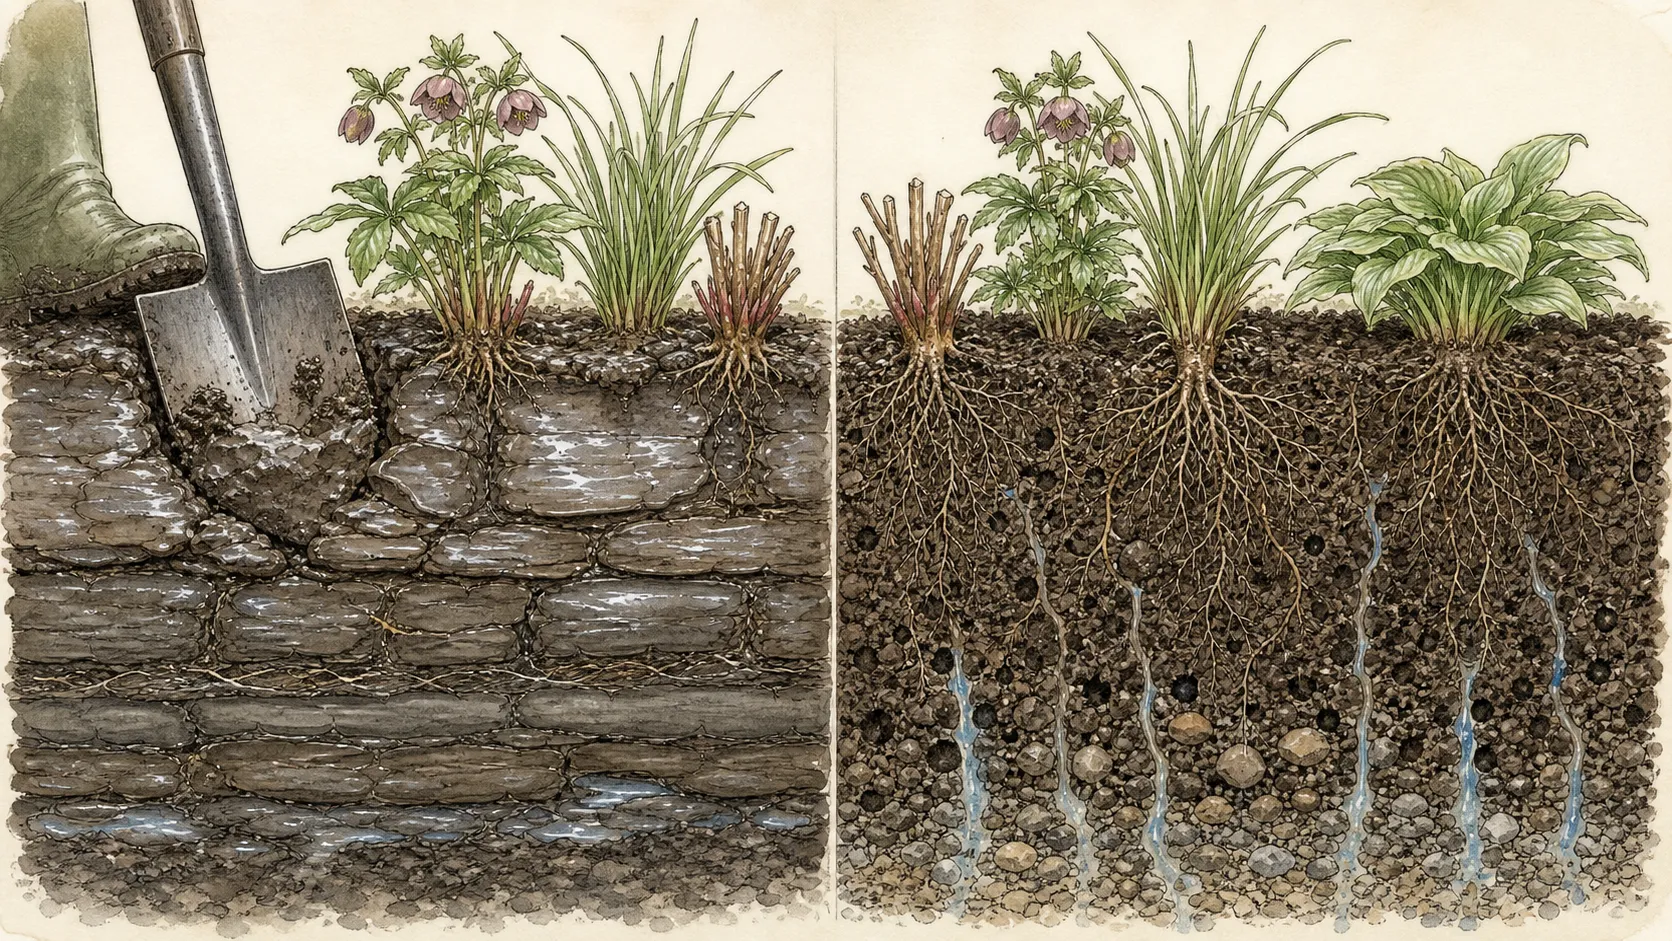
Open one small cultivation unit in a passing area and inspect the first spadeful before continuing. Keep natural aggregates intact and stop at the planned depth. A change to heavier, wetter soil, a perched wet layer, or repeated smearing below the dry surface narrows the passing area. Mark that boundary on the map and keep the unready side closed.
Protect roots, crowns, and new growth after the work
Confine planting traffic to the mapped path and lift soil along existing fracture planes. Break only clods that yield with modest pressure. Pulverizing a passing bed into fine particles can destroy the aggregate structure that allowed it to drain and aerate. Set crowns and root flares at their correct grade, then return surface mulch without mixing it into a sticky lower layer.
Prepare only the footprint needed for the day's planting. Missouri Extension recommends minimum tillage because repeated cultivation breaks down soil structure; a second full-bed pass adds risk after the first spadeful has already shown good tilth. Lay out plants from the path, open each hole at the recorded passing point, and keep excavated soil on a board or tarp. If the next hole crosses into glossy or plastic soil, close the ready portion cleanly and move that boundary onto the map instead of averaging the two conditions together.
Treat a substantial rain or irrigation event as a new moisture condition. Retest the wettest mapped point at the same depth after another drying interval; a sunny crust does not preserve yesterday's pass below it. Record the rainfall and sample result. This prevents schedule pressure from turning an earlier valid observation into permission to work newly saturated soil.
Keep amendments and fertilizer off failed pockets. Compost mixed into mud still requires traffic and tillage, while fertilizer cannot reopen collapsed pore space. Use laboratory recommendations for nutrient and pH decisions after the bed is physically workable. Where a downspout, leak, or compacted path repeatedly saturates one point, correct the water route or redesign access before cultivating around the symptom.
After planting, restore mulch to limit splash and surface crusting, keep it clear of crowns, and maintain the designated access line. Check the first irrigation for ponding in new holes. If water stands in a pocket while surrounding soil drains, pause additional planting there and investigate the soil transition, grade, or drainage connection.
Diagnose a weak response before adding another treatment
A pocket that repeatedly fails after neighboring soil passes needs a water-path diagnosis. Check downspouts, irrigation leaks, slope, edging that dams flow, an old planting hole filled with different material, and a compacted access strip. Digging the wet point again supplies little new evidence and may seal its pores. Observe where water enters and how long the same-depth sample takes to fracture after rain.
A hard layer in otherwise dry soil may be existing compaction, not current wetness. Compare resistance above and below it, root direction, pore continuity, and infiltration. Minnesota cautions that wet traffic and tillage can create persistent dense layers and that freeze-thaw action may affect only shallow soil. Deep loosening is a separate remediation decision whose benefit depends on depth, texture, roots, future traffic, and drainage.
Keep plant symptoms in their own diagnostic lane. Poor growth can arise from low aeration, restricted roots, drainage, pH, nutrients, salts, or disease. The hand test establishes today's cultivation readiness; it cannot identify nutrient deficiency or contamination. Use a laboratory result and local diagnostic service when the next action depends on chemistry or plant health, while preserving an unworked comparison area.
Leave a record for the next seasonal decision
For every numbered point, record date, recent rain or irrigation, sample depth, apparent texture, ball response, tool smearing, and access condition. Photograph the sample beside its flag and include enough of the bed to locate it later. The same point and depth make the next test comparable; a new sample chosen from a drier corner does not show that the original pocket improved.
Shade failed areas on the map and draw the single path or board serving ready ground. Label the wet patch as intentionally unworked so a helper does not carry compost across it or cultivate it for visual uniformity. Store amendments and tools on the firm side until that pocket passes both the hand and tool tests.
Assign one action to each area: plant the accessible passing zone, wait and retest the low clay pocket, redirect a downspout, investigate an irrigation leak, or submit a separate laboratory sample. Reset the workability decision after substantial precipitation. Soil texture and drainage determine how long the interval lasts, so the record should describe the condition that changed, not merely a new calendar date.
Close the log when the planned cultivation is complete and the access route remains firm. Keep the map with notes on compacted edges, slow pockets, and successful paths for the next spring. That history can reveal a recurring water route or traffic problem before anyone enters the bed, reducing both unnecessary testing and preventable structural damage.
Steps
- Level
- moderate
- Time
- One focused session, followed by scheduled checks
- Tools
- Hand trowel, Kneeling or access board, Clean container for comparison samples
- Materials
- No amendment is required for the test itself
- 1Wait for thaw and drainage
Choose a day after the soil profile has thawed and drained following snowmelt, rain, or irrigation. Inspect the route from firm ground. If the path pumps water, takes a deep print, or sinks beneath a board, leave the bed closed. A pale dry crust does not clear wetter soil at planting depth.
- 2Map representative pockets
Number a typical central point, the wettest low spot, a raised or sunny edge, a path margin, and any downspout or amended-hole zone. Flag crowns and bulb foliage. Note slope, shade, recent water source, and apparent sand, silt, loam, or clay texture so the hand response can be interpreted in context.
- 3Take a sample at working depth
Reach the point from one board or path and lift a small intact trowel section from the actual working depth. Observe natural aggregates, shine, free water, odor, and blade smearing before squeezing. Keep numbered samples separate. A dry surface over sticky glossy soil receives a wet classification for the planned digging depth.
- 4Squeeze once and break the ball
Form one ball and press it once with the other palm or heel. A ball that fractures into aggregates supports cultivation. An imprint, shine, smear, ribbon, plastic shape, or released water means wait. Sandy samples may stay loose when moist, so pair their weak ball with moisture, footprint, and trowel evidence.
- 5Work only the passing areas
Proceed only where both the sample and access pass. Open one spadeful and verify that the cut does not polish or smear, then preserve natural aggregates and the planned depth. Mark wet pockets and keep traffic, compost, and machinery outside them. Restore mulch after planting while keeping crowns and root flares exposed.
- 6Retest the same wettest point
After a further drying interval, return to the same flagged depth and repeat one ball and tool test. Restart the decision after substantial precipitation. Log workability apart from laboratory data: the mapped physical evidence times cultivation, while a properly collected laboratory sample guides pH, nutrient, organic-matter, and selected contaminant decisions.
Related reading
Sources
- Soil types. Royal Horticultural Society. Source record · Accessed 2026-08-30.
- Soil compaction. University of Minnesota Extension. Source record · Accessed 2026-08-30.
- Soil testing for lawns and gardens. University of Minnesota Extension. Source record · Accessed 2026-08-30.
- Practice patience when preparing garden soil. University of Missouri Extension. Source record · Accessed 2026-08-30.