Grow · wax begonia seed starting summer bedding
Start Wax Begonias from Seed for Summer Bedding
Raise compact wax begonias from extremely fine surface-sown seed with warm germination, prompt long-duration light, controlled humidity, careful watering, and a bedding plan sized before sowing.
Published Last updated
In this guide
Plan the final bedding geometry before sowing
Count back about sixteen weeks from the intended outdoor planting date; that is the University of Minnesota Extension lead time for seed-grown begonias. The end date is not simply the average last frost. Its begonia guidance waits until soil reaches at least 60°F (16°C), while local forecasts must also be frost-free enough for tender transplants. If the bed normally reaches that soil temperature in late May, a late-January start is reasonable; if spring soil warms earlier or later, move the sowing date with the site.
Measure the final bed before deciding how many dust-fine seeds to sow. The NC State profile describes wax begonias as compact mounds about 6–12 in high and wide; UMN's broader begonia guidance uses about 12 in spacing outdoors. Use the named cultivar's mature width when it is available, draw the actual centers, and add only a modest reserve for germination and transplant losses. Thirty planting positions plus a few replacements is a manageable crop; an entire packet can become hundreds of seedlings that the light shelf cannot finish well.
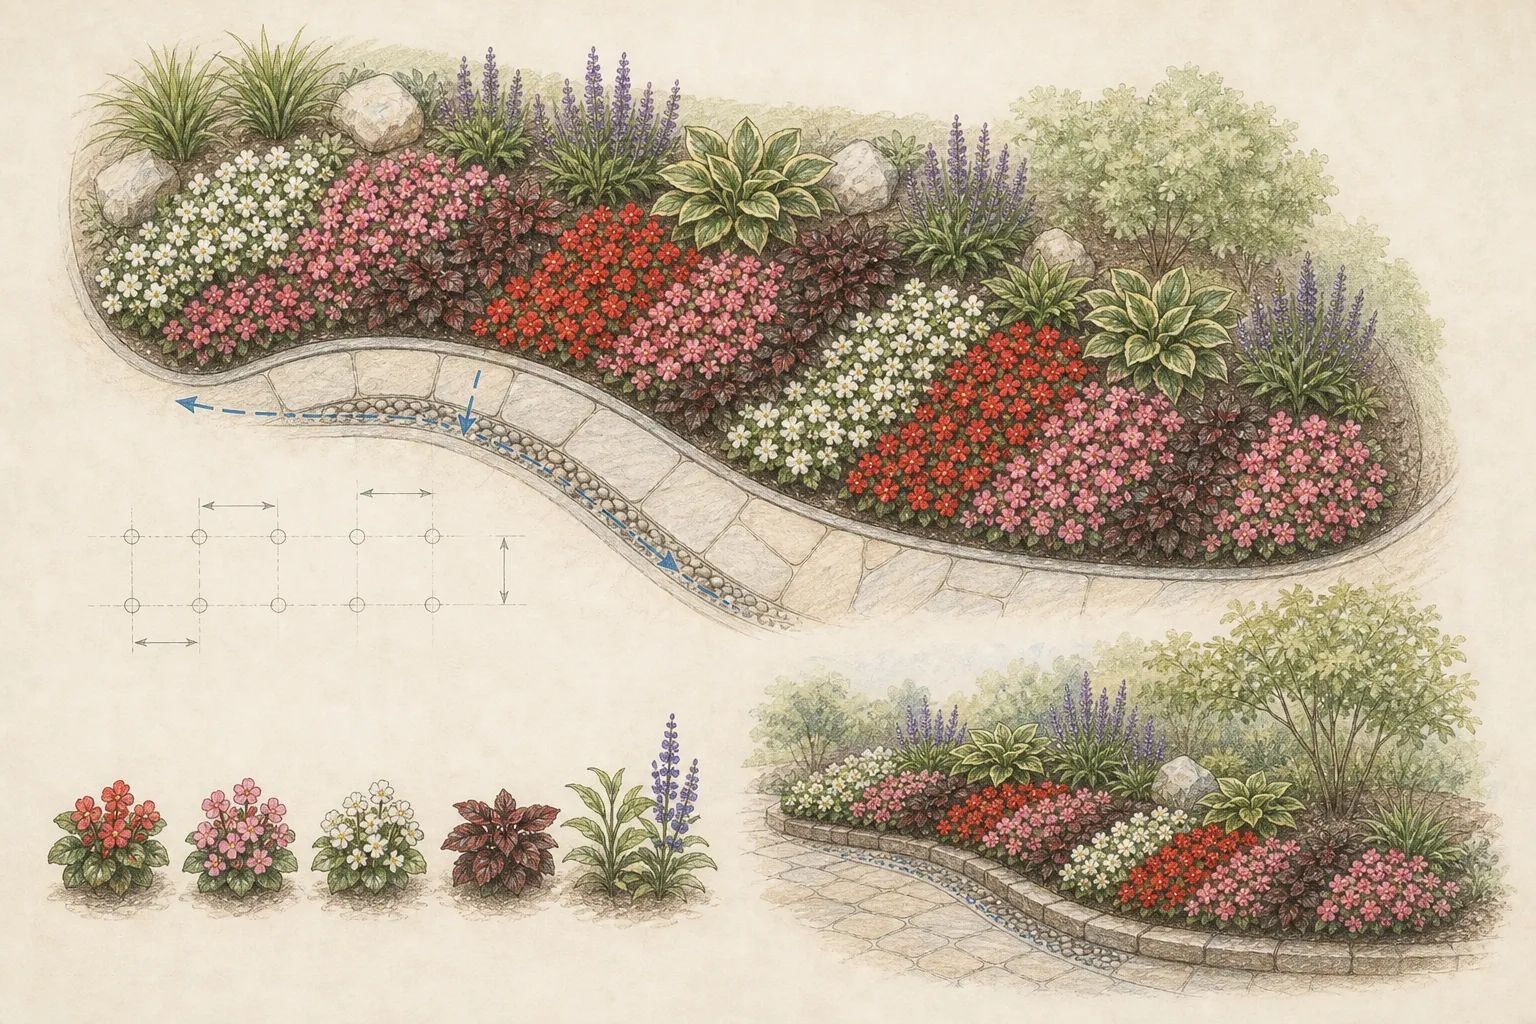
Reserve space for every stage, not only the seed tray. The germination tray needs a 70–75°F (21–24°C) root zone and a humidity cover. After emergence, the crop needs fourteen hours of broad light each day, then more area as plants are moved into containers 1–2 in wider than their cells. Place an empty tray and the intended pots on the shelf now. If the lamps cannot cover that expanded footprint evenly, reduce the plant count before sowing.
Plan safety into the layout. For people, North Carolina Extension classifies wax begonia as a low-severity poison, identifies roots and sap as the hazardous parts, and notes contact dermatitis. Keep plants and sap-contaminated tools outside children's access, wear gloves if skin is sensitive, wash exposed skin, and seek poison-centre advice after a concerning exposure.
For animals, the ASPCA classifies Begonia species as toxic to dogs and cats; it lists vomiting and salivation for those pets and reserves the kidney-failure warning for grazing animals. Keep seed, plants, roots, and discarded seedlings inaccessible, and seek veterinary or animal-poison advice after suspected ingestion.
Prepare for dust-fine surface seed
Choose a shallow divided tray with drainage holes and a rigid bottom tray that can be emptied. Use new fine seed-starting mix; garden soil and reused mix can carry damping-off organisms into the warm, wet conditions required for germination. University of Minnesota Extension directs growers to sterilize previously used pots and trays in a 10 percent household-bleach solution for thirty minutes, then rinse them. Follow the product's ventilation and protective-equipment directions, use bleach by itself, and let the tray drain before filling.
Pre-moisten the mix in a clean tub until it is uniformly damp but not dripping. Fill each cell, settle it gently, and level the top with a straight edge. Wax begonia seed remains on this surface, so ridges become dry high points and depressions become puddles. Water the filled tray once from below, remove it as soon as the surface darkens, and pour away excess. The finished surface should be flat, moist, and firm enough that a pellet rests on it without sinking.
Label the tray before opening seed. Work indoors with fans off, doors closed, and a clean white sheet of paper beneath the packet. Pelleted seed is easier to place but still remains a surface seed; bare seed can resemble dust and should be transferred with a dry folded card or the tool specified by the supplier. Divide cultivars among clearly mapped rows and repeat the label at both ends. Count loose seed only over the white sheet, sheltered from scattering breath or sleeves.
Assemble the germination environment before sowing. Put a root-zone thermometer in a filled neighboring cell, test the heat mat and controller at 70–75°F, fit a clean transparent cover without sealing drainage, and confirm that fourteen-hour lighting can begin at emergence.
Route water below electrical equipment and make a drip loop in every cord. A warm windowsill is not a controlled substitute: direct sun through a covered tray can overheat it while a cold night can drop the medium below the measured range.
Surface-sow and keep the seed visible
Place wax begonia seed on top of the prepared mix and leave it fully exposed to light. Both UMN and North Carolina Extension give this surface-sowing direction. Space pellets one per marked cell or position bare seed as thinly as the packet allows. Press a pellet just enough to make contact with the damp surface; burying it, adding vermiculite, or washing loose seed into a crack defeats the light-exposed method and makes later density impossible to judge.
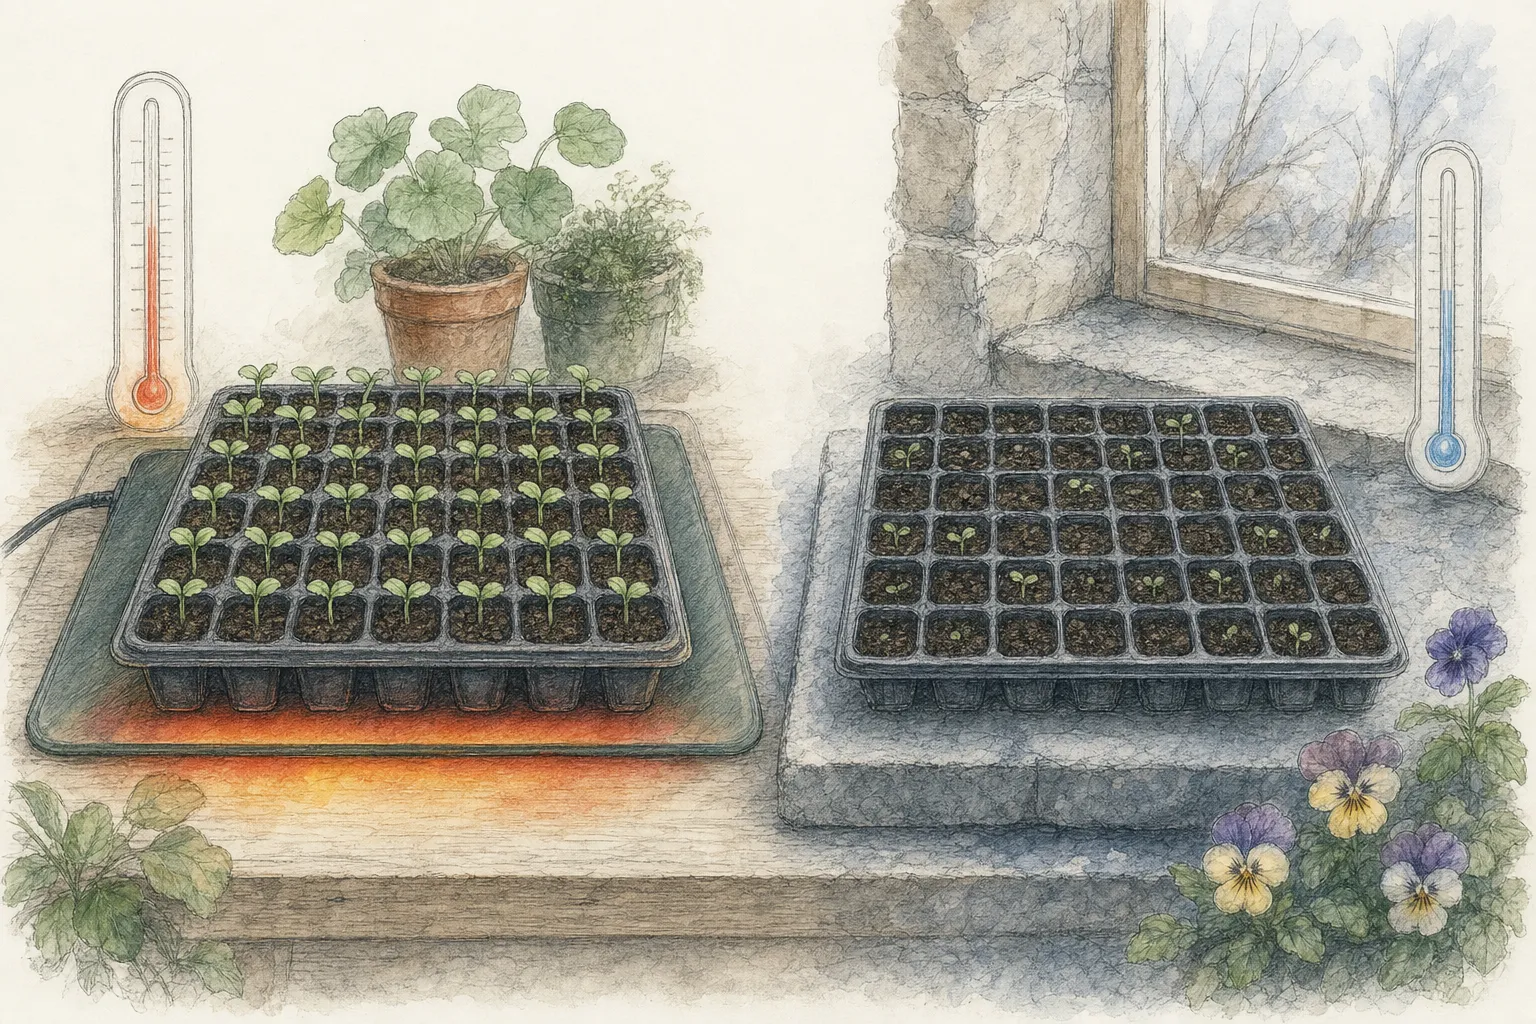
Settle the surface with a very fine mist only if seed-to-mix contact is incomplete. Otherwise add water to the bottom tray and remove it when moisture has moved through the cell, before water pools above. Fit the transparent cover and place the tray over controlled bottom heat. Keep the medium at 70–75°F (21–24°C), the UMN range for begonia germination, and measure it inside the mix because room air and a nearby thermostat can read differently.
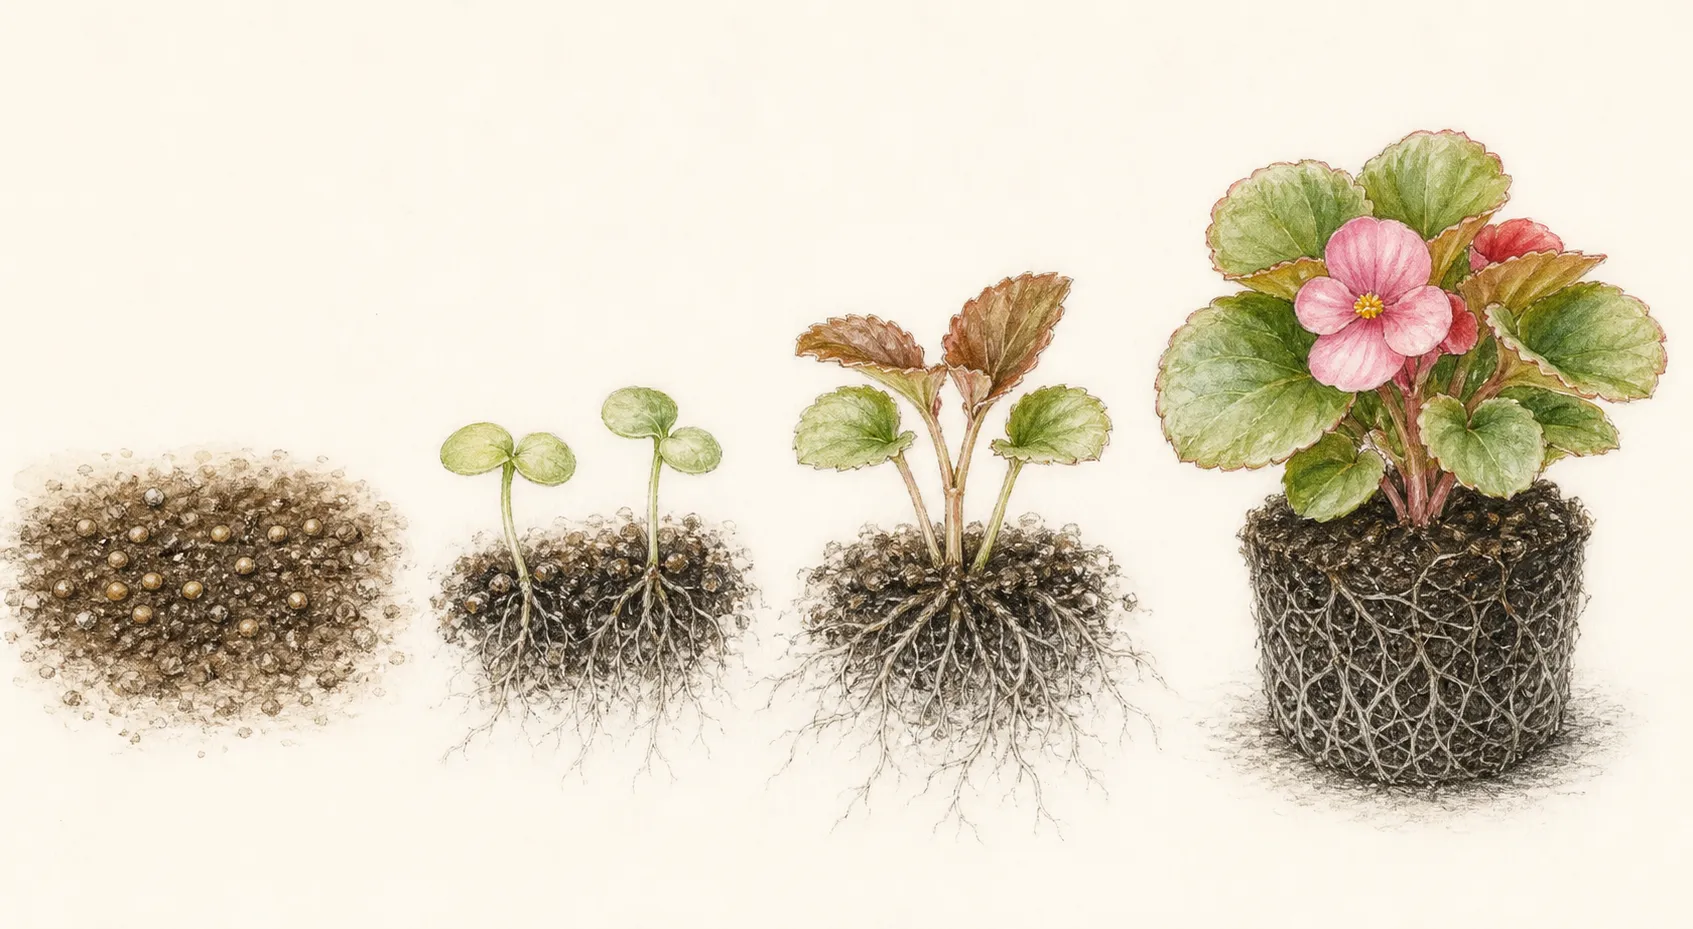
Inspect through the cover every day. Look for a dry pellet shell, pooled water, heavy droplets falling from the lid, green algae, and the first paired cotyledons. Wipe excess condensation from the removed lid over a sink, not over the seed, and reseat it promptly while most positions remain ungerminated. Record root-zone minimum and maximum and the first emergence date. UMN gives 15–20 days at the stated temperature, so a cold tray should be corrected before the seed is declared nonviable.
Leave slow cells undisturbed, with their surface open for inspection. If a section dries, bottom-water carefully and inspect whether the tray or heat source is tilted. If white growth appears on the surface or a seedling becomes water-soaked and threadlike at its base, isolate that cell or row; those are damping-off warning signs and call for a more open enclosure. Keep unsprouted positions humid while beginning to vent the emerged area.
Open the tray into strong light
Begin venting when cotyledons are visible across a useful part of the tray, then remove the cover before seedlings touch wet plastic. Stagger the lid for several hours, increase the opening the next day, and watch the surface closely enough to prevent a sudden humidity drop from drying unrooted plants. Move the few late cells under a small clean cover if necessary. The main crop now needs open drainage and air movement more than the high humidity that carried the seed through germination.
Give the seedlings fourteen hours of light every day, the crop-specific photoperiod in UMN's begonia guidance, followed by a dark period. Its general seed-starting instructions place LED or fluorescent fixtures 2–4 in (5–10 cm) above foliage; use the lamp maker's safe distance when it differs and measure from the highest leaf. Raise the fixture in small increments while keeping all corners inside the lit footprint. Stretching at one edge means the fixture or tray alignment must change.
After germination, hold 70–75°F (21–24°C) by day and 65–70°F (18–21°C) by night according to UMN's begonia schedule. Adjust or remove bottom heat once the room can maintain that range, and power any heat mat independently of the light timer while the root zone still needs overnight warmth. Log the medium temperature at lights-on and lights-off for several days; a stable average can hide a hot midday tray and a cold predawn dip.
Introduce gentle air movement above, outside the direct path across tiny cotyledons. Thin a crowded position only after seedlings can be distinguished: use clean fine scissors to cut the extra at mix level while intertwined roots remain undisturbed. Preserve the strongest upright seedling with an intact growing point. Continue mapping emergence by cultivar, because a whole cold edge, a single saturated cell, and random old-seed failures call for different corrections.
Water and feed the slow seedling
Use the wet and dry weight of the tray to time irrigation. Bottom-water when the surface begins to lighten and the tray is appreciably lighter, then remove it as soon as moisture reaches the upper mix and discard all standing water. If only one edge dries, correct airflow or heat distribution while leaving the wet half undisturbed. Keep runoff from a suspect tray isolated; UMN notes that damping-off organisms can spread through shared irrigation water.
The retained UMN pages give two fertilizer directions: its begonia crop page allows half-strength fertilizer weekly after germination, while its general seedling guidance waits for several true-leaf sets and begins at one-quarter strength. For a small home tray, use the more conservative threshold and rate unless the named seed supplier supplies a crop-specific program. Apply one measured one-quarter-strength feeding per week after several true leaves appear, use plain water between, and stop if salts crust the surface or leaf tips burn.
Inspect stems at mix level with a hand lens. Water-soaked, gray-brown, pinched, or threadlike tissue; wilt above wet mix; missing roots; and white cobweb growth are the UMN damping-off signs. Remove the affected cell and adjacent debris, wash the catch tray before reuse, and check temperature, drainage, light, crowding, and irrigation. A collapsed seedling rarely recovers, and a fungicide should not be improvised without a confirmed diagnosis, a legal label for the crop and site, and local guidance.
Keep fallen cotyledons and algae from sealing the surface, using forceps while roots remain undisturbed. Raise the light as leaves expand and separate cultivars before the fastest group shades the slowest. A compact seedling with several true leaves, a stem that stands without the humidity lid, and roots that hold a small plug is ready for the next container. Calendar age alone is unreliable because wax begonias germinate and enlarge slowly even under the recommended regime.
Pot on without burying the crown
Pot on when several true leaves are open and roots hold the mix together, before the plug becomes a tight cylinder. University of Minnesota Extension recommends the next container be only 1–2 in wider than the cell. Pre-fill clean draining pots with fresh free-draining mix and make a plug-sized opening. Water the seedlings several hours ahead so the plug is cohesive but not dripping, and move one labeled cultivar group at a time.
Lift from below with a narrow plant tag or spoon. Support the plug and, if the top must be steadied, touch a leaf while keeping fingers off the succulent stem and growing point. Set the top of the original mix level with the new surface; burying the stem adds wet tissue below grade, while a proud plug dries at its edges. Firm the surrounding mix lightly, water to settle it, and empty runoff before returning the plant to its tray.
Put transplants back under fourteen-hour light immediately, at the same measured lamp distance they tolerated before the move. Leave enough gap for air between leaves and rotate only if one side consistently leans. If a plug falls apart, shelter that plant from direct fan flow and keep its mix evenly moist while roots re-establish; keep the established crop in open air. Resume feeding only after the plant is upright and making new growth.
Count usable plants after each potting round against the mapped bed. Retain the reserve only until every planting position has a healthy candidate, then compost sound extras where pets cannot reach them and discard diseased material separately. Keep cultivar labels with individual pots, especially when bronze and green foliage groups are intended to repeat. The potting stage is complete when roots occupy the new mix, plants remain compact under the fixture, and no leaves must be interlocked to fit the shelf.
Harden and set the summer display
Begin hardening about two weeks before the bed is ready. UMN starts indoor seedlings with a few afternoon hours outdoors in shade, protected from wind, then adds time and direct light each day while bringing plants inside before night temperatures fall. Wax begonias raised under lamps can scorch in abrupt sun, so keep the first exposures shaded and watch the actual cultivar. Pause during frost, hard wind, or driving rain; one damaging test sets tender leaves back.
Approve the site when the forecast is frost-free, the soil is at least 60°F (16°C), and a squeezed handful crumbles cleanly. Choose well-drained soil, generally in shade or morning sun outside hot afternoon exposure. The exact wax-begonia profile notes that bronze-leaved cultivars tend to tolerate more sun, but that trait does not erase hardening or local heat limits. If drainage is poor after rain, shift the display to raised soil or containers and leave the wet pocket empty.
Set plants on the cultivar's measured centers; about 12 in is UMN's general begonia spacing and matches the upper end of NC State's 6–12 in wax-begonia spread. Transplant on a cloudy day or in late afternoon, slide each root ball out intact, and keep its original surface at garden grade. Water the complete root ball and surrounding soil, then inspect the next morning. A sunken plant should be lifted before irrigation repeatedly collects against its stem.
Water at the base when the root zone begins to dry, avoiding both chronic saturation and overhead wetting that encourages leaf disease. During the first week, provide temporary shade if foliage pales or scorches and wind protection if stems rock in the hole; remove those protections once leaves remain firm through the day. Keep roots and trimmings away from children and animals. At season's end, record final width, sun exposure, losses, and bloom continuity so the next seed count and spacing come from this cultivar's measured performance.
Steps
- Level
- advanced
- Time
- 45 minutes to sow; roughly four months of staged indoor growth
- Tools
- Clean divided seed tray, Fine mister and bottom-watering tray, Adjustable broad grow light and timer, Root-zone thermometer, Small transplant tool
- Materials
- Fresh wax begonia seed or pellets, Fresh fine seed-starting mix, Free-draining potting mix, Successive small pots, Durable labels
- 1Measure the display
Count back about sixteen weeks from the frost-free date when garden soil usually reaches 60°F (16°C). Map planting centers from the named cultivar's spread, using about 12 in only when no more specific direction exists, add a small replacement allowance, and confirm that fourteen-hour lighting covers both the seed tray and later pots.
- 2Prepare the tray
On a waterproof bench, map cultivar rows on a white sheet beneath the divided tray. After sanitizing reused plastic for thirty minutes in the prescribed 10 percent bleach solution, rinse, fill every cell to the same rim with damp new medium, and stand it for ten minutes. Reject any position that retains a puddle before connecting the thermostatic mat.
- 3Surface-sow
With fans and drafts off, place pellets individually or distribute bare seed thinly on the flat damp surface. Press only enough for contact and add no mix or vermiculite. Bottom-water until the surface darkens, remove runoff, fit a transparent humidity cover, and keep the seed visible while light reaches the tray.
- 4Hold warm and humid
Keep the medium at 70–75°F (21–24°C), inspect condensation and surface moisture daily, and record root-zone minimum and maximum. Expect emergence in roughly 15–20 days at that range. Bottom-water without pooling, wipe heavy lid droplets over a sink, isolate any water-soaked, threadlike, or mold-covered cell, and leave the remaining enclosure vented.
- 5Open into long bright light
Vent as cotyledons establish and remove the lid before shoots touch wet plastic. Provide fourteen hours of LED or fluorescent light daily, generally 2–4 in above leaves within the maker's safe range. Maintain 70–75°F by day and 65–70°F at night, add gentle indirect air, and cut crowded extras at mix level.
- 6Water by root condition
Weigh the fully drained tray after irrigation as a wet reference. Rewater when it is clearly lighter and the top pales, stop wicking when upper cells darken, drain, and weigh again. Hold feed until several true-leaf sets, then give one labeled quarter-strength dose per seven days. Remove a collapsed cell with a spoon, seal it for disposal, and sanitize its saucer.
- 7Pot established plugs
Stage labeled pots by bed position and water seedlings three hours ahead. Push up one test plug; if it remains cohesive, move that cultivar row into containers no more than 1–2 in wider, supporting each plant by a leaf and preserving its surface grade. Drain, leave a pot's width between groups, and check for upright new growth after twenty-four hours before resuming feed.
- 8Harden and plant
Over about two weeks, progress from a few sheltered afternoon hours in shade to longer outdoor exposure. Plant only after frost danger passes and soil reaches 60°F, on cultivar spacing in draining shade or morning sun. Preserve the root-ball grade, water at the base, protect briefly from scorch and wind, then remove temporary cover.
Related reading
Sources
- Begonia. University of Minnesota Extension. Source record · Accessed 2026-08-30.
- Starting seeds indoors. University of Minnesota Extension. Source record · Accessed 2026-08-30.
- How to prevent seedling damping off. University of Minnesota Extension. Source record · Accessed 2026-08-30.
- Wax Leaf Begonia - Begonia – Wax Types. North Carolina Extension Gardener Plant Toolbox. Source record · Accessed 2026-08-30.
- Toxic and Non-toxic Plants: Begonia. ASPCA Animal Poison Control Center. Source record · Accessed 2026-08-30.