Grow · sweet pea deep cell seed starting
Start Sweet Peas Indoors in Deep Cells
Raise sweet peas with deep root room, cool bright growth, careful moisture, early support, gradual hardening, and a planting date tied to local conditions.
Published Last updated
In this guide
Set the outdoor date and support first
Set the transplant date before opening the packet. In Minnesota, University of Minnesota Extension places indoor sweet-pea sowing about three to four weeks before plants are hardened and moved outside. The Royal Horticultural Society uses late January through April for spring sowing in the UK and calls for ten to fourteen days of hardening before April planting. Those calendars describe their regions, not a universal date. Count backward from a locally suitable cool-season transplant window, then check the named cultivar because an autumn-sown UK method and a spring start in a cold continental climate need different indoor holding time.
Build the final support before calculating the seed count. Most climbing sweet peas need canes, netting, pea sticks, or trellis, while dwarf cultivars may not need a climbing frame. The RHS spaces transplants 20–30 cm (8–12 in) apart and positions climbers within 5–7.5 cm (2–3 in) of their support. Mark those centers on the bed or container, decide how many usable plants fit, and sow only that number plus a small allowance for failed germination. A six-foot climber should not spend weeks indoors while its bed and anchored support remain undecided.
Keep each cultivar in a separate labeled cell group from sowing through planting. The label should carry the cultivar, seed source, sowing date, and intended support position; color alone cannot identify seedlings. Reserve enough lit shelf space for every deep cell at full spacing, including room to lift the fixture as shoots extend. If the final garden can accept twelve plants but the lighted shelf holds only eight well-spaced cells, raise eight strong plants and leave the excess seed unsown, preventing a tangled crowded tray.
Treat ornamental sweet pea, Lathyrus odoratus, as non-food. North Carolina Extension identifies the seeds as the poisonous part for people and advises separating the plant from edible peas. Queensland's poisons centre says an accidental ingestion is not expected to cause poisoning, but repeated consumption of large quantities of seed over weeks or months can cause a paralytic syndrome; that narrower human-exposure statement does not make pods edible.
For animals, Pet Poison Helpline warns that the plant, including its pea-like seeds, contains toxic compounds and that large exposures can cause appetite loss, lethargy, or neuromuscular signs. Keep seed, pods, and pulled vines inaccessible, and contact a poison centre or veterinarian promptly after a suspected exposure.
Choose depth before sowing
Use one clean root trainer or other deep individual cell per seed, with an unobstructed drainage hole and a tray beneath it. The RHS specifically offers root trainers or 9 cm (3 in) pots for individual sweet-pea seed. A deep cell is useful because its complete plug can be moved without separating intertwined roots; it is not permission to keep a tall seedling indefinitely in a narrow volume. Reject cracked cells, blocked holes, and containers that cannot stand upright when watered.
Fill with fresh, free-draining seed compost and exclude garden soil from the cells. Pre-moisten the mix in a separate tub until it is evenly damp and holds together lightly when squeezed but releases no water. Fill each cell to leave enough rim for the specified 1 cm covering layer, tap the tray once to settle large voids, and level without compressing the mix into a dense column. Water should be able to enter across the surface and leave through every cell base.
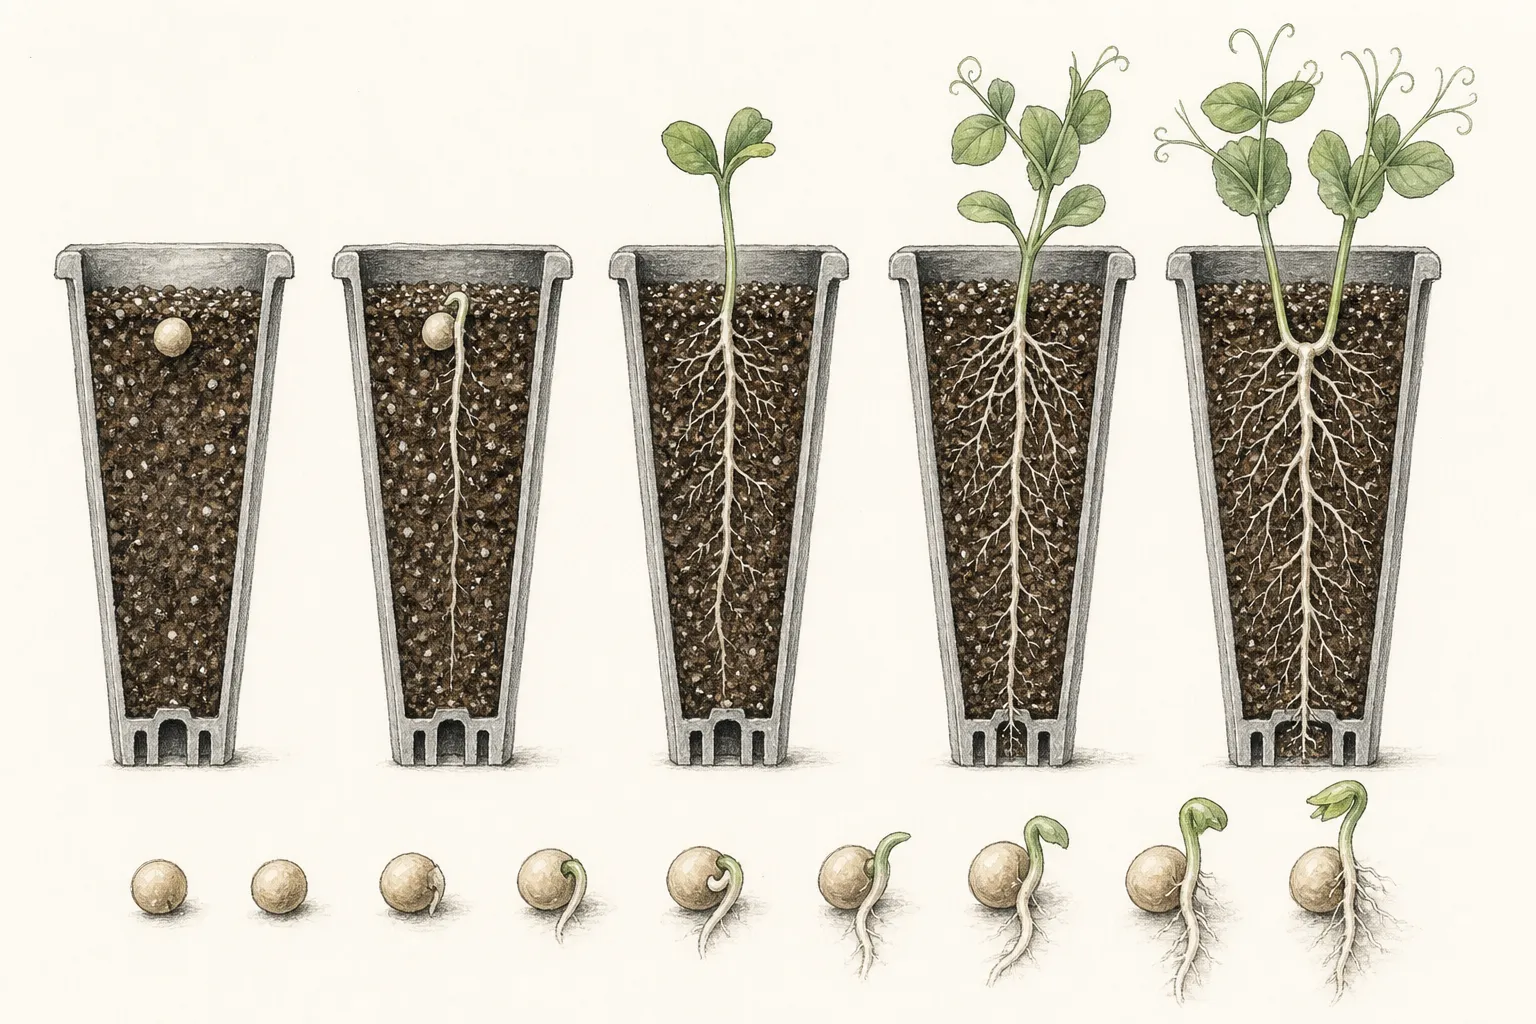
Put the permanent labels in place before seed treatment begins. Arrange cultivars in blocks with an empty divider cell or a second label at the far end so one displaced marker cannot merge two names. Set the filled tray on its final shelf and test the complete watering route: add a measured amount, confirm that all cells wet evenly, then empty runoff. A tray that bows, traps drainage, or cannot be removed beneath the light should be corrected while it contains only mix.
Leave enough clearance above the cells for the fixture, the first temporary support, and safe watering. University of Minnesota Extension recommends individual containers because roots in a communal flat grow into one another and are likely to be injured during separation. The deep-cell method succeeds when each seedling remains individually removable. If cells must be packed so tightly that leaves overlap before the planned transplant date, reduce the sowing count or add another fully lit tray now.
Prepare and sow sound seed
Inspect dry seed and discard pieces that are moldy, split through the embryo, or already soft. The RHS method places sound hard-coated seed on moist kitchen tissue in a closed container in a warm room, then sows it as soon as it swells or starts to sprout. Overnight soaking is another method, but the RHS notes that soaked seed can rot when it is not sown immediately. Use one method for a batch, prepare the filled cells first, and move swollen seed directly from treatment into compost.
Reserve nicking for hard seeds that have not swollen. Remove only a tiny chip from the coat opposite the eye, exactly where the RHS directs, and stop before pale internal tissue is cut. Stabilize the seed on a board, keep the blade moving away from fingers, and skip this treatment if the packet supplies primed or otherwise treated seed. Nicked, swollen, and untreated seeds should remain in separately labeled groups because their emergence times cannot be interpreted if mixed.
Make a 1 cm (about 1/2 in) depression in each cell, place one seed, and replace 1 cm of the same fine compost. This is the RHS pot-sowing depth; it is shallower than its 2.5 cm outdoor drill. Water with a narrow gentle stream until the covering layer is moist and drainage first appears, then empty the catch tray. Keep the cells at about 15°C (59°F). A clear cover is optional for moisture retention and must come off after germination.
Check the cells at least daily without excavating them. Rewater when the surface begins to lighten and the cell feels distinctly lighter, applying enough to moisten the column and then draining excess. Note the first emergence and the number emerged in each labeled group. If one cell stays saturated while its neighbors drain, clear or replace that cell; if the entire tray dries in less than a day, reduce air leakage from the optional cover before repeatedly flooding the mix.
Move seedlings into cool bright growth
Remove the clear cover when shoots appear and place the tray immediately under broad light. The RHS identifies insufficient light combined with excess warmth as the cause of weak, leggy sweet-pea seedlings and directs growers to a cooler, brighter place. Transfer emerged cells out of the 15°C opaque germination cover immediately. Move late cells to a small labeled tray if they still need humidity, and give the green seedlings an unobstructed light period.
For a general indoor-seedling setup, University of Minnesota Extension recommends LEDs or fluorescents 2–4 in (5–10 cm) above the canopy for 12–16 hours daily, with darkness each night. Start near the fixture maker's safe distance, measure from the highest leaf, and raise the lamp as the shoots grow. Rotate the tray only if measured coverage or consistent leaning shows one edge receives less light; a quarter-turn cannot repair an undersized fixture.
Water the root column, not just the visible surface. Lift one representative cell before and after watering to learn the weight change, add water gently, and discard runoff. Keep foliage and the tray surface dry enough for air to move between checks. A stem that narrows and collapses at mix level is not thirst; remove the affected cell and inspect drainage, crowding, temperature, and sanitation before watering the remaining tray again.
Seed reserves feed sweet-pea seedlings through germination and early growth. In a nutrient-free soilless mix, follow the general UMN threshold of several true-leaf sets before using a water-soluble feed at one-quarter label strength once a week, with plain water at other irrigations. Skip feeding if the mix already contains starter fertilizer. Salt crust, persistently wet cells, or soft elongated growth calls for correcting water, drainage, and light while holding further feed.
Manage extension, pinching, and first support
Install a short twig, narrow mesh strip, or other removable support as soon as tendrils begin reaching neighboring cells. Put it inside the same cell or along the tray edge so it can move with the plug. Guide a shoot once with a loose loop below a leaf node, leaving the soft stem free of tight wraps. Check each morning and release tendrils that have crossed a cultivar label or attached to the next plant before they form a woven mat.
For ordinary garden-grown, spring-sown sweet peas, the RHS pinching threshold is 7.5–10 cm (3–4 in). At that height, pinch the growing tip immediately above a healthy leaf to prompt strong side shoots. Autumn-sown seedlings often branch without this intervention, and exhibition cordons follow a different one-stem system. Confirm which system the cultivar and intended display require before cutting, reserving the garden-bush method for suitable spring-sown plants.
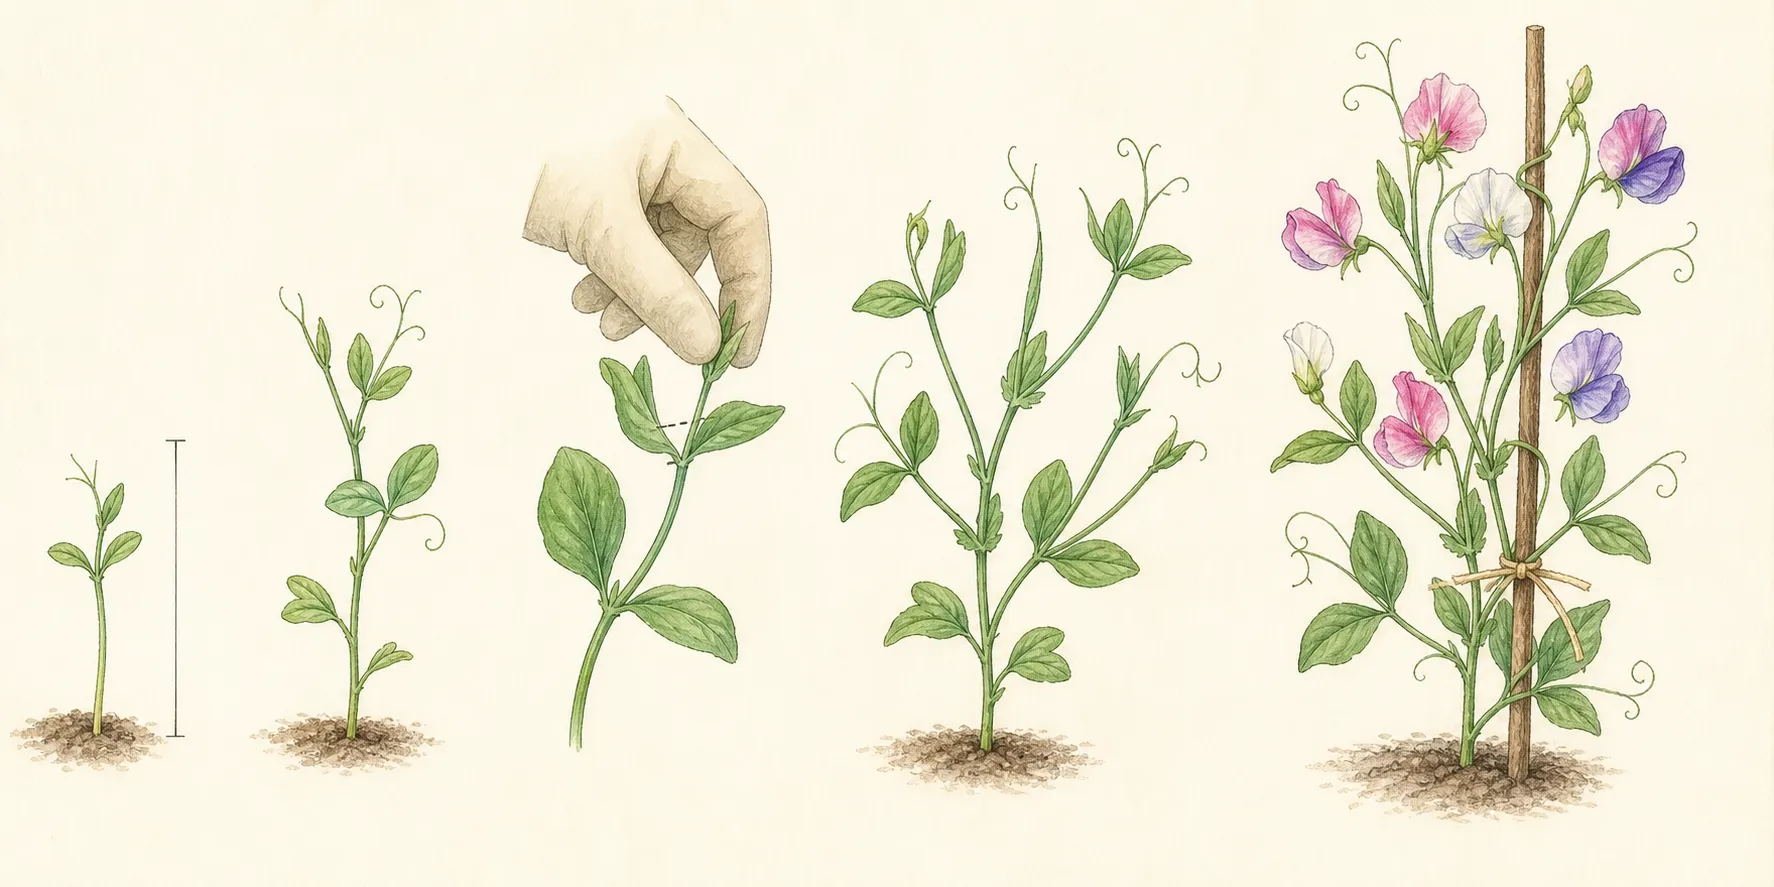
Pinch only a compact, actively growing seedling that has reached the stated height and has a healthy leaf below the cut. Wait if the plant has just emerged, is wilted, is collapsing at the base, or lacks a sound node. Use clean snips when a fingertip pinch would crush the stem, wipe the tool between suspect plants, and keep the removed tip out of pet-accessible waste. One cut is the treatment; repeated removal before side shoots develop only spends limited indoor growth time.
Re-space the cells when leaves touch continuously, and raise both lamp and support without increasing the lamp-to-leaf distance beyond the useful range. Inspect the cell base weekly. White root tips at a drainage hole show that roots have reached the container edge; leave the plant seated while the plug develops. The practical endpoint is a plug held together by roots while the shoot remains compact and separable, ready for hardening before circling roots or intertwined tendrils force a disruptive move.
Harden without checking growth
Start hardening when roots hold each plug, shoots are compact, and the forecast is approaching the local planting window. Use the RHS period of 10–14 days as the working span. On the first day, place seedlings outdoors for a few afternoon hours in bright shade, sheltered from wind, then bring them back before temperatures fall. Add time and a little direct light on later days; one abrupt full-sun day is not a shortened hardening program.
Check every narrow cell before it goes outside and again when it returns. Wind and brighter light can dry the perimeter cells first. Water cells that have become light before wilting and drain every plug completely before overnight holding. Keep the temporary supports attached during moves and free any tendril that has fastened to the shelf, neighboring pot, or carry handle before lifting the tray.
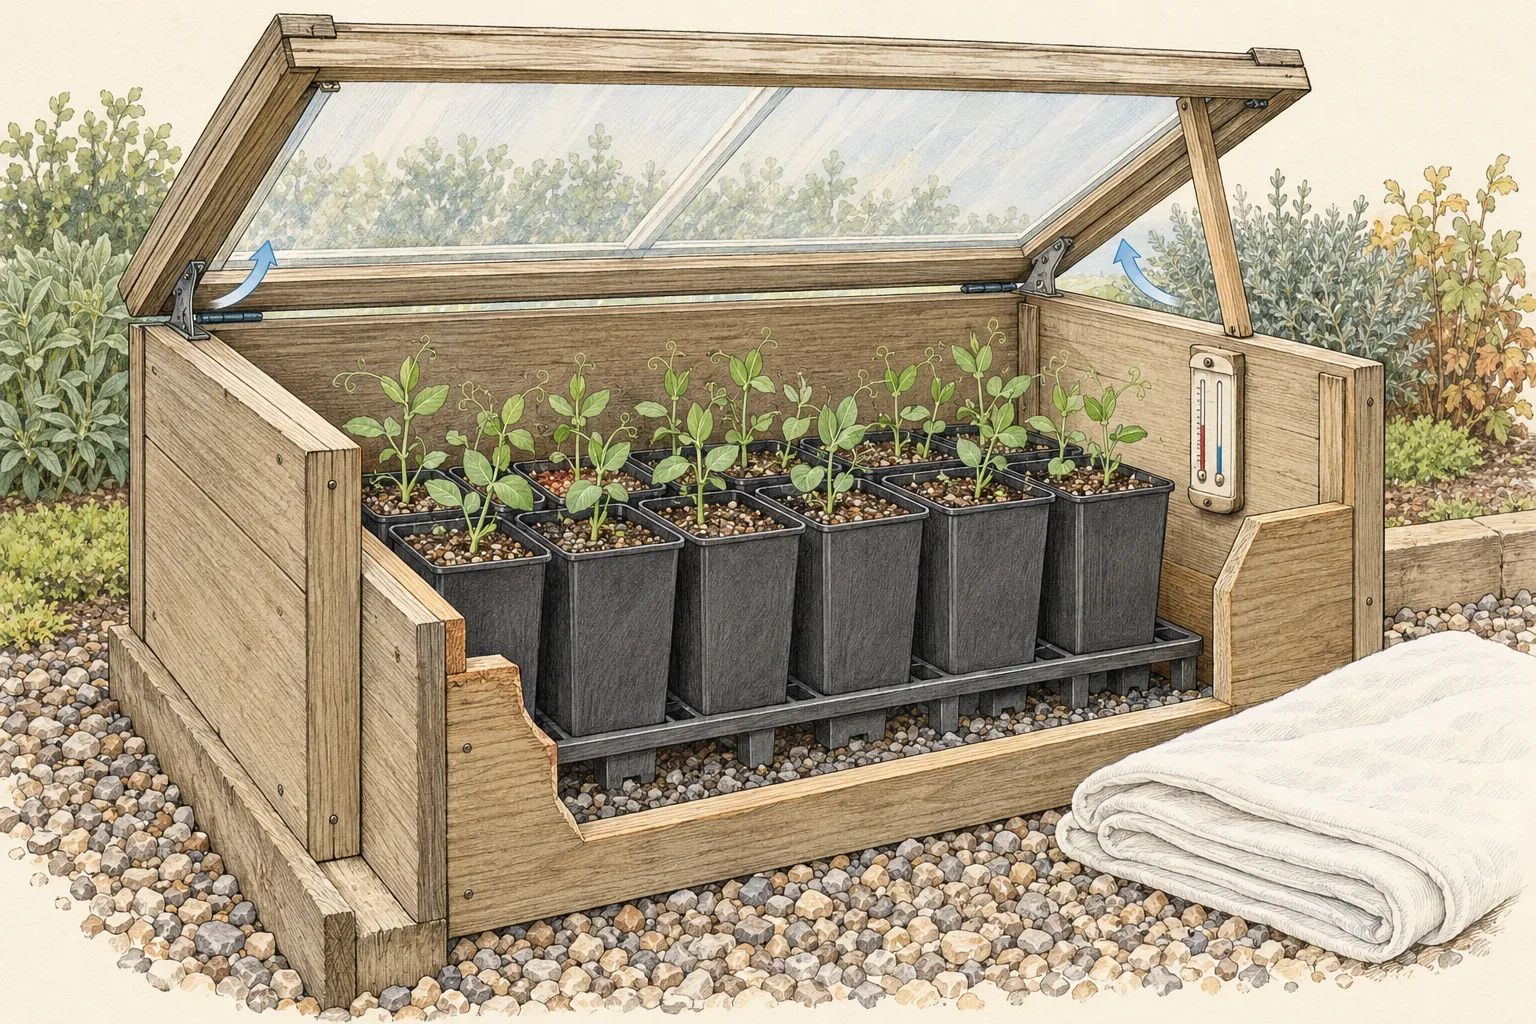
Protect the crop from freezing weather even though established sweet peas favor cool conditions. University of Minnesota Extension brings hardening seedlings inside before nighttime temperatures drop and extends exposure over about two weeks; the RHS also specifies protection from cold shock. Pause the progression during a hard freeze, drying wind, or severe storm, then resume from the last exposure the plants tolerated. A paused day costs less than broken stems or frozen cell walls.
The tray is ready to plant when seedlings can remain outside through the intended daytime exposure without bleaching, persistent wilt, or torn foliage, the plugs stay intact when eased from a test cell, and the bed is workable and free of saturation. Choose a cloudy day or late afternoon, as UMN recommends for transplanting. If the support is not anchored or the soil smears when handled, keep acclimated plants protected outdoors and postpone the final move.
Plant with roots, support, and aftercare aligned
Prepare a sunny position in fertile, moisture-retentive but well-drained soil, matching the conditions shared by RHS and North Carolina Extension guidance. Anchor the full-height support first. Dig holes at the planned 20–30 cm centers and within 5–7.5 cm of the climbing support. Water the cells, ease each complete plug out by squeezing or opening the container, and lower it into a hole at the same surface grade. Hold the plug itself, keep pressure off the stem, and preserve sound roots intact even when they are visible at the edge.
Backfill around the plug, firm just enough to close large gaps, and water until the full planting depth is wet. Add the RHS-recommended 5–8 cm (2–3 in) organic mulch around the root zone while keeping it off the stem. Guide each shoot to the support with a loose tie until tendrils grip. Check ties after wind and remove any that begin to constrict; a tendril-bearing vine should not hang from one tight loop.
Maintain even moisture through establishment. The RHS advises checking in-ground sweet peas every three to four days in dry weather and container plants daily, then wetting the full root depth when watering. Use those as inspection intervals, not automatic doses: feel below the mulch and water when the root zone is drying. Persistent saturation, a sunken plug, or runoff that bypasses the root ball calls for correcting grade and infiltration rather than adding another surface sprinkle.
Pick flowers or deadhead frequently to prevent pod set from ending bloom, and remove every pod from areas shared with edible peas. Expect heat above 30°C (86°F) to interrupt flowering under the RHS guidance; keep roots watered, hold heavy feeding, and wait for cooler conditions. Record bloom start, the date heat stopped flower production, watering problems, and cultivar height. At season's end, bag seed-bearing material where children or animals cannot reach it and clean reusable supports before storage.
Steps
- Level
- moderate
- Time
- 35 minutes to sow, followed by several weeks of cool bright growth
- Tools
- Deep cells or root trainers, Narrow-spout watering can, Broad grow light and timer, Waterproof labels, Clean snips
- Materials
- Named sweet pea seed, Fresh seed-starting mix, Short twig or mesh supports, Clean water
- 1Set the schedule
Count back three to four weeks from a locally suitable cool-season transplant date as a cold-climate starting point, then reconcile it with the packet and local Extension advice. Reserve another 10–14 days for hardening, anchor the final support, mark 20–30 cm planting centers, and sow only the number the lit shelf and bed can hold.
- 2Prepare deep cells
Use one clean root trainer or deep draining cell per seed. Pre-moisten fresh seed compost until evenly damp, fill without hard compaction, leave room for a 1 cm covering layer, and label cultivar, source, sowing date, and destination before opening the packet. Test that every cell drains and the full tray fits beneath the light.
- 3Treat only as advised
Place hard untreated seed on moist tissue in a closed container and sow when it swells or begins to sprout. If using an overnight soak, have cells ready and sow immediately. Nick only an unswollen hard seed, removing a tiny coat chip opposite the eye without cutting the pale interior, and keep treatment groups separately labeled.
- 4Sow and germinate
Set one seed per cell, cover with 1 cm of compost, water gently until drainage appears, and empty runoff. Keep the root zone near 15°C (59°F). Use a clear moisture cover only if needed, inspect daily without digging, and transfer emerged seedlings directly from the cover into open light.
- 5Grow cool and bright
Move shoots under a broad LED or fluorescent fixture for 12–16 hours daily, beginning within the maker's safe range and generally 2–4 in above the leaves. Keep conditions cooler than a warm germination corner, water the full cell when it becomes light, drain excess, and separate late or collapsing cells from healthy seedlings.
- 6Add support and pinch selectively
Add a removable twig or mesh before tendrils cross between cells. For ordinary garden-grown spring seedlings, pinch one compact, healthy shoot at 7.5–10 cm (3–4 in), immediately above a healthy leaf. Leave weak plants and naturally branching autumn starts uncut, and follow separate cultivar instructions for dwarf or exhibition-cordon plants.
- 7Harden gradually
Over 10–14 days, begin with a few afternoon hours in bright shade out of wind, then add time and direct light in small increments. Bring trays in before freezing temperatures, pause during severe weather, check narrow cells before and after exposure, and plant only when leaves remain firm and plugs hold together.
- 8Plant intact plugs
On a cloudy day or late afternoon, set intact plugs at their original grade, 20–30 cm apart and within 5–7.5 cm of the anchored support. Water the complete root depth, mulch 5–8 cm without touching stems, tie shoots loosely, inspect moisture every three to four dry-weather days, and remove flowers or pods before seed develops.
Related reading
Sources
- How to grow lathyrus. Royal Horticultural Society. Source record · Accessed 2026-08-30.
- Starting seeds indoors. University of Minnesota Extension. Source record · Accessed 2026-08-30.
- Sweet Pea - Lathyrus odoratus. North Carolina Extension Gardener Plant Toolbox. Source record · Accessed 2026-08-30.
- Sweet pea (Lathyrus odoratus). Queensland Poisons Information Centre. Source record · Accessed 2026-08-30.
- Sweet Pea Is Toxic To Dogs. Pet Poison Helpline. Source record · Accessed 2026-08-30.