Grow · indoor canna rhizome starting
Pot Up Canna Rhizomes Indoors for a Strong Summer Start
Inspect canna rhizomes, preserve growing points, cover them shallowly, water lightly until shoots appear, and harden the leafy plants after frost.
Published Last updated
In this guide
Decide whether early growth is useful
Start canna rhizomes indoors only when the extra lead time solves a real seasonal limit. Iowa State places the useful window about four to six weeks before the average last frost, while the Royal Horticultural Society starts them in March or early April under frost-free conditions. A gardener without strong light and enough floor space usually gets sturdier plants by waiting for warm outdoor soil.
Work backward from the date when both frost danger and cold soil have passed, not from the first mild afternoon. Cannas are tropical or subtropical tender perennials; foliage is easily damaged by frost, and an early plant can outgrow a windowsill quickly. Before potting, reserve a bright place, a hardening area, and final spacing suited to the named cultivar.
Starting indoors is most useful for sound dormant rhizomes in a short-season climate. It does not rescue rotting storage stock or compensate for a final site that lacks sun, warmth, moisture, or room. Keep a compact cultivar and a six-foot cultivar on different plans: pot size, handling clearance, support, and border position all change with mature height.
Direct outdoor planting remains a valid control. Minnesota Extension reports that cannas bloom well when rhizomes go into the garden after the soil warms and frost danger passes. Compare that simpler route with the labor of indoor potting. An early start earns its place when it advances bloom in a short season or exposes storage problems before bed space is committed, not merely because calendar spring has arrived.
Match the head start to available warm growing space
Start only sound canna rhizomes that can move from potting into suitable warmth and then adequate light. Increase watering with active growth while preserving drainage. Keep the final outdoor move conditional on warm soil and frost risk, using the cultivar's adult scale for spacing. A shoot appearing indoors is not itself evidence that the garden is ready.
Inspect and divide only healthy stock
Unpack rhizomes on a washable surface and examine every section before adding moisture. Keep tissue that is firm and carries visible eyes or growing points. Discard pieces that are soft, leaking, foul-smelling, extensively shriveled, or collapsing around the crown. Storage debris can be brushed away, but healthy skin does not need to be scrubbed or peeled.
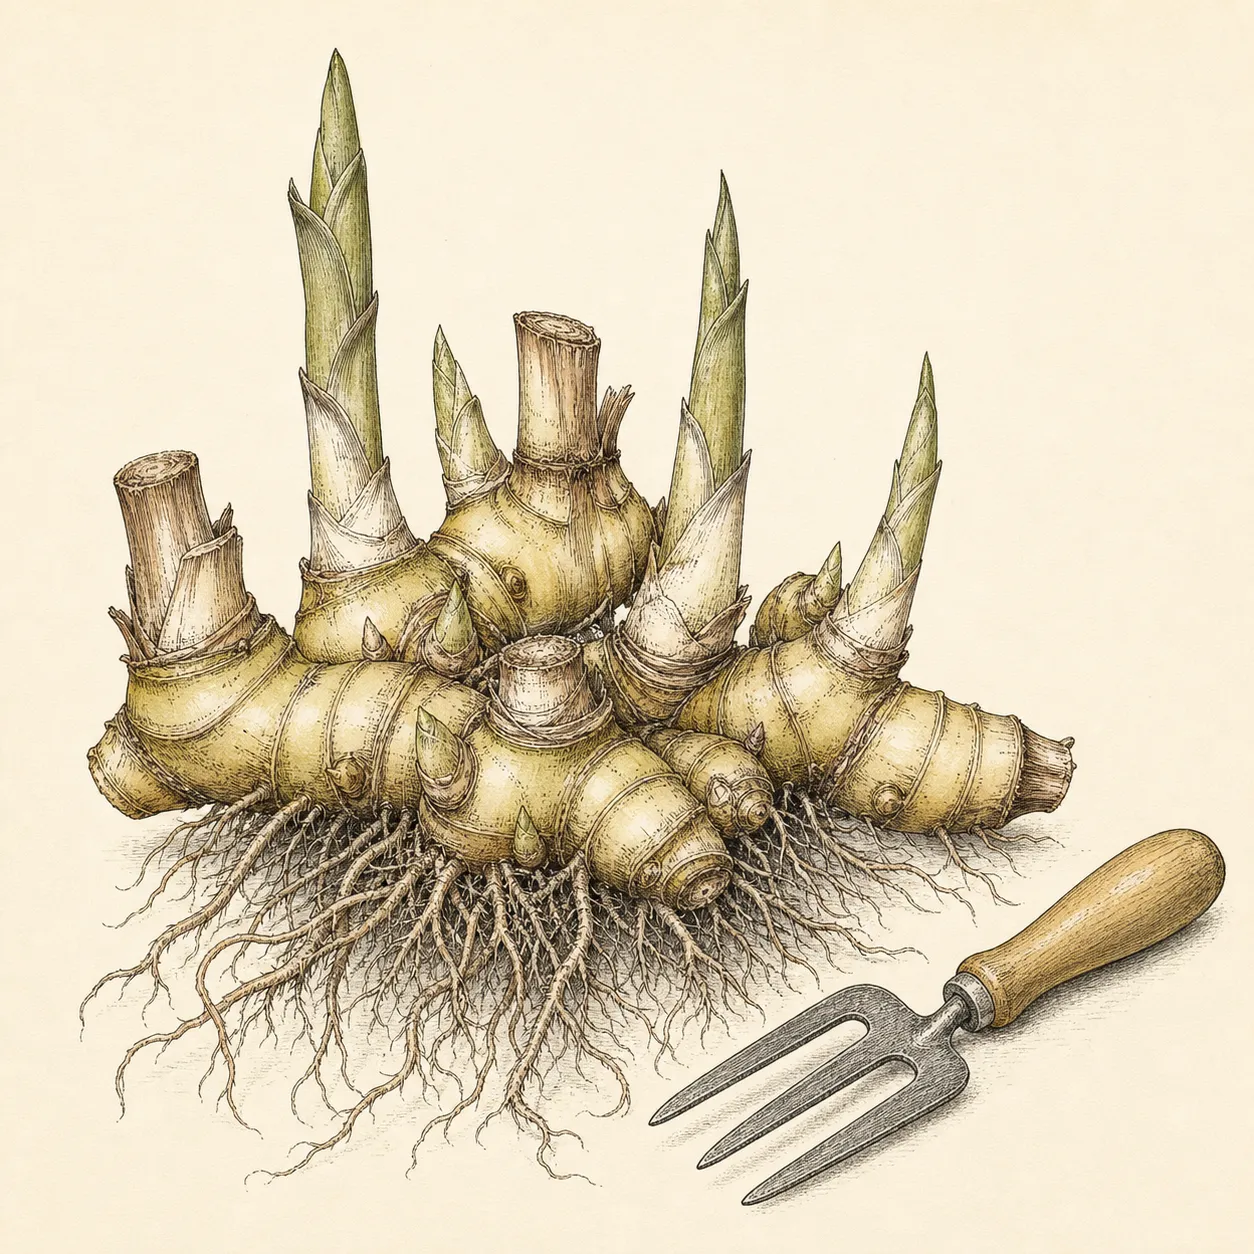
Divide only when a large clump has enough sound storage tissue and buds to make useful plants. The RHS recommends two or three growing points per division; University of Minnesota guidance requires at least one eye. Make the fewest cuts needed with a clean sharp knife, and avoid slicing through the narrow connection that joins a bud-bearing crown to its storage tissue.
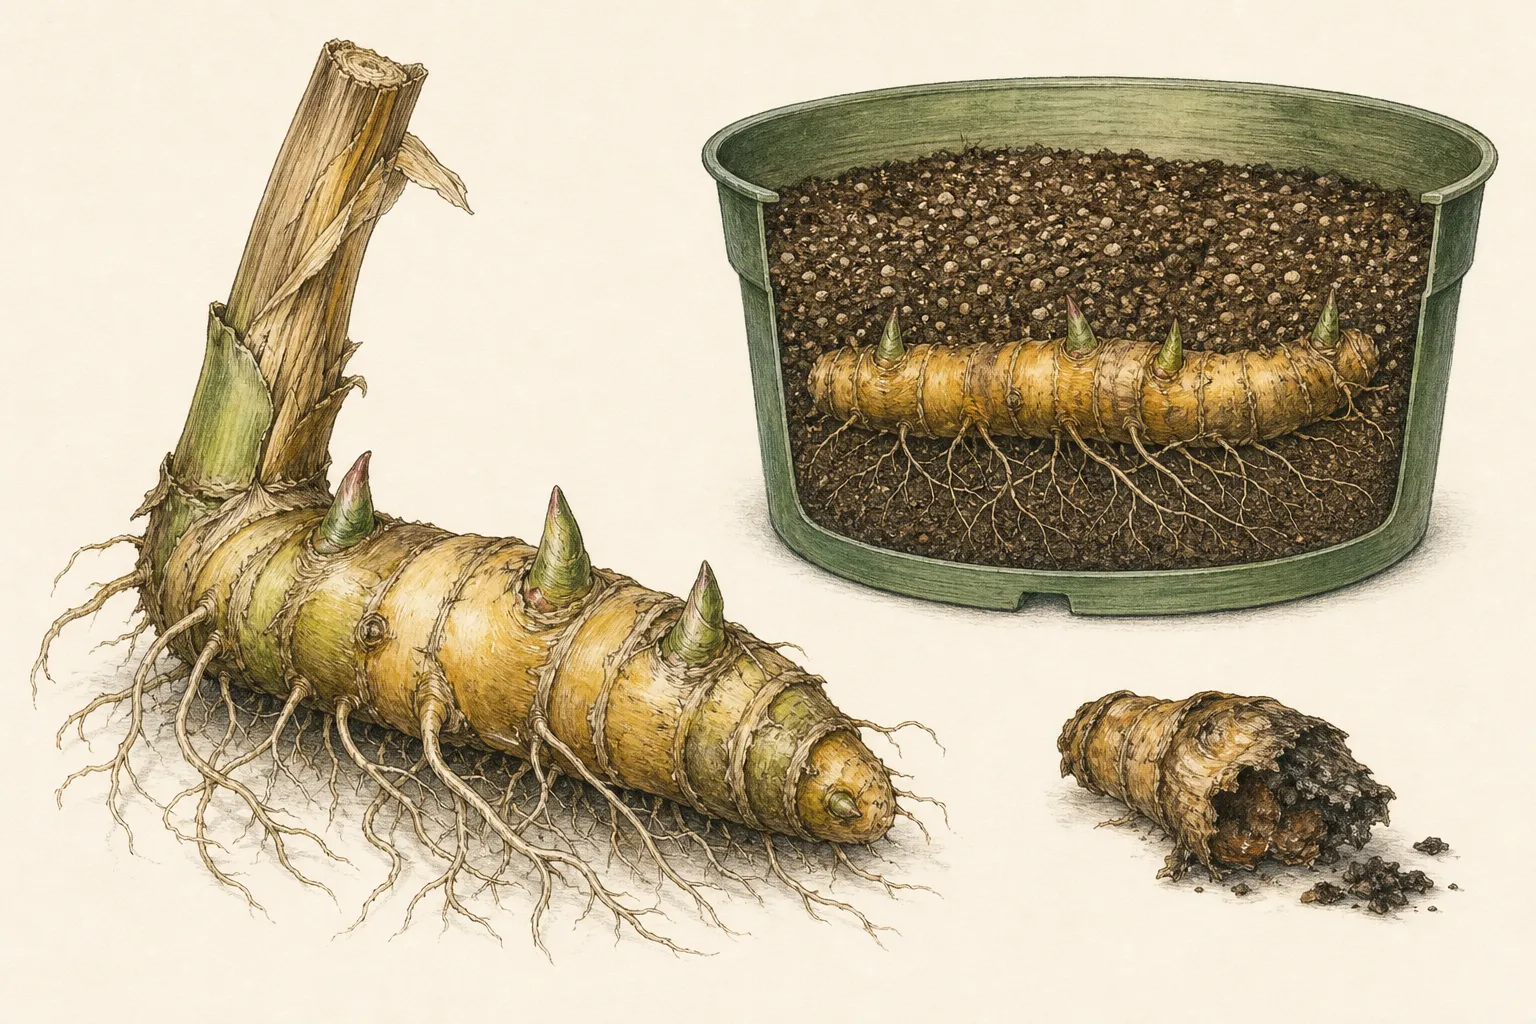
Let fresh cut surfaces dry briefly before potting when the retained regional guidance supports spring division. The aim is a clean, firm wound that enters airy, lightly moist mix. Use only labelled products supported by current local recommendations on cut surfaces.
Separate stock that produces persistent yellow streaks, mosaic patterns, distorted leaves, or severe stunting. RHS and Iowa State sources identify viruses as a serious canna problem, and division leaves infected plants diseased. Isolate suspect plants, prevent rhizome sharing, and dispose of confirmed infected material according to local guidance.
A viable division needs a bud attached to living crown and storage tissue; a detached fleshy segment without an eye cannot replace the missing growing point. Keep naturally dry scars distinct from advancing rot. A firm cut that remains dry can be monitored, while a margin that softens, darkens, or spreads after potting should be removed from the collection before nearby pots and tools carry contaminated material farther.
Choose a stable draining pot
Use a stable pot with unobstructed drainage holes. The RHS uses a 20 cm, or 8 inch, pot to start a rhizome; Iowa State advises a large pot. Size the container to one vigorous division with room for roots and shoots, because tangled roots and tall leaves make later transplanting needlessly damaging.
Fill with fresh, open potting medium made for containers. Garden soil alone compacts in a pot, drains unpredictably, and may carry disease organisms indoors. Moisten dry mix evenly before planting, then let excess water leave. A saucer may protect the floor, but empty it after drainage so dormant rhizomes retain air.
Label each pot with cultivar, division date, and expected height. Foliage color and mature scale are useful before flowers appear, and an intact label keeps a virus concern or weak division from being mixed back into healthy stock. Put tall cultivars where their leaves can expand without brushing lamps, glass, or neighboring plants.
Use separate labelled pots for divisions that will later be planted apart. One rhizome per manageable container makes moisture, emergence, and health easier to read. It also preserves one rooted ball for damage-free transplanting. Where space is limited, start fewer high-priority cultivars with uniform light.
Cover the rhizome shallowly
Lay the rhizome horizontally with buds or young shoots facing upward and roots spread without sharp bends. Cannas grow from a creeping underground stem, so standing the piece vertically misplaces both buds and roots. Support the rhizome in its natural position on the medium.
Indoor covering depth differs among the retained authorities. RHS pre-starting guidance says to just cover the rhizome and leave young shoots exposed, while Minnesota and Iowa guidance uses roughly 3 to 4 inches of mix. Follow the named cultivar or regional instruction; in every case, keep an emerged shoot above the surface and avoid a deep, cold, waterlogged layer.
Water once lightly enough to settle the mix around the rhizome, then allow the pot to drain completely. Dormant tissue has little immediate water demand. Mark the original moisture level by pot weight or by feeling below the surface, and wait for drying and visible activity before adding more water.
Keep ordinary border cannas separate from water-canna guidance. RHS advice allows named water cannas to stand in shallow pond water during active summer growth, but that does not make a dormant ornamental rhizome tolerant of a saturated indoor pot. Until roots and leaves are working, air around the rhizome is the priority. Use the care instructions for the actual canna group; aquatic exceptions stay group-specific.
Shift care as leaves expand
Hold newly potted cannas frost-free. The RHS specifies about 10–16°C, or 50–60°F, for starting rhizomes; warmer rooms can accelerate leaf growth before roots and light are ready. A steady moderate temperature is more useful than bottom heat that keeps saturated mix warm around inactive tissue.
Give emerging shoots strong, even light as soon as they break the surface. Rotate pots only as needed to prevent a hard lean, and increase spacing before leaves overlap. Weak elongated growth indicates that warmth is outrunning light; move the plants to brighter conditions; feeding cannot thicken light-starved stems.
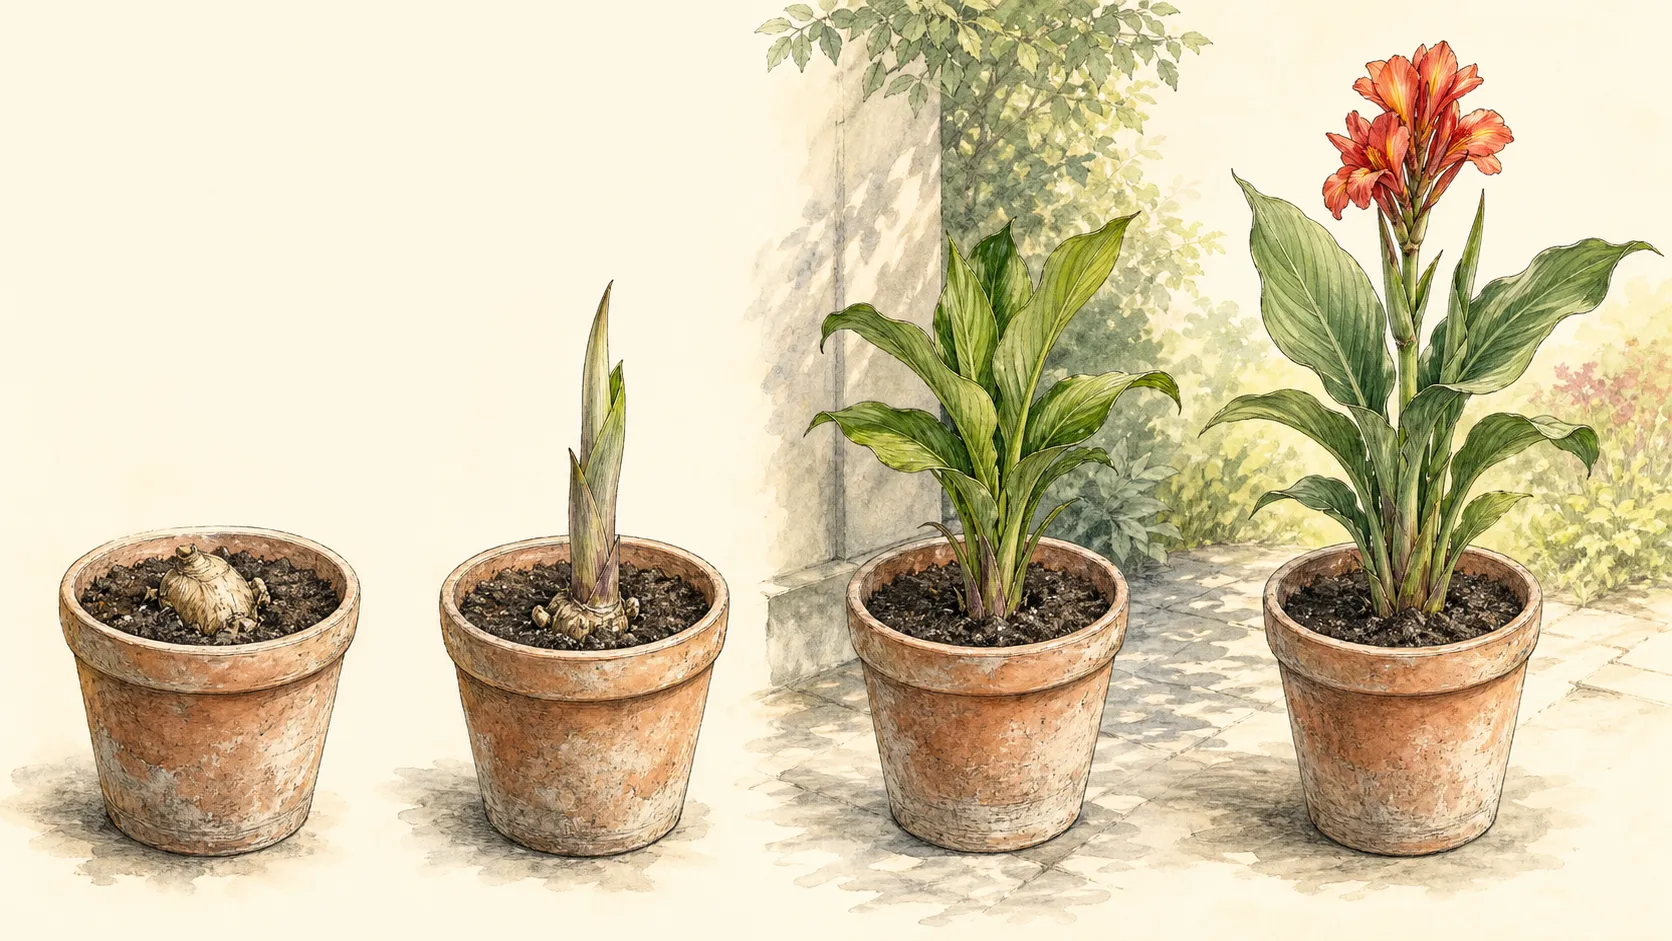
Increase watering gradually as roots and leaf area expand. Active cannas appreciate moisture, but a pot still needs to drain between thorough waterings. Check the mix below the surface and the weight of the container. Yellowing with a soft rhizome points toward excess moisture, whereas limp leaves in a rooted, fast-drying pot indicate genuine demand.
Inspect every new leaf for stable color and shape. A single mechanical tear is different from repeated mosaic, streaking, or distortion across successive leaves. Isolate suspicious pots before pruning or moving among them, clean tools after contact, and seek a diagnostic opinion and halt propagation of uncertain stock.
Feeding is not the first response to a slow dormant pot. Stored rhizomes already contain reserves for initial growth, while fertilizer cannot correct cold, darkness, rot, or a missing eye. Begin any container feeding only after roots and leaves are active and according to the product label. The early indoor objective is a compact rooted transplant, not maximum leaf size before outdoor light and final soil are available.
Diagnose delayed emergence without excavating every few days. Compare the start date, temperature, original firmness, and whether a viable eye was present. A cool but firm rhizome may simply be slow; move it only if the growing conditions fall outside the retained guidance. A softening crown, sour smell, or spreading dark tissue is different and warrants isolation. Repeated digging breaks new roots and gives no useful advantage over lifting once for a specific concern. If a labelled cultivar remains firm but dormant while others grow, keep moisture low and allow the documented starting window before declaring failure.
Harden after frost risk declines
Begin hardening only after the forecast is moving beyond frost risk. Start with short periods in sheltered shade, protected from cold wind and direct midday sun. Indoor leaves have not developed for outdoor radiation or drying, so an abrupt full-sun move can scorch a plant that was otherwise healthy.
Increase outdoor time and light over several days, returning pots to protection on cold nights. Watch pot moisture because wind can dry a leafy canna quickly while cool overcast conditions slow use. Hardened growth should remain upright and normally colored; bleaching, blackened edges, or collapse means the transition moved faster than the plant.
Plant after frost danger into warm soil in a sunny, sheltered position. Retained sources place rhizomes about 3–4 inches deep and roughly 1.5–3 feet apart, with RHS guidance near 30 inches. Transfer the rooted pot at its established level, water it in, and give tall cultivars support before summer wind and leaf weight make access difficult.
For a summer container, use the mature plant to choose final container volume. RHS guidance recommends a final container at least 30 cm, or 1 foot, wide, but large cultivars require more root room and stability. Keep drainage holes open, leave watering headspace, and avoid a light narrow vessel that can overturn once broad leaves catch wind. A rooted 8-inch starter is a stage, not necessarily the display pot.
Carry labels and health records forward
Carry the cultivar label and health status into the garden. Record which rhizomes sprouted promptly, which divisions failed, and which showed questionable foliage. Those observations improve next winter's storage and next spring's starting date without turning one slow but sound division into a disease diagnosis.
Keep tools used on confirmed virus-infected stock separate until they are cleaned appropriately. Dispose of infected rhizomes through the route advised by local plant-health guidance. Healthy cannas may be divided again in future years, but repeated multiplication is worthwhile only when the stock remains true to type and vigorous.
At the end of summer, compare flowering time and final height with the indoor start date. A plant that became root-bound or leggy indoors gained no useful head start. Adjust next season by starting later, giving stronger light, using a larger pot, or planting dormant rhizomes directly after the soil warms.
When frost ends the display, keep the record connected to storage. Minnesota guidance lifts rhizomes after frost blackens foliage, dries them, and stores them frost-free around 40–50°F; the RHS also keeps lifted stock frost-free with very little water. Note which indoor-started divisions remained healthy through storage. A weak result can originate in winter moisture or damage, not only in the following spring's potting technique.
Inspect stored labels and clump size before the next indoor cycle. A cultivar that produced crowded roots in its starter pot may need a later start or larger pot, while a slow compact form can use less space. Match the number of divisions to the final border, and retain enough uncut crown tissue for each eye. This closes the feedback loop from summer scale to spring handling.
Use the transplant root ball as another quality check. White or pale firm roots distributed through the mix show that the indoor start produced establishment; sparse roots around a large leafy top signal that warmth and water advanced shoots too quickly. Keep a rooted ball intact at planting. A weakly rooted division can remain protected longer if the season permits, or the next cycle can begin later with cooler growth and stronger light. Record which adjustment is chosen so final flowering can be connected to root quality at the move.
Steps
- Level
- moderate
- Time
- 20 minutes per rhizome plus growing time
- Tools
- clean knife, 20 cm or larger pots, labels
- Materials
- peat-free potting medium, water
- 1Inspect the rhizome
Unpack rhizomes in bright shade and retain only firm sections with sound crowns and visible eyes. Isolate soft, leaking, badly shriveled, or foul material before it touches clean pots or tools, and label any stock whose identity or virus status is uncertain.
- 2Make sound divisions
Divide only a healthy crowded clump. Use a clean sharp knife so each piece retains at least one sound eye and substantial storage tissue; two or three growing points make a stronger division where the clump permits. Allow clean cuts to dry briefly before potting.
- 3Pot shallowly
Choose a stable draining pot, commonly 8 inches or larger for one useful division, and fill it with fresh open container mix. Lay the rhizome horizontally with buds up. Follow regional depth guidance, keeping any emerged shoot exposed and keeping the crown in an aerated zone.
- 4Hold warm and frost-free
Water lightly once and drain the pot. Keep it frost-free at moderate warmth, roughly 50–60°F in RHS guidance, and withhold routine watering while the rhizome remains dormant. Use below-surface moisture to guide the next watering.
- 5Increase light and water
Move emerging shoots immediately into strong even light and give them room. Increase water only as roots and leaves become active, empty saucers, and inspect successive leaves for mosaic, streaking, or distortion that requires isolation and diagnosis.
- 6Harden gradually
Harden rooted leafy cannas over several days after frost risk declines: begin in sheltered shade, extend outdoor time, add sun and wind gradually, and return pots to protection on cold nights. Pause the transition if leaves bleach, blacken, or collapse.
- 7Plant for mature scale
Plant into warm garden soil after frost danger, preserving the pot-grown level and the documented spacing for the cultivar. Water the root zone, install support early for tall forms, and carry the label and health record into the final border or container.
Related reading
Sources
- Canna Plant Care. Royal Horticultural Society. Source record · Accessed 2026-08-30.
- Calla and canna lilies. University of Minnesota Extension. Source record · Accessed 2026-08-30.
- Canna indica. Royal Horticultural Society. Source record · Accessed 2026-08-30.
- When can I start canna rhizomes indoors?. Iowa State University Extension and Outreach. Source record · Accessed 2026-08-30.