Grow · garden chrysanthemum pinching
Pinch Garden Chrysanthemums in Early Summer for a Branched Autumn Display
Identify hardy garden mums, remove soft shoot tips above leaves while growth is active, repeat only on healthy plants and stop in time for local autumn bud development.
Published Last updated
In this guide
- Use pinching to redirect a finite season
- Set the stopping stage before the first pinch
- Confirm that the plant is a garden mum
- Check establishment before removing growth
- Choose timing from growth stage and local autumn
- Find the soft tip and the working leaves
- Make the first pinch one shoot at a time
- Let branches extend before deciding on a second pinch
- Set a regional final-pinch boundary
- Support the post-pinch canopy without crowding it
- Troubleshoot uneven branching or missing buds
- Let the autumn display finish the experiment
- Steps
Use pinching to redirect a finite season
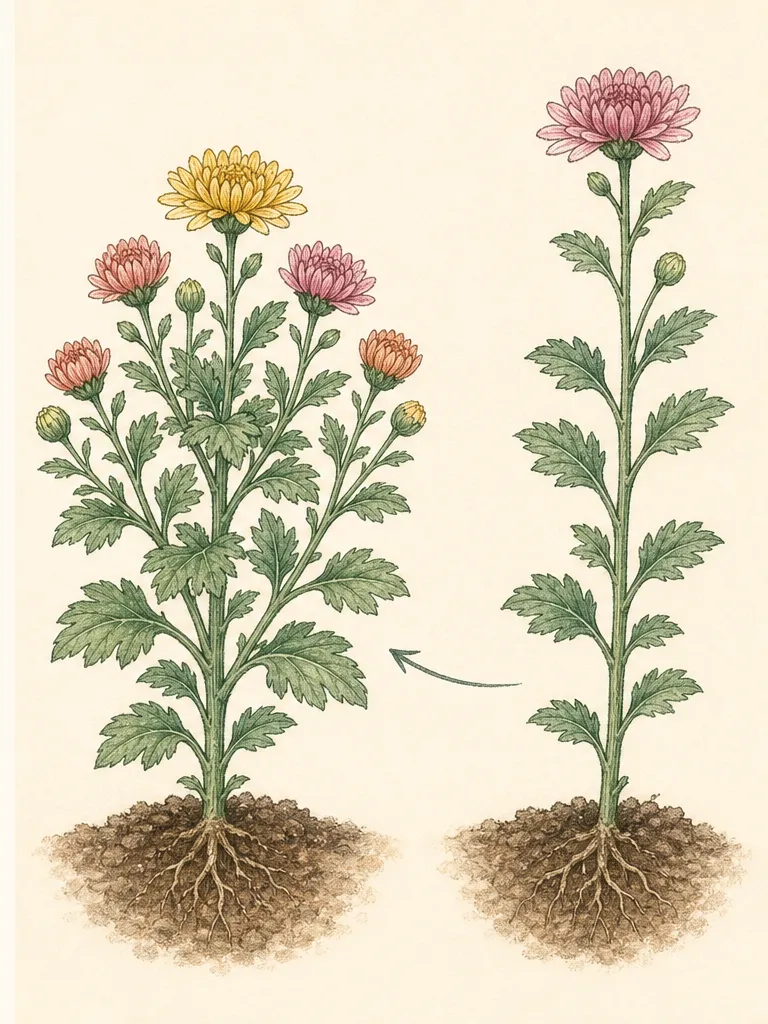
Pinching removes the soft terminal portion of a growing chrysanthemum shoot. That tip normally exerts dominance over buds below it; once removed, side buds can extend and create more branches. On a healthy garden mum, a planned early-season sequence can produce a broader, denser autumn mound that is less dependent on a few tall stems. The technique changes architecture before flowering rather than removing flowers after they fade.
Every pinch also removes time and leaf area. New branches must grow and later form buds, so repeated pinching cannot continue indefinitely. University extension recommendations differ on exact height, amount removed and final date because climate, planting time and cultivar matter. The useful principle is consistent: begin after active vegetative shoots are established, repeat only after new growth develops, then stop early enough for the intended autumn display.
Define the reason before working. A vigorous established garden mum may need branching; a weak new division may need roots and leaves more. A naturally compact cultivar may require little intervention. Pinching should create an ornamental mound suited to its space, not force every chrysanthemum into the same size or erase the distinctive habit described by its label.
Set the stopping stage before the first pinch
Confirm an established, healthy garden chrysanthemum and a suitable regional pinching window before removing a soft tip. Wait for new branches before repeating the operation, and stop at the stated seasonal boundary. Keep an untreated comparison where useful so increased branching can be weighed against changes in height and flowering, not judged from compactness alone.
Confirm that the plant is a garden mum
Iowa State and University of New Hampshire distinguish hardy garden chrysanthemums from florist or gift mums raised mainly for temporary display. Plants sold in full bloom during autumn may have been produced under controlled conditions and may not have enough time to establish before winter. A colorful pot labeled only as mum is not automatically the established perennial assumed by an early-summer pinching schedule.
Look for a durable cultivar label that identifies the plant as a garden or hardy mum and gives regional hardiness information. Verify it with a reliable nursery or local extension source. Even within garden mums, winter survival varies with cultivar, drainage, exposure and climate. The word hardy is not a promise that every plant will overwinter in every garden.
This how-to applies to chrysanthemums already growing vegetatively in a garden bed or a spring-planted garden cultivar after establishment. It does not instruct a consumer to cut back a flowering florist pot, nor does it convert a fall impulse purchase into a branched perennial. If identity or hardiness is uncertain, preserve the label and observe the plant rather than applying a schedule designed for a different production type.
Check establishment before removing growth
Part the stems and inspect the crown. A suitable plant has several firm actively extending shoots, normal foliage color and soil that is moist but not saturated. A spring transplant should resist a gentle stability check and show new growth beyond what it carried in the pot. Delay pinching if the root ball shifts, shoots remain limp or the plant has not resumed growth.
Correct site problems first. Garden mums need a position and soil appropriate to their cultivar and region; weak stretched growth in inadequate light or yellowing in poorly drained ground will not be repaired by multiplying branches. Check irrigation overlap, mulch against the crown and competition from neighboring plants. Move or amend only in a locally suitable way rather than combining severe root disturbance with shoot removal.
Skip plants under drought stress, heat stress, recent division, crown decline or widespread foliar symptoms. Remove no healthy tip until the underlying condition is understood. If one sector is strong and another is weak, do not pinch the whole clump for visual equality. Preserve leaf area on the weaker portion and diagnose root-zone differences.
Choose timing from growth stage and local autumn
Extension sources often begin when shoots have reached several inches and carry multiple healthy leaves. Iowa State discusses beginning around six inches, while Missouri uses a somewhat shorter starting range. These are observation points, not competing rules. The plant must offer enough leafy stem below the pinch to branch and enough established root capacity to support that response.
Early summer means different development in New Hampshire, Iowa, Missouri and a long-season southern garden. Use current local extension guidance for garden chrysanthemums and keep records of the cultivar's usual flowering period. A late spring, a newly planted mum or a naturally late cultivar may need fewer pinches than an established early vigorous selection.
Check for flower buds before beginning. Once terminal or side buds are clearly forming for the autumn display, generic pinching risks removing them and resetting the schedule. If the plant arrived pre-pinched from a nursery, let its new branches extend and evaluate structure before repeating the operation. Calendar habit should never overrule visible reproductive growth.
Find the soft tip and the working leaves
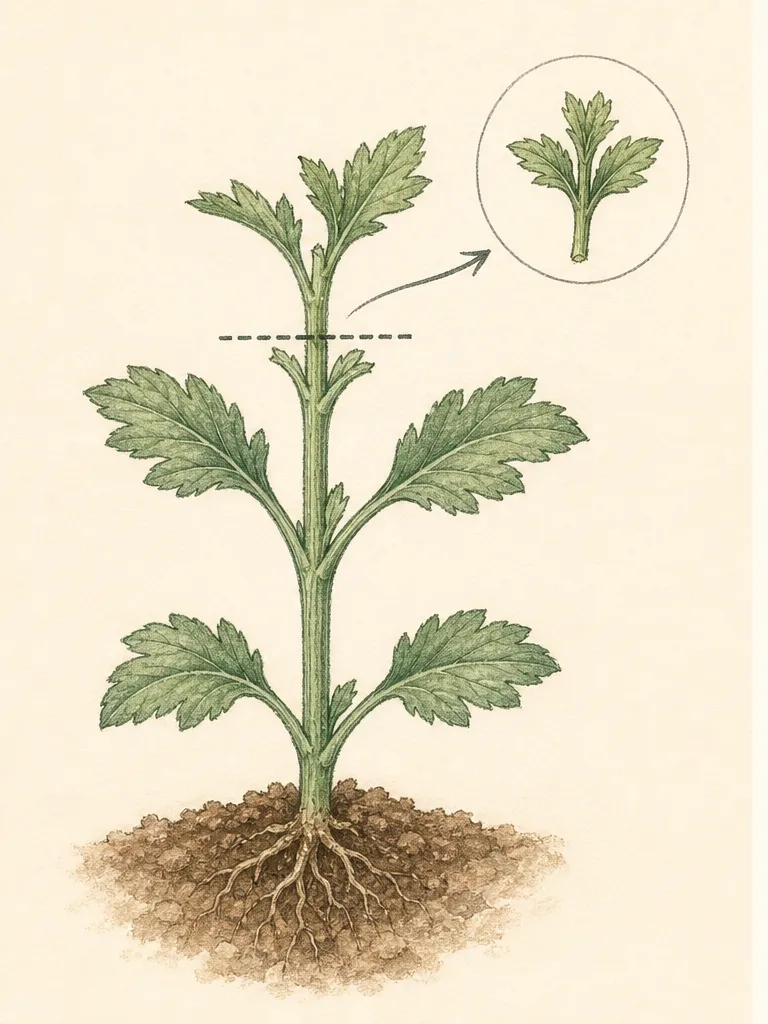
Hold one shoot without squeezing it. The terminal tip is the tender newest growth at the top, surrounded by small unfolding leaves. Below it are expanded leaves and their side buds. The pinch belongs just above a healthy leaf pair or node, leaving a leafy stem framework. It does not belong at the woody crown and should not strip the shoot to bare stubs.
University guidance ranges from removing about an inch of tip growth to taking a few inches from taller stems. Match the amount to the actual internodes and desired outline. On a short shoot, removing a long measured segment could erase most of its foliage; on an overextended shoot, taking only the tiniest tip may barely change height. Preserve multiple healthy leaves below every cut.
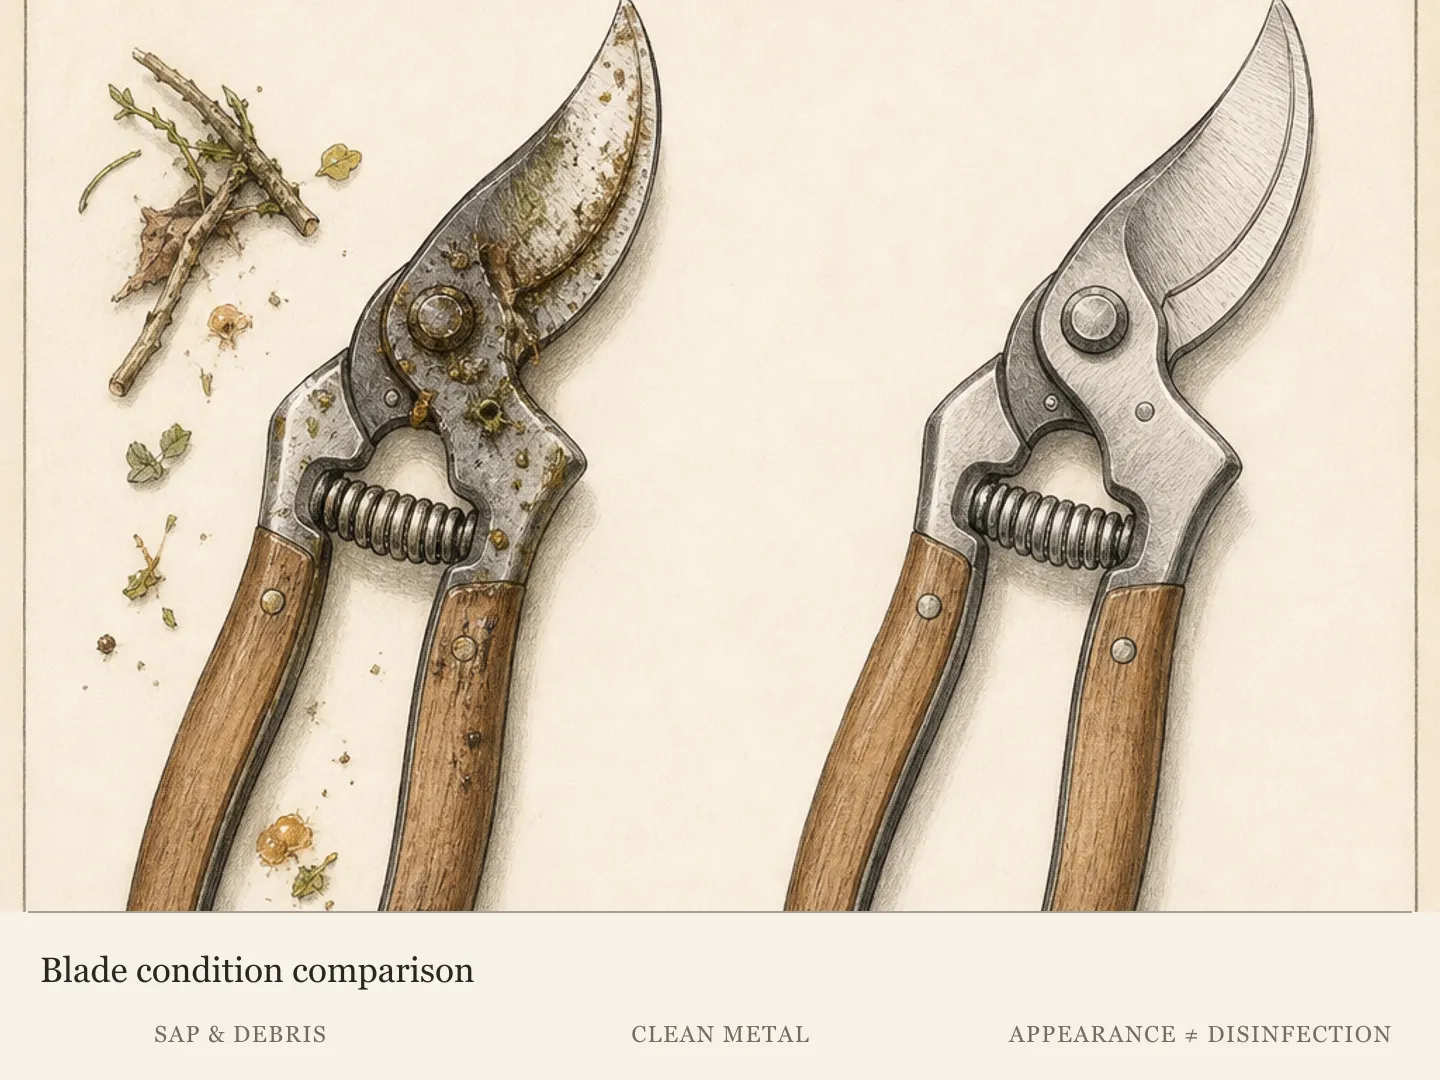
Soft tips can often be removed with clean fingertips, but small clean snips provide better control on firmer stems and reduce torn tissue. Clean the tool before moving among plants, particularly when symptoms are present. Do not gather an opaque fistful and shear across it. Individual shoot handling reveals buds, weak stems and hidden ties that a fast surface cut misses.
Make the first pinch one shoot at a time
Begin at the outside of the clump. Pinch or snip one active tip above a healthy leaf pair, release the stem and confirm that useful foliage remains. Continue around the plant at a consistent visual level while allowing naturally shorter shoots to stay taller. The goal is a balanced branching framework, not a perfectly flat top.
Leave weak, damaged or late-emerging shoots unpinched until they catch up, and consider leaving them entirely if the regional stop point approaches. Remove the tips into a container rather than dropping them into the crown. Soft clippings can mat against lower stems, hide moisture problems and make it difficult to observe new side growth.
Step back after each quarter of the plant. A domed outline usually suits a freestanding mound, while a border-facing plant may be slightly lower toward the path. Keep stems clear of neighboring crowns and preserve cultivar spacing. If many shoots already lean because the plant is shaded or crowded, stop and address the design problem rather than repeatedly shortening symptoms.
Let branches extend before deciding on a second pinch
Side buds below the first pinch should become new shoots. Wait until those branches have extended and produced their own healthy leaves before considering another round. Iowa, Illinois, New Hampshire and Missouri recommendations all describe repeated early-season pinching, but frequency is conditional. A plant that branches densely after one pass may already have the intended structure.
Assess root-zone moisture and color during the interval. Water according to soil need, delivering moisture to the root zone and allowing excess to drain. Do not fertilize automatically to speed regrowth. Excessive soft growth can stretch, lodge and require another intervention. Use soil testing and local chrysanthemum guidance if fertility is in question.
For a second pinch, shorten the ends of the new branches above leaves just as before. Do not reach deep into the clump to remove the original stem again. Retain a representative unpinched section if learning how a new cultivar responds. Label the date so later flowering can be compared with treatment rather than attributed vaguely to weather.
Set a regional final-pinch boundary
The last pinch protects the future flower schedule by being the moment pruning stops. University of New Hampshire describes ending by late June in its context, Iowa and Illinois commonly use the beginning of July, and Missouri extends guidance into mid-July for its conditions. These dates are regional examples, not a sequence to average into one national deadline.
Choose the local boundary from extension advice, expected first frost, cultivar bloom period, current growth and visible bud stage. A short-season garden or late cultivar usually needs more untouched time than a long-season site with an early selection. If reliable local guidance is unavailable, err on the side of stopping earlier and preserve a control section for observation.
After the boundary, do not keep trimming protruding shoots to preserve a perfect sphere. Those stems may carry the autumn buds the gardener is trying to produce. Use loose support for a wayward branch, remove only broken or diseased tissue as appropriate, and accept small differences in height. The finished mound should show living branching, not continuous topiary maintenance.
Support the post-pinch canopy without crowding it
As branches fill, ensure that nearby plants and mulch do not press against the crown. Keep the root zone evenly managed for the soil and weather, avoiding cycles of prolonged saturation and severe wilt. Direct irrigation to soil rather than repeatedly wetting dense foliage late in the day, and maintain spacing that allows the mound to dry after rain.
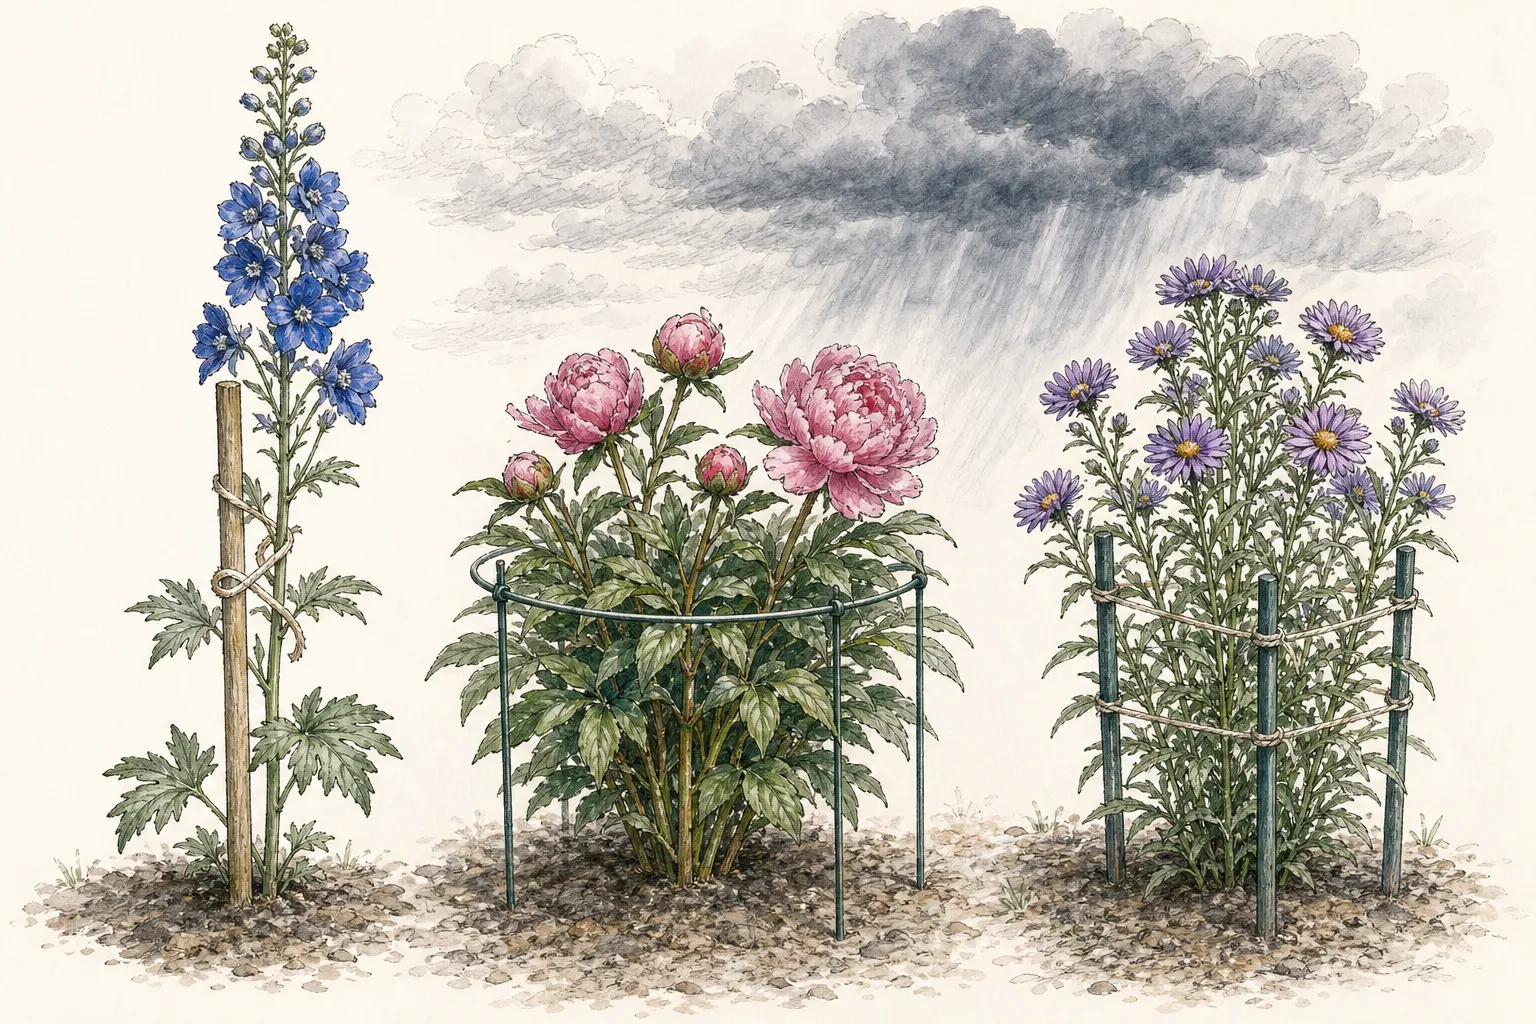
Install discreet support before autumn flowers make stems heavy if the cultivar or exposed site needs it. A low open ring or several perimeter stakes can hold the natural dome without squeezing it into a column. Add ties loosely and check expansion. Pinching can improve branching, but it cannot guarantee that a tall cultivar will resist every wind or downpour.
Do not mound extra soil or thick mulch around the base to brace stems. That obscures the crown and changes moisture at the plant's most sensitive junction. Correct lodging with support, light and cultivar placement. If a selection repeatedly overwhelms the site despite appropriate care, relocate or replace it in the suitable season rather than escalating the number of pinches.
Troubleshoot uneven branching or missing buds
If one side branches and another remains sparse, compare light, root competition, water distribution and the number of leaves retained. Do not pinch the vigorous side again simply to match a weak sector. Mark the difference and improve the limiting condition. A blind low cut or damaged crown may leave no side buds capable of filling the gap that season.
If buds form very late or not at all, review the final pinch date, night lighting, cultivar identity, establishment and regional season. Chrysanthemum flowering responds to day length, and artificial light at night can disrupt normal development. Seek local extension guidance before altering the site. Fertilizer cannot restore flower buds repeatedly removed by late trimming.
If the plant becomes soft and floppy despite many branches, examine shade, excess fertility, crowding and cultivar height. Add open support and stop further tip removal after the regional boundary. Record the result. Next year, reduce enrichment, improve siting or begin with a cultivar whose mature habit fits the border rather than using pinching as permanent size denial.
Let the autumn display finish the experiment
During bloom, compare stem number, mound width, height and first flower date with an unpinched or differently pinched control. More branches do not automatically mean a better plant if flowers opened too late, the center became congested or the path was still blocked. Judge the full ornamental effect and maintenance cost, not a close-up count of buds.
Deadhead or retain finished flowers according to the garden's design and plant-specific regional guidance, but do not confuse autumn cleanup with early-summer pinching. In cold regions, extension services often advise leaving stems through winter and delaying major cutback; in other conditions, sanitation needs may differ. Follow current local recommendations for overwintering garden mums.
Update the plant label with first and final pinch dates, flowering start, winter survival and mature spread. A successful sequence can be repeated on that cultivar under similar conditions. A poor sequence may need fewer pinches, an earlier stop or no pinching at all. The record turns a broad extension practice into a precise garden method without pretending every chrysanthemum or region behaves alike.
Steps
- Level
- easy
- Time
- 15 to 30 minutes per established clump for each pinching round
- Tools
- Clean fingertips or small snips, Gloves, Plant labels and pencil, Soil probe
- Materials
- Container for shoot tips, Garden notebook, Optional low open plant support
- 1Verify a hardy garden chrysanthemum
Use the cultivar label and reliable regional guidance to distinguish a garden mum from a florist or temporary fall pot. Confirm local hardiness and mature habit. Apply this method to vegetatively growing garden plants, not to a chrysanthemum already carrying its retail flower display.
- 2Approve establishment and plant health
Look for a stable crown, several firm active shoots, normal foliage and soil that drains. Delay after planting or division and during drought, heat stress, root trouble or unexplained symptoms. Correct light, irrigation and crown-burying problems before removing healthy tips.
- 3Set the first pinch by growth stage
Begin when shoots are several inches tall with multiple expanded leaves, using current local extension guidance and cultivar records. Check carefully for flower buds. A pre-pinched nursery plant may need time to extend before any additional work.
- 4Remove one soft terminal tip
Hold a shoot gently and pinch or snip just above a healthy leaf pair, leaving several working leaves and side buds below. Adjust the amount to internode spacing rather than copying a fixed length. Confirm the stem remains leafy before treating the rest.
- 5Shape the clump without flattening it
Work around the plant one shoot at a time, leaving weak and shorter shoots alone. Build a softly domed or border-facing outline and collect clippings away from the crown. Stop if low light, crowding or root stress—not tip dominance—explains the form.
- 6Wait for new branches before repeating
Let side buds extend into leafy shoots, then evaluate whether the plant needs another pinch. Repeat only on healthy active branches above leaves. Probe moisture, avoid reflex fertilizer and label the treatment date so its effect on autumn flowering can be measured.
- 7Stop at the regional boundary
Use local extension advice, cultivar bloom time, first-frost pattern and visible buds to set the final pinch. Regional university examples range from late June into July, so do not impose one nationwide date. When uncertain, stop earlier and preserve flowering shoots.
- 8Support and record the autumn result
After the final pinch, leave healthy tips intact, use an open support if needed and keep mulch off the crown. Compare height, branch structure and flowering with an untreated section. Record timing and winter outcome before deciding whether to repeat, reduce or omit pinching next year.
Related reading
Sources
- Growing Chrysanthemums in Iowa. Iowa State University Extension and Outreach. Source record · Accessed 2026-08-19.
- Pinch Those Mums. University of Illinois Extension. Source record · Accessed 2026-08-19.
- Can Fall Mums Be Planted in the Garden?. University of New Hampshire Extension. Source record · Accessed 2026-08-19.
- Chrysanthemums. University of Missouri Extension. Source record · Accessed 2026-08-19.