Grow · caladium autumn lifting and storage
Lift Caladium Tubers Before Autumn Frost for Indoor Winter Storage
Lift caladiums before autumn frost, dry the foliage before packing, and choose a measured indoor temperature for dormant tuber storage.
Published Last updated
In this guide
- Lift before frost, with a drying space already prepared
- Use the plant name and forecast together
- Label and select before opening the rootball
- Lift from beneath the rootball
- Finish drying before removing the foliage
- Choose a named temperature method and measure the shelf
- Pack intact tubers so each can be inspected
- Check changes, then hand survivors back to spring care
- Steps
Lift before frost, with a drying space already prepared
Lift caladium tubers before autumn frost, dry the lifted plants with their foliage attached, and pack the cleaned, intact tubers only after that drying stage. Choose a measured indoor storage position suited to caladium. The cold corner used for gladiolus is not automatically suitable for these tropical foliage plants. Some losses are possible even with careful handling, especially among small tubers; saving a favourite planting starts with selecting sound material and a workable room.
Early October is a useful planning point in many temperate Northern Hemisphere gardens. It is not a universal harvest date. A northern inland border may need clearing earlier, while a sheltered coastal container may retain its leaves much longer. Put the local forecast beside the condition of the plants. Yellowing signals the approach of dormancy, but waiting for every leaf to collapse can leave a gardener lifting in cold rain or after frost has already arrived.
This method is for ornamental garden caladiums being taken out of beds or containers for dormant tuber storage. It does not describe keeping a leafy plant growing indoors all winter. Before starting, clear a warm, airy drying tray and a separate storage shelf. The newly lifted plant and the cleaned dormant tuber occupy different amounts of space, and the transition between those stages needs somewhere to happen.
Use the plant name and forecast together
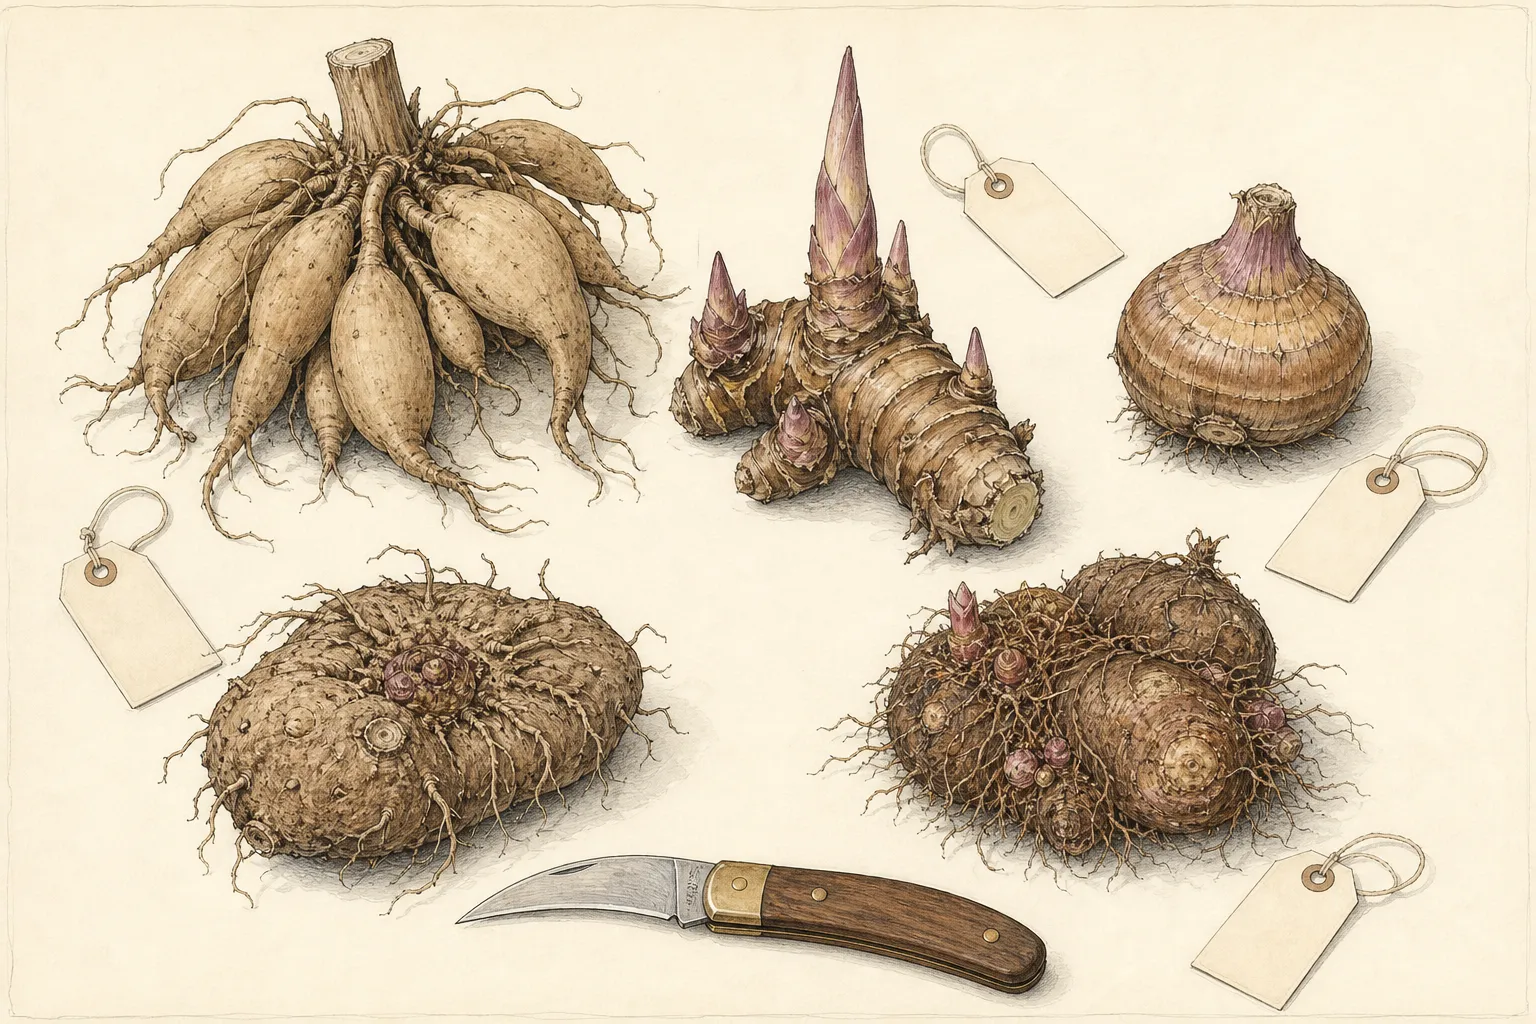
Confirm the label while the leaves are still present. Caladiums commonly carry thin, colourful heart-shaped or arrow-shaped leaves on individual stalks rising from below ground. The name elephant's ear is also used for other plants with different storage needs. Keep a supplier label or take a reference photograph of each planting before lifting. A collection of anonymous brown organs is much harder to sort after the foliage has gone.
The stored organ is a tuber, although garden catalogues often call it a bulb. Expect an irregular, knobbly structure, not an onion-like bulb with obvious layers or a chain of long canna rhizomes. Keep sound tissue intact even when the specimen looks less tidy than a retail photograph. Established plants can produce untidy shapes; firmness and freedom from decay matter more than symmetry.
Wisconsin Extension specifically advises lifting caladium before frost. North Carolina Extension reports damage below 45°F (about 7°C), reinforcing the need to plan before a freezing forecast. That figure is a warning about cold exposure, not a precisely safe outdoor holding temperature. If an abrupt cold spell is approaching, move a portable pot into shelter or lift a bed planting while conditions still allow careful work.
Iowa State also describes lifting at autumn yellowing but permits waiting until after a hard frost. The pre-frost route here follows Wisconsin and avoids making frost injury a required step. A gardener who has already missed that window can still inspect the underground material, but damaged tops are no assurance that the tuber survived. Keep such plants separate until their condition is clear.
Label and select before opening the rootball
Write the cultivar name on a durable label and keep that label with the plant through drying and packing. If the name is unknown, a plain description such as pink centre with green margin, linked to a photograph, is more useful than a guessed cultivar. For several pots, number the containers and use the same numbers on the drying trays. This small preparation prevents attractive but different varieties from becoming one mixed storage lot.
Examine the base of each plant before committing it to the batch. Gradually yellowing leaves on an otherwise sound plant fit the autumn transition. A collapsing, soft base or an unpleasant smell calls for a separate inspection. Neither yellow leaves nor dark marks alone identify a particular disease. Keep the article's lifting procedure separate from diagnosis, and ask a local plant clinic about repeated unexplained losses.
Choose how much material is worth carrying through winter. A small tuber from a weak plant may be less dependable than a substantial, firm specimen; Iowa State explicitly notes that small caladium storage organs can dry out and die. If space is limited, prioritise healthy plants with a known place in next year's containers. Record any deliberate discards now so a smaller spring collection is not mistaken for an unexplained storage failure.
Lift from beneath the rootball
In a bed, begin loosening the soil several inches away from the base, working around the plant before lifting from underneath. A garden fork lets you raise a soil mass while seeing where its tines enter. The important distance is clearance from the actual tuber, which may extend beyond the visible stalks. If the first attempt meets resistance, enlarge the loosened area and release the resistance before lifting.
Support the lifted root mass and gently shake or tease away loose soil. Leave foliage attached for the drying stage. Pulling on a handful of stalks concentrates force at their attachment and gives poor control over the underground organ. For several adjacent plants, lift and label one at a time. A crowded border is easier to dismantle methodically than to sort after all the leaves and roots have been piled together.
For a single-species container, lay the pot on its side and slide out the rootball while supporting it. A plastic nursery pot can be flexed; a rigid decorative container requires patience around the edges. Work loose mix away with your fingers. If roots from neighbouring plants cross the caladium in a mixed container, expose their paths before separating them. Prioritise the sound tuber; some fine roots may be lost as the mix comes away.
Use the gentle soil-removal approach described in Iowa State's caladium instructions. There is no need to polish the surface, peel it, or cut apart a clump now. A tuber that is accidentally sliced deserves separate handling, not concealment in the sound batch. Both Iowa and Wisconsin recommend leaving division until spring because pre-storage injuries increase the opportunity for decay. Wash and put away the digging tools once lifting is finished; keep sharp edges off the drying tray.
Finish drying before removing the foliage
Spread the lifted plants on a tray in a warm, dry, ventilated place, with space to turn and inspect each one. Keep them out of weather and strong direct sun. A shallow mesh tray or open crate is convenient because loose soil can fall away and the labels remain visible. A closed bag full of freshly lifted plants provides neither a useful view of the tubers nor room for their attached foliage to dry.
Iowa State gives one to two weeks of warm drying for caladium; Wisconsin describes about a week. Use these as planning ranges and inspect the actual plants. Foliage should become dry enough to remove, and wet soil clinging around the base should not be carried straight into packing. A damp, crowded tray may need a change of arrangement, not merely another date written on its label.
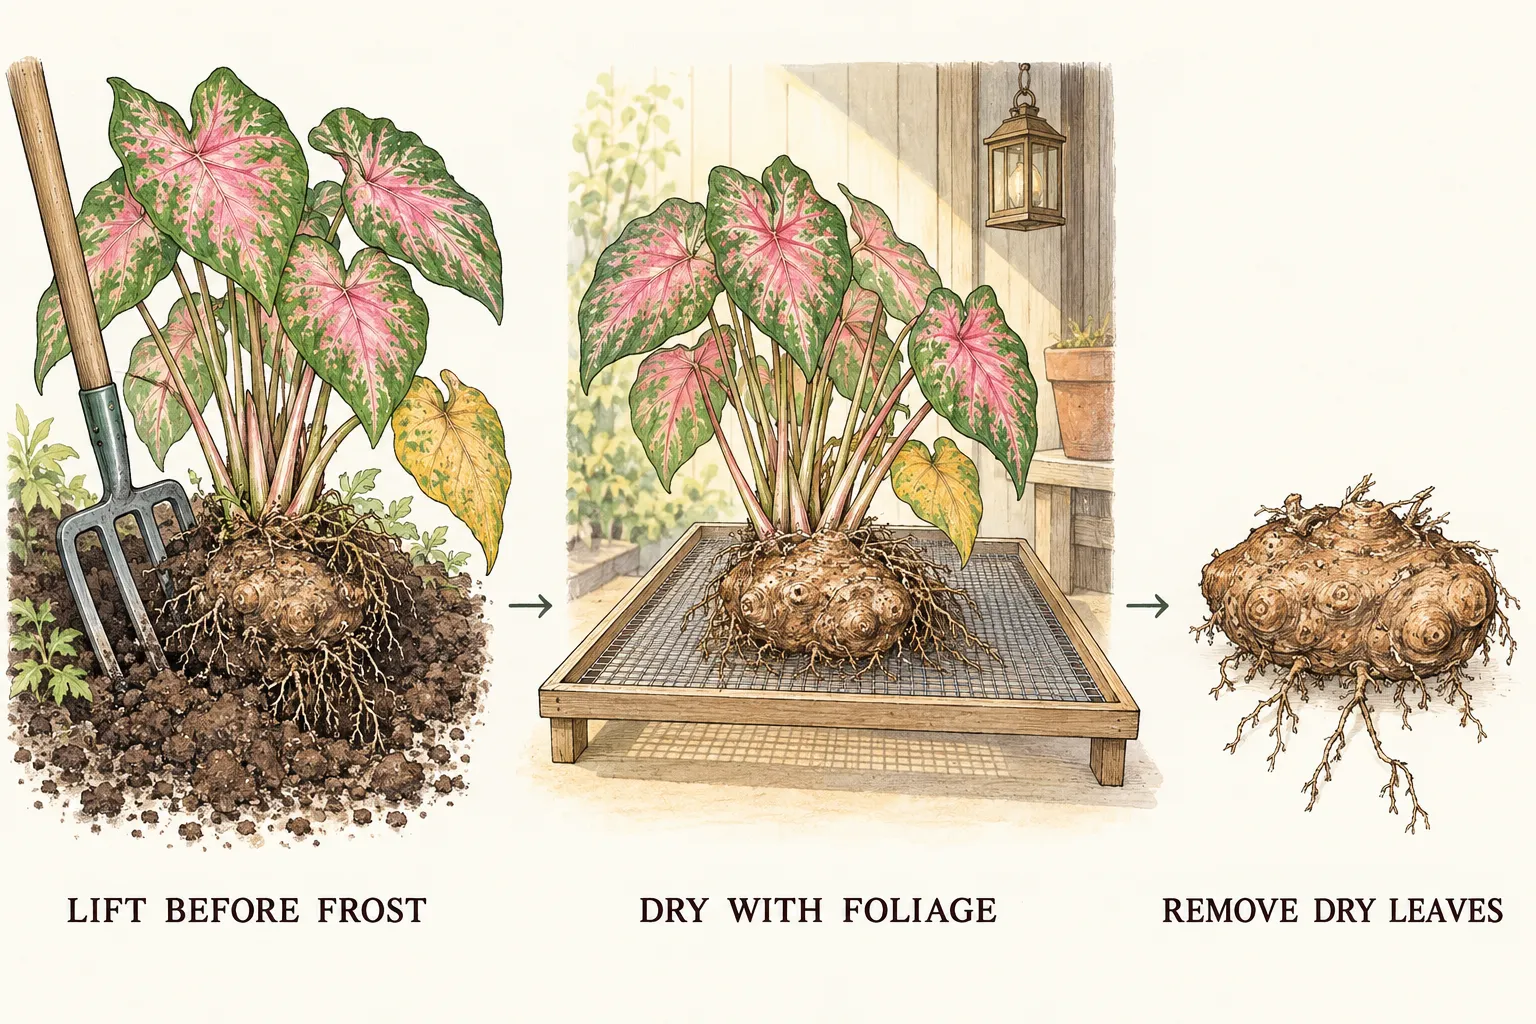
Once the foliage is dry, remove it carefully and brush away remaining loose soil. Keep the tuber whole. If a stalk resists removal, allow further drying or trim only the dry material, keeping the underlying tuber tissue intact. The goal is a clean, inspectable storage organ with an intact surface, not a carved specimen. Transfer each label immediately as the leafy plant becomes a much smaller object.
Separate curing from long-term storage in your notes. A tuber lying on an open tray to dry is not yet a packed winter specimen, and an unfinished batch should not disappear into the storage cupboard just because the room is ready. Write down the lifting date, the date foliage was removed and the packing date. These details can explain later losses more usefully than a general note that the plants were brought inside in October.
Choose a named temperature method and measure the shelf
Caladium storage recommendations differ among institutions. Iowa State specifies 60–65°F (about 16–18°C), Wisconsin about 60°F (16°C), and North Carolina Extension a warmer 70–75°F (21–24°C). The University of Florida's landscape sheet gives 50–60°F (10–16°C). These are different published protocols, not four readings to average into a newly invented optimum. The procedure here uses the Iowa range alongside its drying and dry-packing instructions.
Put a minimum–maximum thermometer at the intended tuber height and check the location across day and night. Room names are poor substitutes for readings: a spare bedroom, basement shelf and attached garage can behave very differently. For this selected method, seek a steady 60–65°F position with access for inspection. A local supplier's cultivar-specific advice may justify a different protocol; record that choice and keep the lot identifiable.
A garage that is merely frost-free may still be substantially colder than the chosen range. Equally, a shelf directly above a radiator can become warmer and drier than the room thermostat suggests. The thermometer belongs beside the box, not on the opposite wall. Check again when heating begins and during the first prolonged cold spell. Moving the box is an appropriate response when the room stops providing the conditions you selected.
If the only available storage is too cold or impossible to monitor, weigh the cost of replacing the plants against maintaining a new storage arrangement. Saving tubers is optional. A small trial with spare plants can teach you about the room, but keep that experiment separate from a claim that every caladium will survive it. A photograph records the number and initial condition with minimal handling.
Pack intact tubers so each can be inspected
Use dry vermiculite or dry peat moss, the materials named in Iowa State's caladium method, in a breathable container such as a cardboard box. Loosely surround the tubers and leave a gap between each specimen. The cutaway illustration shows the arrangement exposed for clarity; the real tubers can be covered by the packing medium. Leave enough clearance to lift each specimen out safely.
Wisconsin's general packing guidance warns against airtight containers and direct contact between stored organs. Apply those handling principles while retaining the warmer caladium-specific temperature choice. A tightly sealed plastic tub with damp packing is a different environment from dry material in a cardboard box. The lid should keep the batch tidy while allowing ventilation and easy checks; airtight sealing is not a substitute for controlling the storage room.
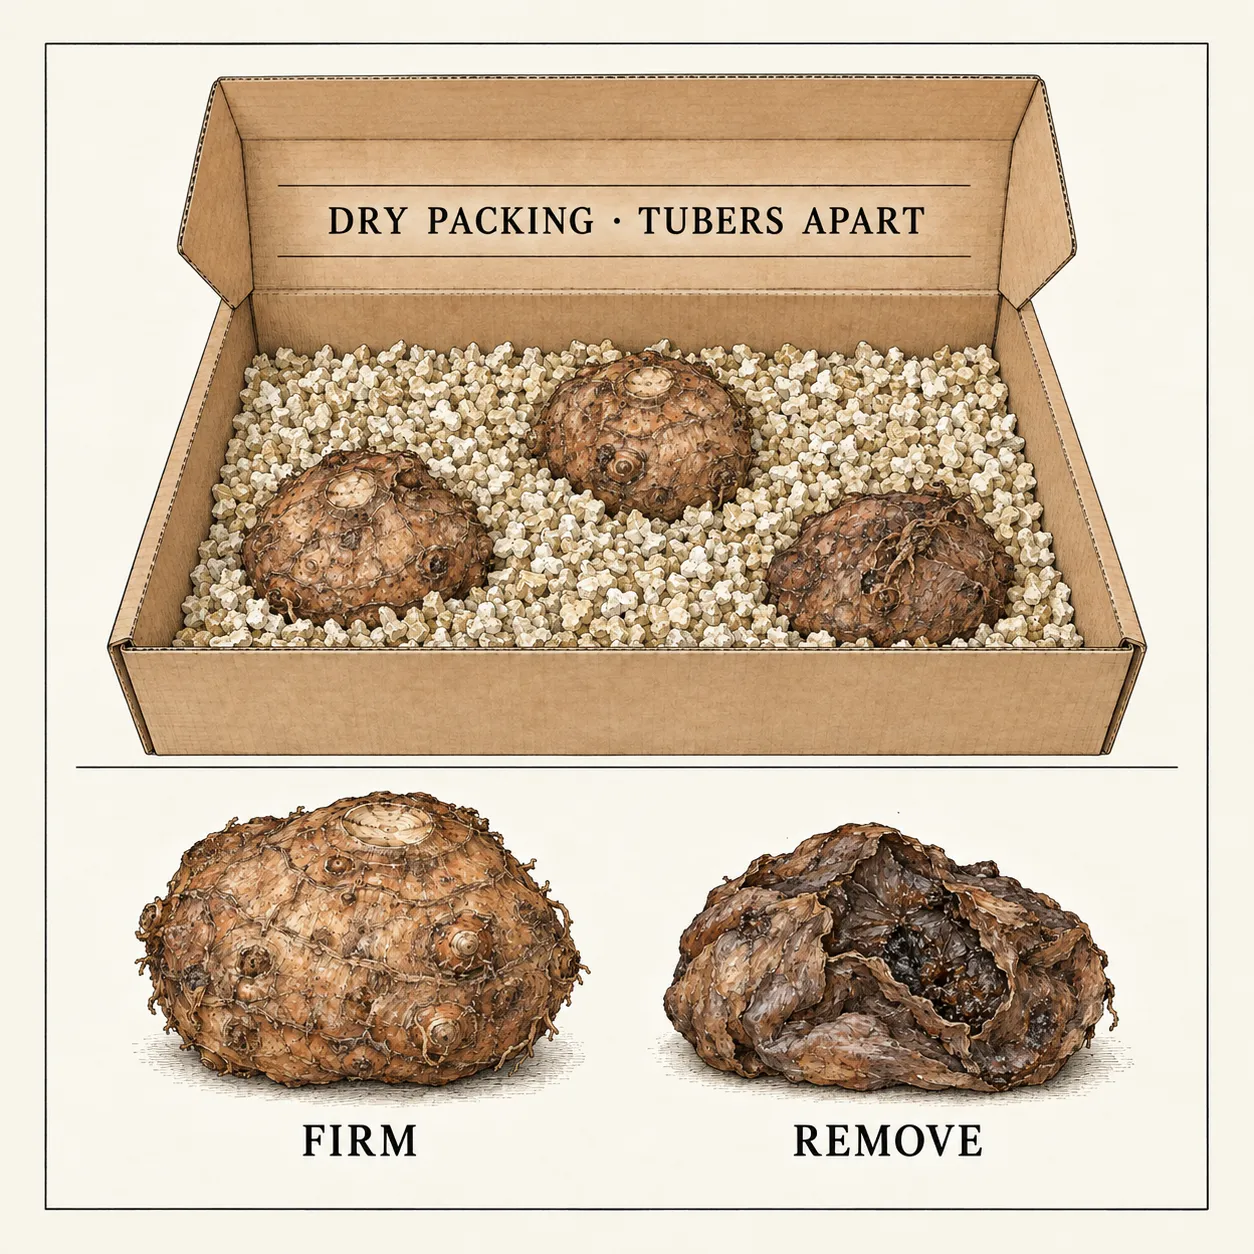
For a small collection, one shallow layer makes inspection straightforward. If several cultivars share a larger box, use labelled sections that can be opened independently. Put the plant name, packing date and selected temperature range on the outside as well as keeping identification inside. Store the box where it will not be confused with food, household recycling or spring seed packets. A helper should be able to find a particular lot by its label while the other sections stay packed.
Check changes, then hand survivors back to spring care
Inspect periodically through winter, looking for a change from the original firm condition. Remove soft, rotting specimens from the shared box. If packing feels unexpectedly damp or there is condensation, open the batch, assess the tubers and correct the environment before repacking sound material. A dry-looking surface is not a reason to squeeze or cut every tuber; repeated rough handling can undo the careful autumn work.
Shrivelling needs a different response from decay. Iowa State notes that small caladium organs are vulnerable to drying, and its general storage guidance permits light moistening of packing when conditions become excessively dry. That is a conditional adjustment, not a weekly watering schedule. First check for direct heater exposure and reassess the room. If moisture adjustment is needed, make it slight and local, then revisit the lot; soaking the tubers or making the box wet is not the selected storage method.
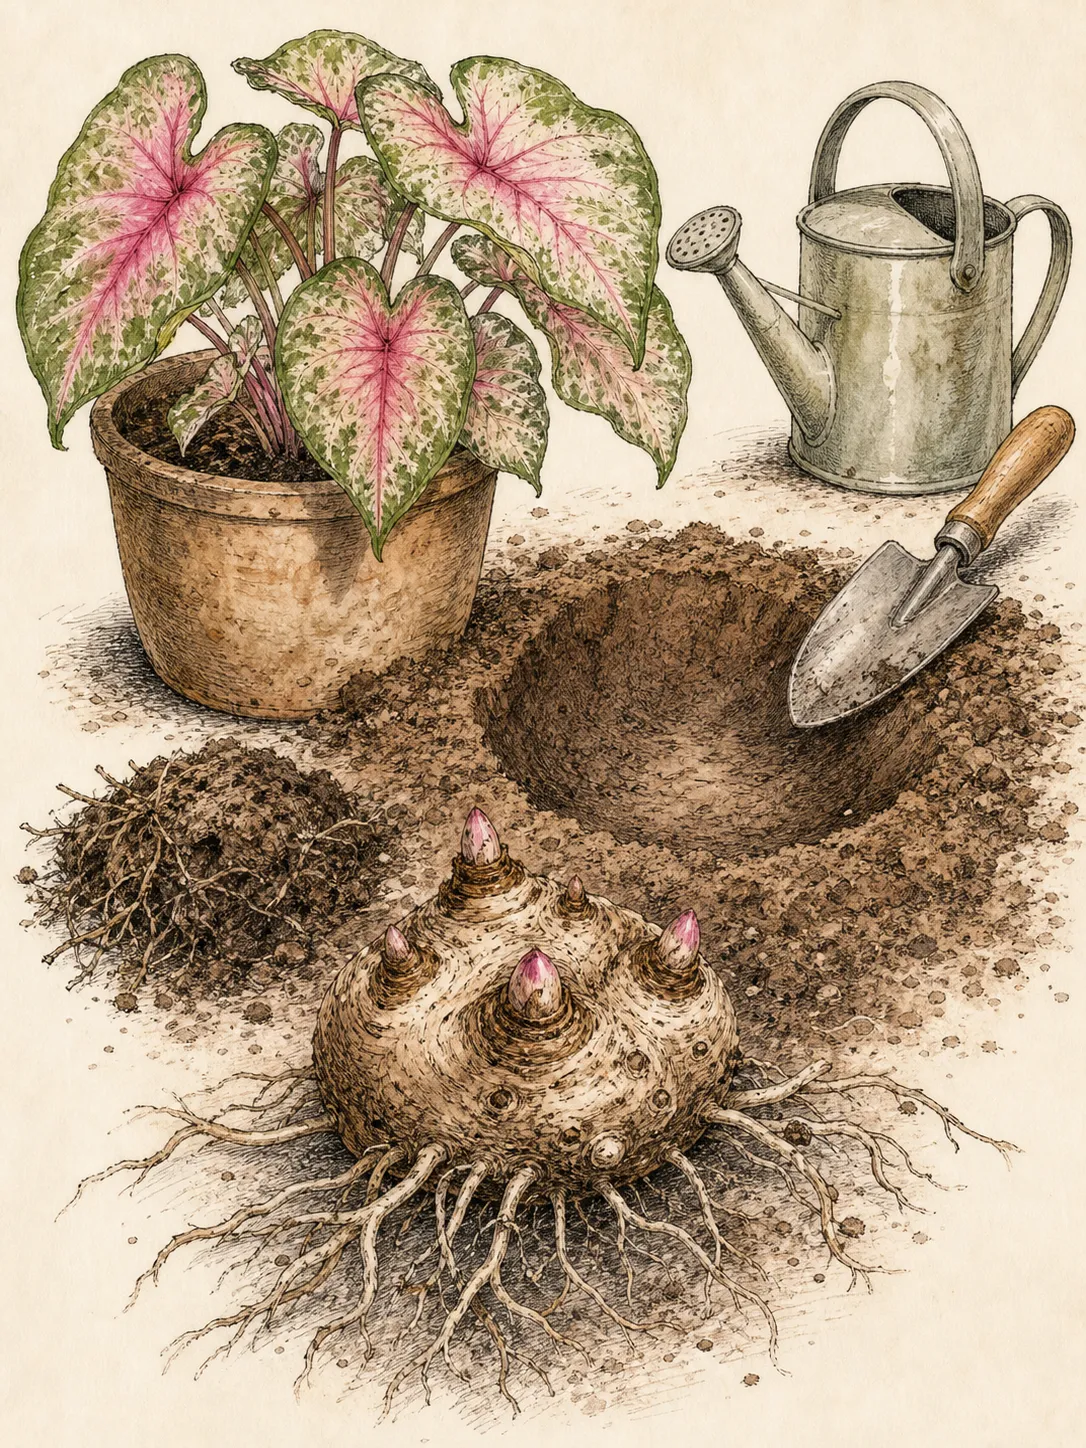
Keep a short record of losses, room changes and any moisture adjustment. In spring, assess firmness again before committing container space. The existing caladium planting guide takes over when frost danger has passed and soil warmth is suitable. A date on the seed calendar does not make cold outdoor soil ready. Retaining an identifiable, sound tuber until that point is the purpose of autumn storage; new roots and leaves belong to the next stage.
Steps
- Level
- moderate
- Time
- One lifting session, about one to two weeks of drying, then periodic winter checks
- Tools
- Garden fork or hand trowel, Minimum–maximum thermometer, Plant labels and pencil, Clean snips for dry foliage
- Materials
- Sound ornamental caladium plants, Open drying tray, Cardboard storage box, Dry vermiculite or peat moss
- 1Prepare the shelf and tray
Measure the proposed storage position with a minimum–maximum thermometer. For the Iowa State method used here, arrange a shelf at 60–65°F (about 16–18°C), plus a warm airy tray for the earlier drying stage. Keep both accessible. Write the selected temperature method on the box so a helper does not move it into colder general bulb storage.
- 2Identify the plants and schedule lifting
Label each cultivar while foliage remains recognisable, linking unknown varieties to photographs. Check the local forecast and lift before frost. Move portable pots into shelter if cold weather arrives before you can process them. Set plants with a soft or collapsing base aside for separate assessment; keep them outside the sound storage batch.
- 3Loosen the whole root area
Insert a fork several inches back from a bed plant and loosen around it before raising the root mass. Slide container plants out while supporting their rootballs. Remove loose soil gently, retaining attached foliage. Keep the tuber intact, separate accidentally damaged specimens and transfer the identification label with every plant.
- 4Dry, then remove the old foliage
Spread lifted plants on the prepared tray with space around them. Allow roughly one to two weeks under the Iowa method, checking that foliage and adhering surfaces actually dry. Remove dried leaves gently, preserving the underlying tissue, brush away loose soil and inspect the tuber again. Record the packing date; leave division for spring.
- 5Pack and establish a reference condition
Loosely surround sound tubers with dry vermiculite or peat in a ventilated box, keeping specimens apart. Attach cultivar labels inside and a temperature reminder outside. Take a photograph of the batch and put the thermometer beside it. Keep a clear route for lifting each tuber during inspection.
- 6Inspect through winter and restart when suitable
Check periodically for softness, decay or increasing shrivelling. Remove rotten material and correct unexpected dampness or heater exposure. Treat any slight moistening of excessively dry packing as a monitored adjustment, not routine watering. Reassess survivors in spring and use the separate caladium planting guide to time their return to warm growing conditions.
Related reading
Sources
- Storing Tender “Bulbs” for Winter. University of Wisconsin–Madison Division of Extension. Source record · Accessed 2026-09-19.
- How to Overwinter Tender Perennials. Iowa State University Extension and Outreach. Source record · Accessed 2026-09-19.
- Caladium. North Carolina Extension Gardener Plant Toolbox. Source record · Accessed 2026-09-19.
- Caladium x hortulanum Caladium. University of Florida IFAS Extension. Source record · Accessed 2026-09-19.