Grow · insulate small greenhouse bubble wrap winter
Fit Bubble Insulation in a Small Greenhouse for Winter
Fit removable bubble insulation inside a small greenhouse for winter ornamentals, balancing heat retention with light, usable vents and measured nighttime temperatures.
Published Last updated
In this guide
- Decide whether the plants benefit from a lining
- Separate insulation, heating and temperature checks
- Repair and dry the structure before covering it
- Choose a durable clear material and a manageable coverage plan
- Measure fixed bays, doors and vents separately
- Attach the lining to the frame and test every opening
- Manage dampness and plant light after installation
- Remove, label and reuse when the season changes
- Steps
Decide whether the plants benefit from a lining
Fit bubble insulation only after deciding which winter plants need the extra heat retention and how much light they can spare. Repair unwanted gaps, clean and dry the greenhouse, then attach removable lining to suitable frame points while keeping doors and vents usable. Check the overnight temperature near the plants after installation. Bubble lining slows heat loss; it does not supply heat or guarantee that an unheated greenhouse stays frost-free.
RHS estimates that an added plastic layer can reduce incoming light by about ten percent. Treat that as an indication of the trade-off, not a measured value for your particular roll, glazing and installation. Overlaps, dirt and multiple layers can make an already dim winter position less useful. A clear material is not the same as an optically invisible one.
The decision depends on the collection. Hardy alpines needing strong light may gain little from extra lining, while some resting tender container plants benefit more from heat retention. Leafy plants that still need bright conditions deserve a suitable position of their own. List the minimum temperature and light requirement of each group before turning the entire structure into one insulated compartment.
Mid-November can be a useful time to review a small greenhouse, but the forecast decides when protection is needed. If tender plants are already inside, work in sections and move them into suitable temporary shelter. The installation should improve the conditions they will actually experience, not leave them outside through a cold night while the last panel is fitted.
Separate insulation, heating and temperature checks
An unheated greenhouse can become very cold overnight even when it warmed strongly in afternoon sun. Insulation changes the rate at which heat escapes through the structure and unwanted air leaks; it does not establish a dependable minimum temperature by itself. Keep a safe alternative shelter available for plants whose needs exceed what the house can maintain.
RHS uses about 4°C as a domestic greenhouse frost-free heating example. That is not a universal temperature for all ornamental plants, and adding bubble lining does not automatically produce it. Choose the target from the plants, then judge whether the existing heating and shelter arrangement can maintain that target during the expected weather.
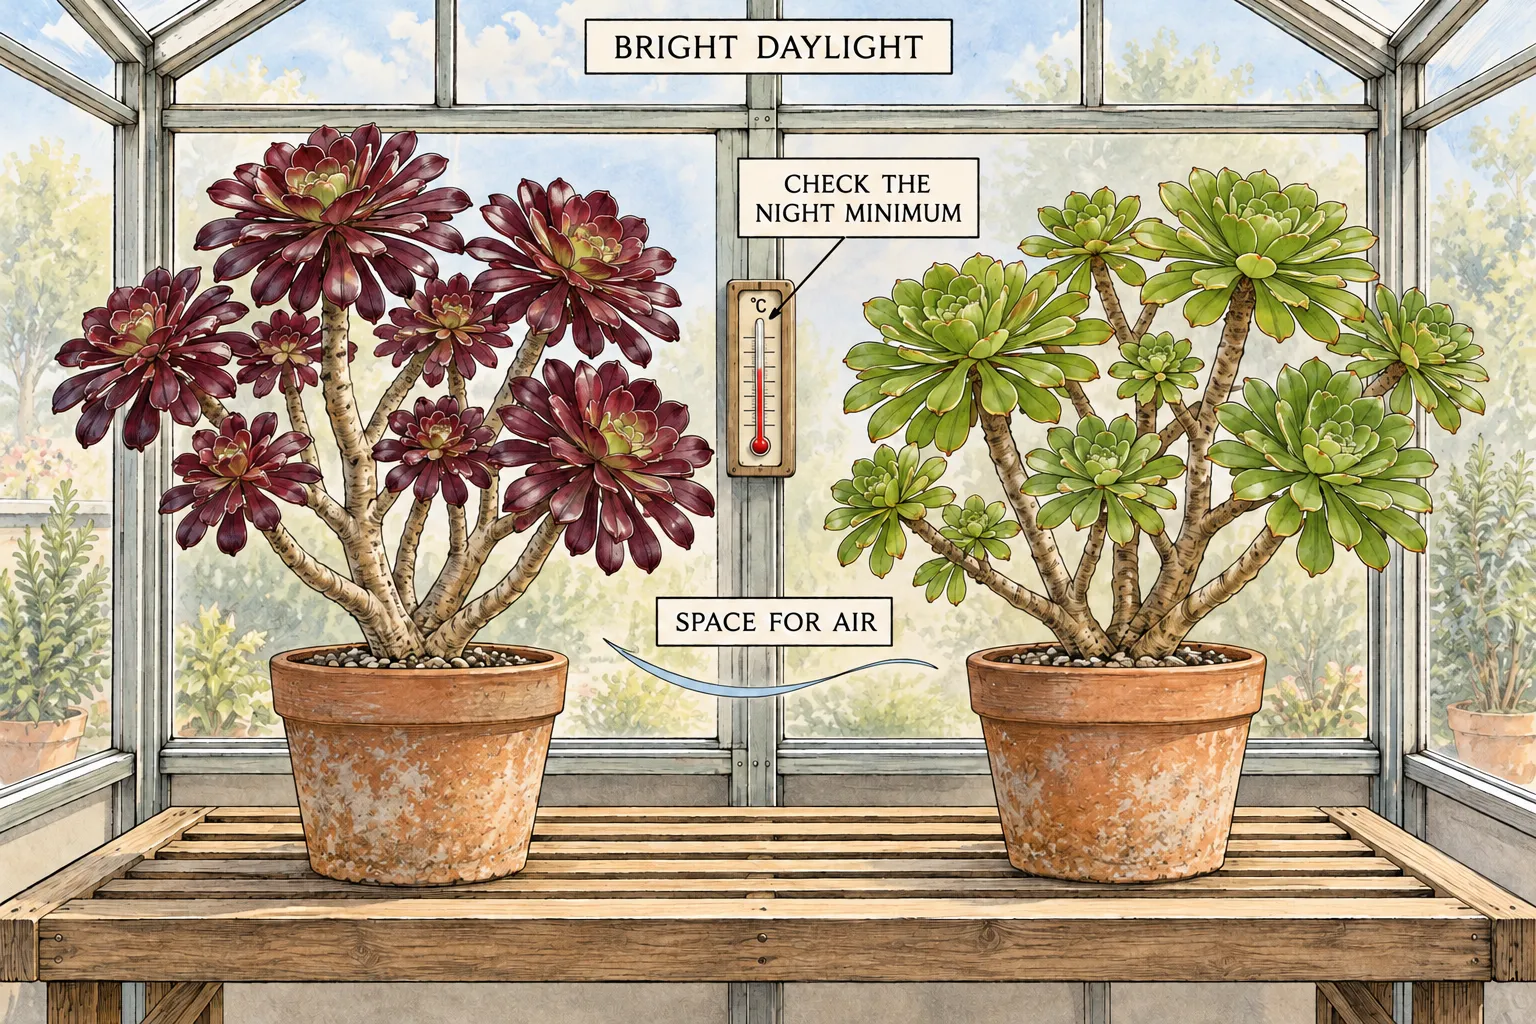
Use a minimum–maximum thermometer where most of the plants stand. RHS warns that a heater's thermostat can differ from the temperature the plants experience because it is close to the heater. Record the overnight minimum and the daytime maximum, especially during the first cold or sunny spells after lining. A reading at midday cannot establish what happened before dawn.
If dependable heat is necessary, use equipment intended for greenhouse conditions and follow its instructions. RHS calls for professionally installed electrical connections. Keep the lining clear of heaters, required air supplies and equipment access according to the relevant manuals. This fitting job concerns removable insulation; it does not include altering wiring, burners, flues or heater ventilation.
Repair and dry the structure before covering it
Inspect the panes, glazing bars, door seals and opening vents while they remain visible. RHS places replacement of broken panes and correction of unwanted draughts before adding insulation. A sheet of bubble polythene should not conceal loose glass, a broken catch or a door that cannot close. Arrange suitable repairs before covering the affected area.
Clean the surfaces according to the glazing manufacturer's instructions and let them dry. Hartley recommends lining after the annual clean and thorough airing. A clean pane gives winter light a better starting point; a dry frame also makes it easier to assess the fixings and any compatible tape used on the lining. The separate greenhouse-cleaning guide covers that preparation in detail.
Identify the actual structure before choosing hardware. Glass, coated plastic glazing, wooden frames and aluminum profiles need different treatment. Use attachment points and clips approved for the greenhouse or confirmed suitable by its supplier. A fixing that works in one manufacturer's aluminum channel is not automatically suitable for another profile.
Work only where you can reach securely with appropriate access equipment. Clear the aisle and move pots away from the working area before handling a roll overhead. Leave damaged or inaccessible glazing for suitable assistance. Keeping the job removable is useful later, but reversibility does not make an unsuitable fastening or an improvised reach safe.
Choose a durable clear material and a manageable coverage plan
Choose clear horticultural bubble insulation suited to prolonged greenhouse exposure. Hartley warns that ordinary packing material can deteriorate quickly in sunlight and recommends material intended for this job. RHS also encourages reusing suitable bubble wrap across years. Those recommendations can work together: assess the condition and intended use of existing material before buying more, and retain sound greenhouse lining for the next winter.
Check the sheet for brittleness, tears and collapsed areas before fitting it. Ask the supplier how it should be oriented, fastened, joined and removed on your glazing system. The bubble pattern alone does not tell you its durability or whether an adhesive will be compatible with a coated panel. Product instructions should settle those details.
Decide between lining the house and protecting a smaller occupied section. RHS describes using a bubble-wrap screen and battens to reduce the area that needs heating when a large house contains few plants. In a small greenhouse, a partition is worthwhile only if there is still room to reach the pots and operate ventilation. Every enclosed section needs its own temperature and access check.
Keep a bright area available for plants that would lose too much useful light behind extra layers. A partition also creates a new shadow and a new movement route, so sketch it before cutting material. If the collection is mainly hardy plants that benefit from winter light, leaving the glazing clear may be the better choice. Insulation is a response to a need, not a compulsory annual decoration.
Measure fixed bays, doors and vents separately
Draw a simple panel map of the greenhouse interior. Mark fixed side glazing, roof slopes, the door and every moving vent, then note handles, hinges and automatic openers. Measure the actual surface to be lined; a roof slope is longer than its horizontal projection. Label each measurement so a roof piece is not mistaken for a wall panel when the roll is on the bench.
Work from the sheet width you can buy and the frame points available for attachment. Long joined sheets can reduce the number of loose edges, as Hartley notes, but a continuous strip must stop where a moving opening needs independence. Add the overlap or fixing allowance specified for the product and frame; that allowance can differ between systems.
For a simple quantity check, two fixed bays each 0.6 m wide and 1.5 m high have a combined face area of 1.8 m². That calculation excludes overlaps, trimming, the roof, the door and vents. A narrow roll can also create more seams than the same total area in a different width. Use the sketch to test the cutting layout before treating an area total as the purchase quantity.
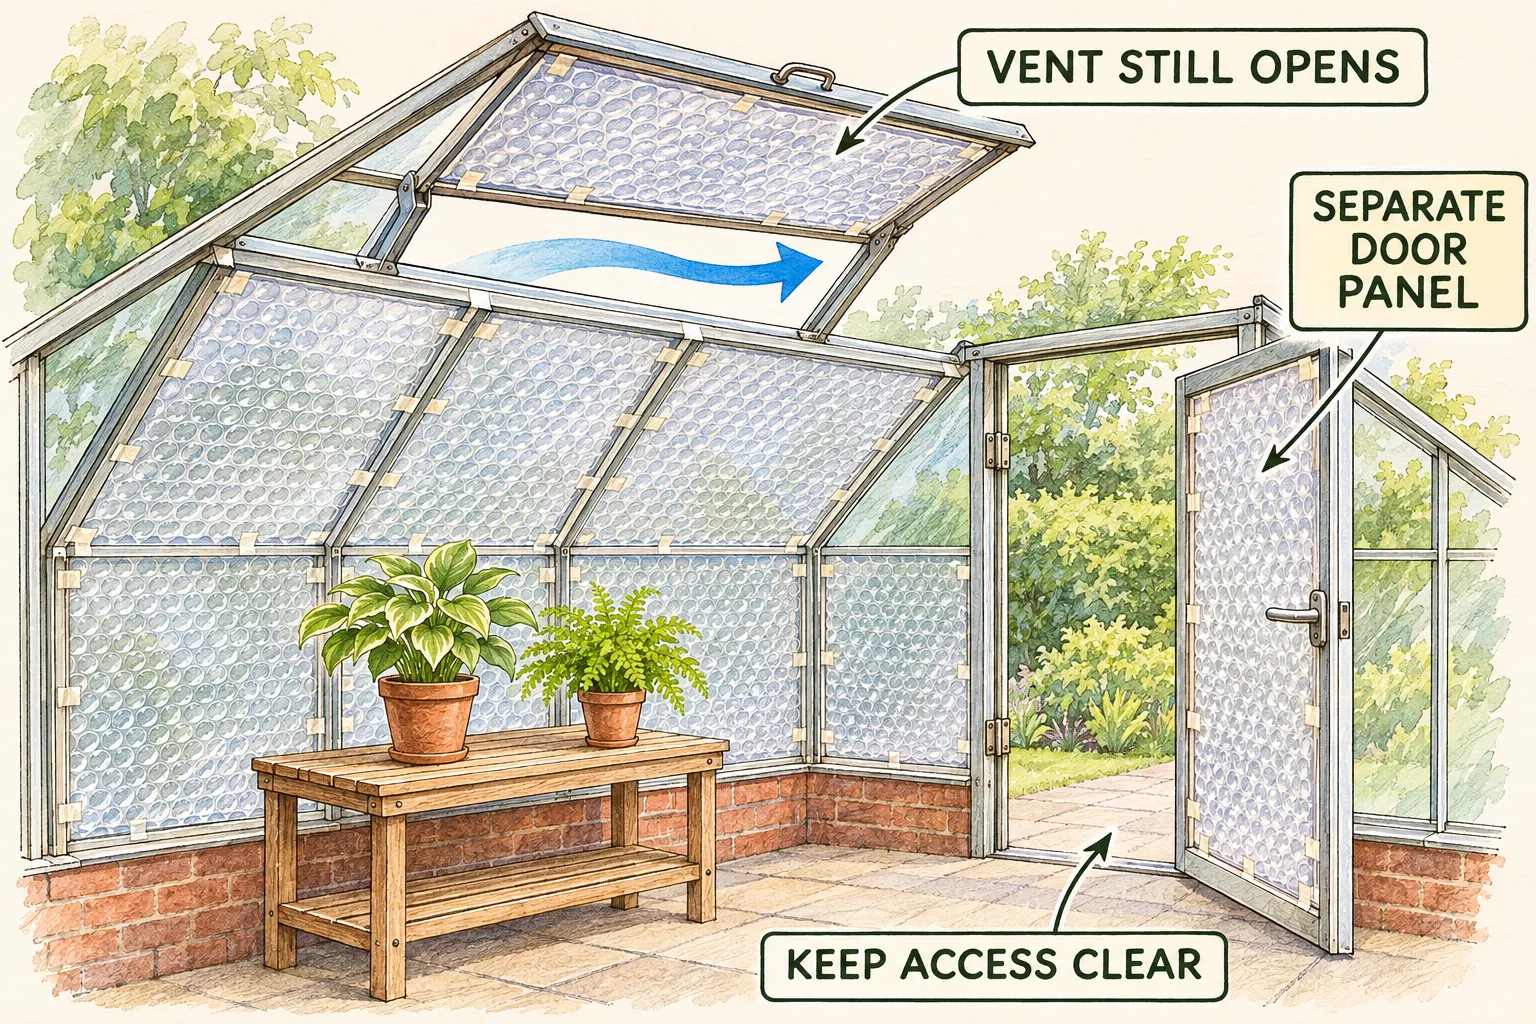
Plan separate pieces for opening panels. The lining on a door should move with the door; the lining on an opening roof vent should move with that vent or otherwise leave its intended opening clear. Mark where a piece must be removable for maintenance. A neat sheet stretched across a moving joint can turn an operable greenhouse into a sealed box.
Attach the lining to the frame and test every opening
Start with an accessible fixed side bay and use the approved removable fixings to hold the material against the intended frame points. Support the sheet along its run so it stays controlled and does not sag onto plants. Follow the lining manufacturer's tension and joining instructions; stretching until it tears at the clips is not a useful test of insulation quality.
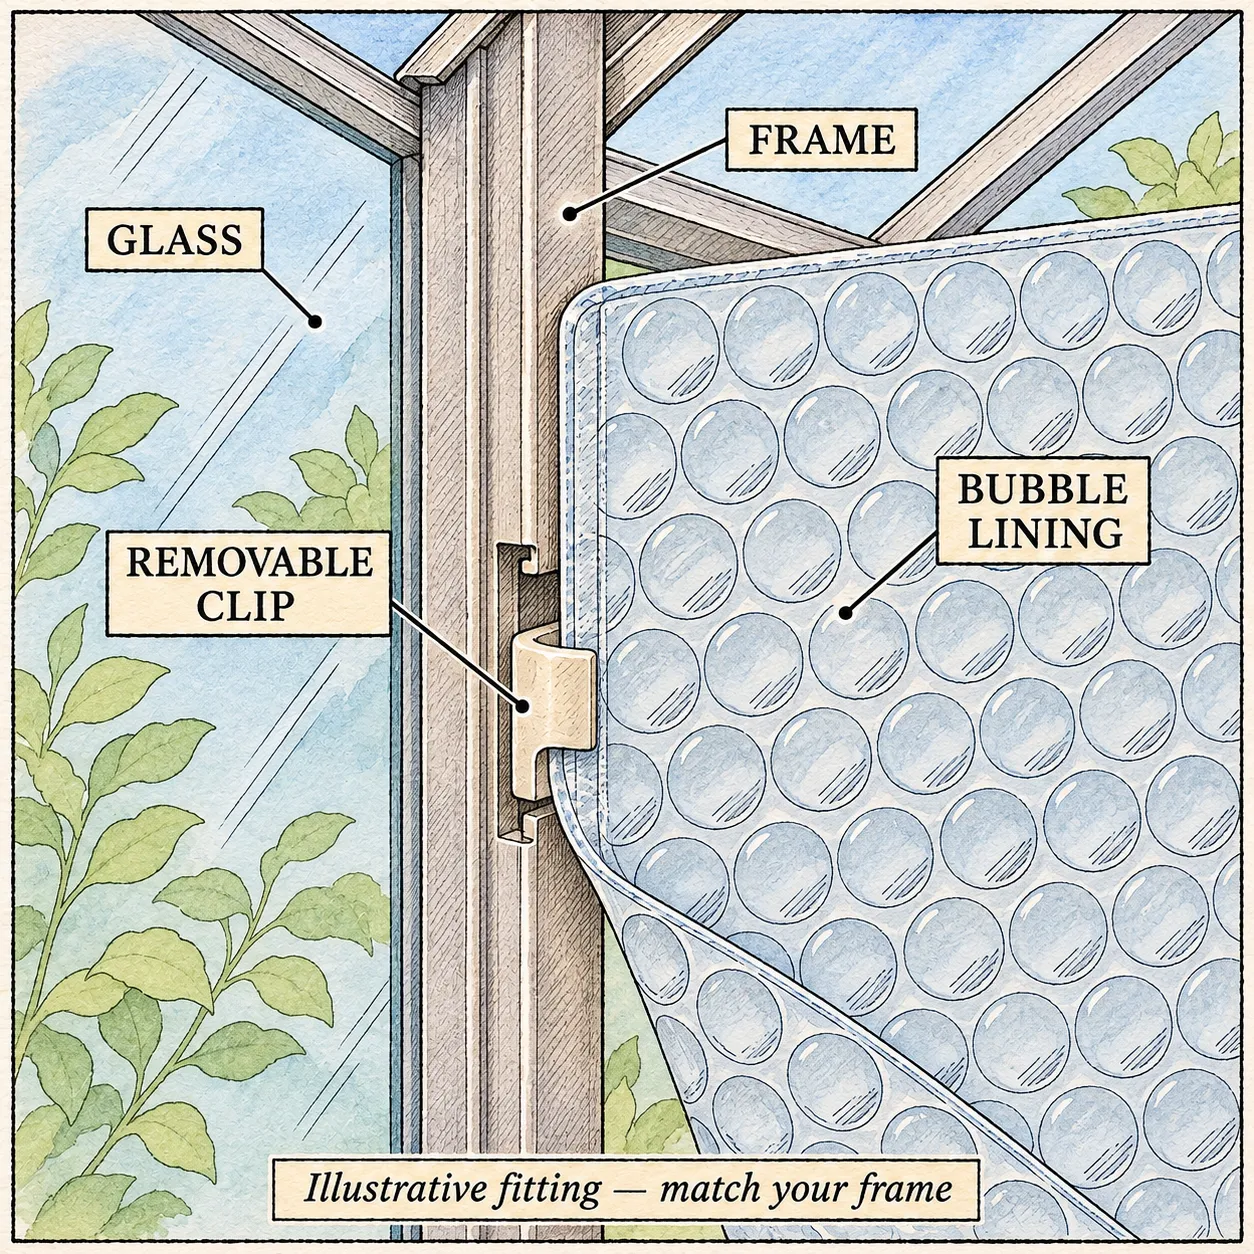
Fix to the frame using its suitable system, keeping fasteners away from the glazing itself. Hartley describes several methods for its own structures, including channel fixings and clips. The close-up drawing is a conceptual example of a removable frame attachment, not a universal clip design. Match the hardware to the real bar profile before proceeding around the house.
Join adjacent fixed sheets neatly with the compatible method, then fit the door and vent pieces independently. Open and close each moving panel through its normal travel. Check the hinges, latch and any automatic opener for contact with the lining. A vent that opens only a crack because the sheet pulls tight has not passed the check.
RHS explicitly requires continued ventilation, and Virginia Cooperative Extension makes the same point even in its commercial winter energy guidance. Some fitting advice describes how lining can obstruct access; treat that as a problem to prevent, not an instruction to seal every opening. Preserve a practical way to ventilate and to inspect the joints during winter.
Finish the roof areas only with suitable access and support. Keep a record of where each labelled piece belongs and how it can be released. Walk the aisle with the door open, operate the vents again and check that no loose edge hangs into the plants or equipment. Complete the mechanical checks before returning the whole collection.
Manage dampness and plant light after installation
A more tightly enclosed structure changes humidity as well as heat loss. Virginia Cooperative Extension notes that reducing leaks tends to increase relative humidity and emphasizes air movement and ventilation. Those principles apply to a small house, although its industrial fan sizes and airflow calculations are not a domestic recipe.
On mild, sunny days, use the working doors and vents to reduce dampness as RHS advises, while keeping the plants within their temperature requirements. Close them appropriately before colder conditions return. There is no single ventilation duration that fits every greenhouse, weather pattern and plant collection. Observe temperature and condensation as the conditions change.
Inspect the liner, glazing and plants after rain and cold nights. Persistent condensation, dripping onto foliage or wet pockets beneath a loose sheet deserve attention. Check for leaks, excess watering, crowded growth and inadequate air exchange. Lining cannot compensate for pots left standing in runoff or a greenhouse packed so tightly that leaves remain pressed together.
Watch the plants for a light problem as well as cold damage. Weak, stretched growth beneath overlapping or dirty insulation is a reason to review the position and coverage. Thin out unnecessary layers, improve access to daylight or move the affected plant to a more suitable space. Adding another layer to every cold-looking corner can make light the next limiting factor.
Keep the thermometer visible and compare several nights with the forecast. A successful mild-night reading does not establish performance in a severe freeze. If the temperature approaches the plants' lower limits, use the planned alternative protection or relocate them before damage occurs. The useful evidence is the measured environment, not the appearance of a fully wrapped house.
Remove, label and reuse when the season changes
Review the need for lining as days lengthen and the collection changes. Spring seedlings and actively growing ornamentals may need the light that was traded for winter heat retention. Remove sections when their benefit has passed, using the weather and plant requirements to guide the change. Retain a cold-spell plan during the transition.
Release fixings gently and keep reusable hardware together. Label each dry, serviceable sheet by its location on the panel map, then store it clean and protected from damage. Inspect brittle material before the next installation. RHS favors repeated reuse where the material remains suitable; a worn sheet that breaks apart during fitting has reached a different decision point.
After removal, check the frame and vent mechanisms for damage or residues and clean them by the manufacturer's method. Reconfirm that glazing, drainage routes and opening panels are accessible. Record which plants needed more light, which position became coldest and which joint was awkward to manage. Those observations can justify a smaller, better-targeted lining arrangement next winter.
Keep any claim of savings proportionate to the evidence you have. The result of this job is a fitted, operable lining with known limits, not a promised reduction in a particular bill. Weather, heating settings, greenhouse construction and the plants' required temperatures all affect energy use. Plant survival still depends on meeting those requirements after the material is in place.
Steps
- Level
- moderate
- Time
- Several hours for a small accessible greenhouse; ongoing winter checks
- Tools
- Tape measure and panel sketch, Scissors suitable for the lining, Minimum–maximum thermometer, Suitable access equipment for reachable installation work
- Materials
- Clear horticultural bubble insulation, Frame-compatible removable fixings, Compatible joining tape if specified, Labels for reusable pieces
- 1Set the plant requirements and coverage
List the winter temperature and light needs of the ornamental plants using the greenhouse. Decide whether the benefit of insulation justifies reduced light, and whether only part of the house needs lining. Choose a protected alternative for plants if overnight temperatures fall short. Prepare a panel sketch with every door, vent and access route marked.
- 2Repair, clean and dry before measuring
Inspect the structure and arrange repair of damaged glazing, loose components and unwanted gaps. Clean by the glazing manufacturer's method and allow the frame and panes to dry. Move plants and loose equipment into suitable temporary shelter. Confirm the approved attachment method for the actual frame; a different greenhouse manufacturer's fixing detail may not apply.
- 3Measure and cut independent pieces
Measure the fixed bays, roof slopes and moving panels separately. Plan the cuts against the roll width and include the joining and fixing allowances specified for the material. Label the pieces before fitting. Give the door and roof vents independent sections so no continuous sheet will bridge a moving joint or obstruct the normal opening.
- 4Fit fixed panels and preserve movement
Secure an accessible fixed section to approved frame points, supporting the sheet as you progress. Join fixed sheets by the compatible method, then fit the separate door and vent pieces. Open and close each panel fully enough to confirm normal operation. Keep hardware, handles and equipment access clear, and correct sagging or snagging before adding plants.
- 5Check the occupied greenhouse
Return the plants with space for inspection and air movement. Position the minimum–maximum thermometer near the collection and record daytime and overnight readings. Ventilate during suitable mild weather and inspect for persistent condensation, trapped runoff or loss of useful light. A lining that looks complete still needs measured evidence that the plants' conditions are being met.
- 6Review and remove seasonally
Recheck performance as colder weather arrives, using the backup protection if plant temperatures approach their limits. As spring light demand increases, remove lining that is no longer justified. Dry and label sound pieces for reuse, store their fixings together and inspect the exposed frame. Keep notes on cold positions and awkward joints for the next installation.
Related reading
Sources
- How to heat a greenhouse efficiently. Royal Horticultural Society. Source record · Accessed 2026-11-04.
- How should you attach bubble wrap to the inside of a greenhouse?. Hartley Botanic. Source record · Accessed 2026-11-04.
- Dealing with the High Cost of Energy for Greenhouse Operations. Virginia Cooperative Extension. Source record · Accessed 2026-11-04.