Plant problems · clematis wilt diagnosis
Diagnose Clematis Wilt Before Cutting the Vine to the Ground
Trace sudden collapse to the lowest healthy node, inspect stems for lesions and breakage, separate fungal wilt from root and water stress, and preserve sound growth while the diagnosis develops.
Published Last updated
In this guide
- Trace every collapsed shoot to its lowest sound tissue
- Trace a collapsed shoot before assigning a pathogen
- Separate fungal wilt from breakage and girdling
- Check water, roots, and crown depth
- Compare leaf symptoms on healthy and wilted stems
- Prune confirmed affected stems without sacrificing the crown
- Stabilize the site while new shoots are observed
- Treat preventive products as a diagnosis-dependent choice
- Plan replacement only after recurrence is understood
- Close the route when the next evidence points elsewhere
- Protect new basal shoots from a repeat stem failure
- Coordinate wilt pruning with the clematis pruning group
- Inspect nearby vines without assuming contagion
- Use the support map as part of recurrence diagnosis
- Keep the final cut visible
- Diagnosis
Trace every collapsed shoot to its lowest sound tissue
Clematis wilt can cause a previously healthy shoot to collapse rapidly, with leaves and stems above an affected point turning limp and then dark. Begin at the wilted tip and follow that exact stem down through the support. Keep neighboring stems separate. Photograph every bend, tie, lesion, and color change before cutting. One plant can carry both affected and healthy shoots from the same crown.
Look for a dark, constricted, cracked, or discolored stem area near soil level or higher on the vine. A fungal lesion interrupts transport above it, but a snapped stem, tight tie, abrasion, or borer injury can create the same upper collapse. Turn the stem gently and inspect all sides. Do not pull the entire vine from the trellis while the connection remains unreadable.
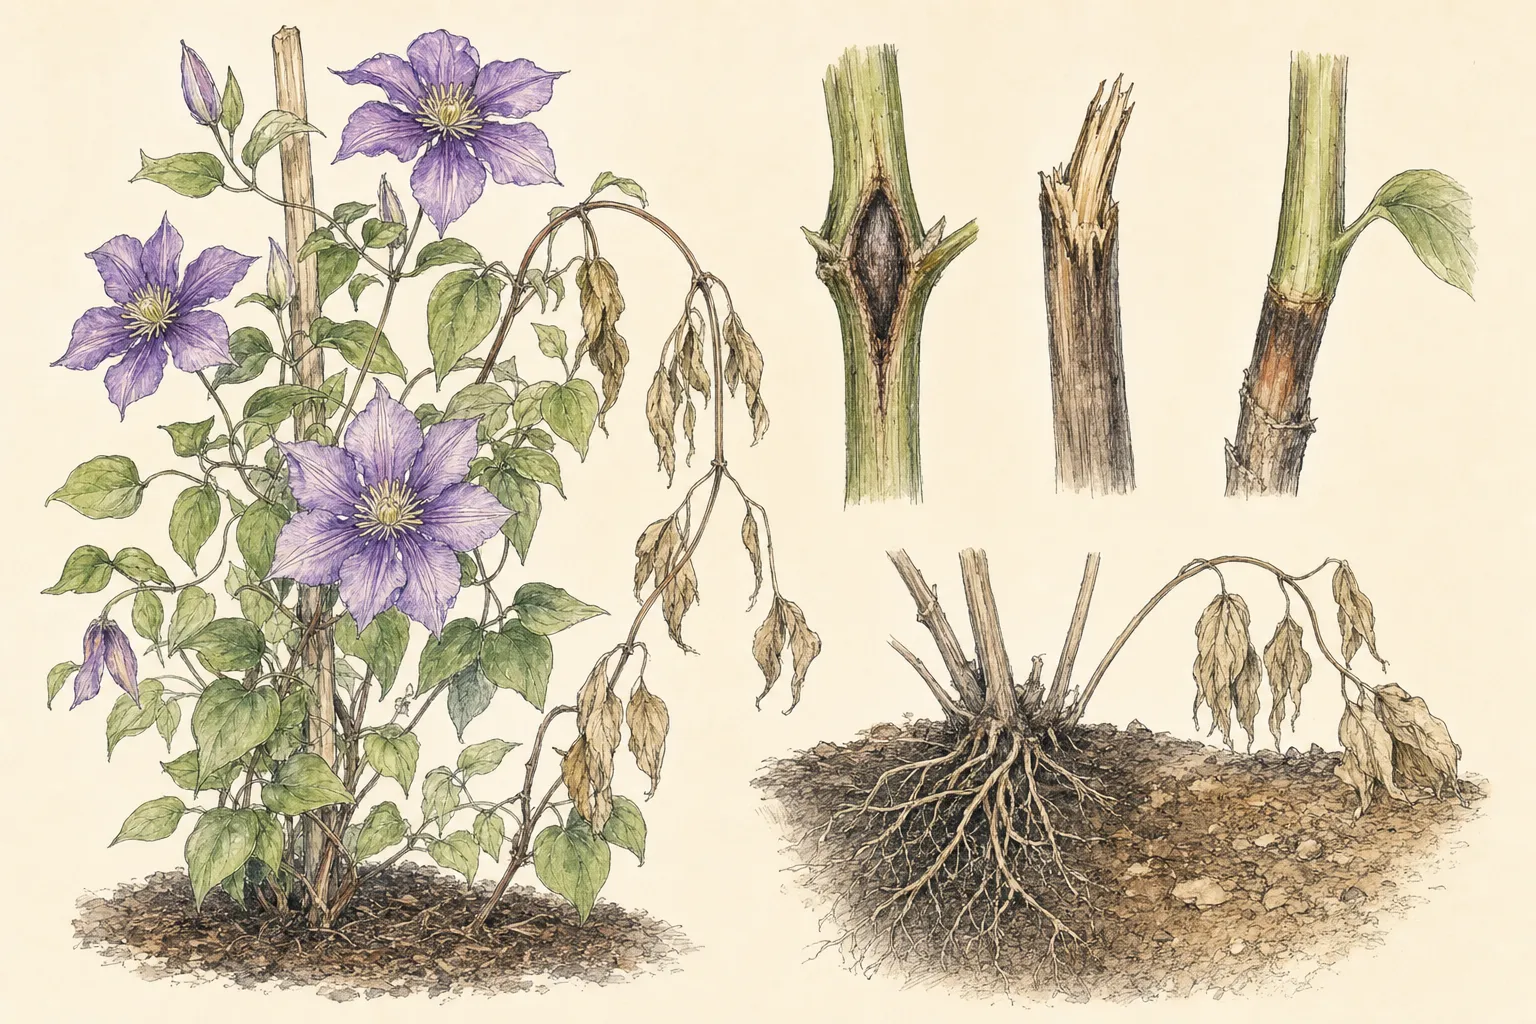
Mark the lowest section that remains firm and normally colored. If collapse reaches the crown or several shoots fail from the base, broaden the inspection to roots and planting conditions. Preserve a fresh section containing the boundary between diseased and sound tissue for local diagnosis. A dry black stem collected only from the dead tip carries less useful evidence.
Trace a collapsed shoot before assigning a pathogen
Follow the affected shoot back toward the crown and compare lesions with ties, rough support contact and other mechanical damage. Check root-zone moisture independently. Separate shoots may provide different evidence, so preserve healthy growth while sampling an uncertain boundary. Recurring collapse at the same contact point needs a support correction, not an assumed repeat of fungal wilt.
Separate fungal wilt from breakage and girdling
Clematis stems are brittle and can kink in wind or while being tied. A break often occurs at a support contact or handling point, with physical crushing visible. Tight twine can girdle a growing stem. Remove the tie and photograph the compression. If tissue below is healthy and other shoots remain vigorous, repair support and prune the broken stem without extending the disease claim.
Inspect for abrasion where stems rub wire, masonry, or one another. A rough support can wound multiple stems at the same height. Add soft guides and distribute growth across the trellis. Do not bind all vines into one tight bundle; the resulting wet, abraded mass makes both disease and mechanical damage harder to distinguish.
If dark lesions appear independently of support contact and collapse progresses on separate shoots, fungal wilt becomes more plausible. Preserve samples and clean tools between cuts. A field pattern supports action but may not identify the exact pathogen. Use local diagnostic services when the plant is valuable, recurrence is severe, or several vines are affected.
Check water, roots, and crown depth
Drought can wilt the entire plant or the shoots supplied by a dry root section, while saturated soil can damage roots and produce similar loss of water uptake. Probe below mulch at several points and depths. Compare the original root ball with surrounding soil. A damp surface does not prove the roots are wet, and one emitter can leave half the crown dry.
Locate the crown and planting depth according to the clematis type and local guidance. Keep mulch from burying stems excessively or holding them wet. Check drainage, root competition, and recent construction. A vine planted against a wall may sit in a rain shadow even when the adjacent bed receives water, or it may receive roof runoff that saturates the hole.
Look for soft roots, foul odor, crown decay, vole injury, or physical disturbance only where inspection can be made without destroying the plant. Do not excavate every root during active wilt. Record soil and site evidence, restore stable moisture, and seek diagnosis when broad basal decline persists.
Compare leaf symptoms on healthy and wilted stems
Leaves above a transport failure wilt as a consequence, but separate foliar diseases can spot or blight leaves without causing sudden whole-shoot collapse. Photograph leaves from below and above the suspected stem point, plus a healthy shoot. Note whether spotting precedes wilt, whether margins crisp during heat, and whether insects or webbing are present.
Powdery mildew can coat leaves while the vine remains structurally sound. Leaf spots may produce bounded lesions. Spider mites can stipple foliage in hot dry sites. These problems can coexist with clematis wilt but should not be merged into one treatment. Follow each symptom from its own evidence and preserve the healthy canopy when removing a failed shoot.
Review herbicide exposure and fertilizer. Drift can distort new growth across exposed parts of the plant, and excess salts can injure roots. A one-sided pattern after nearby spraying or broad distortion on multiple species needs a separate route. Do not apply fungicide to compensate for an unresolved chemical or root injury.
Prune confirmed affected stems without sacrificing the crown
Once an affected stem is traced, cut below the lesion into firm healthy tissue, using clean sharp pruners. If no healthy section remains above the crown, remove that stem near its origin without injuring neighboring shoots. Bag diseased material and dispose according to local guidance. Do not compost it where the system may not manage the pathogen.
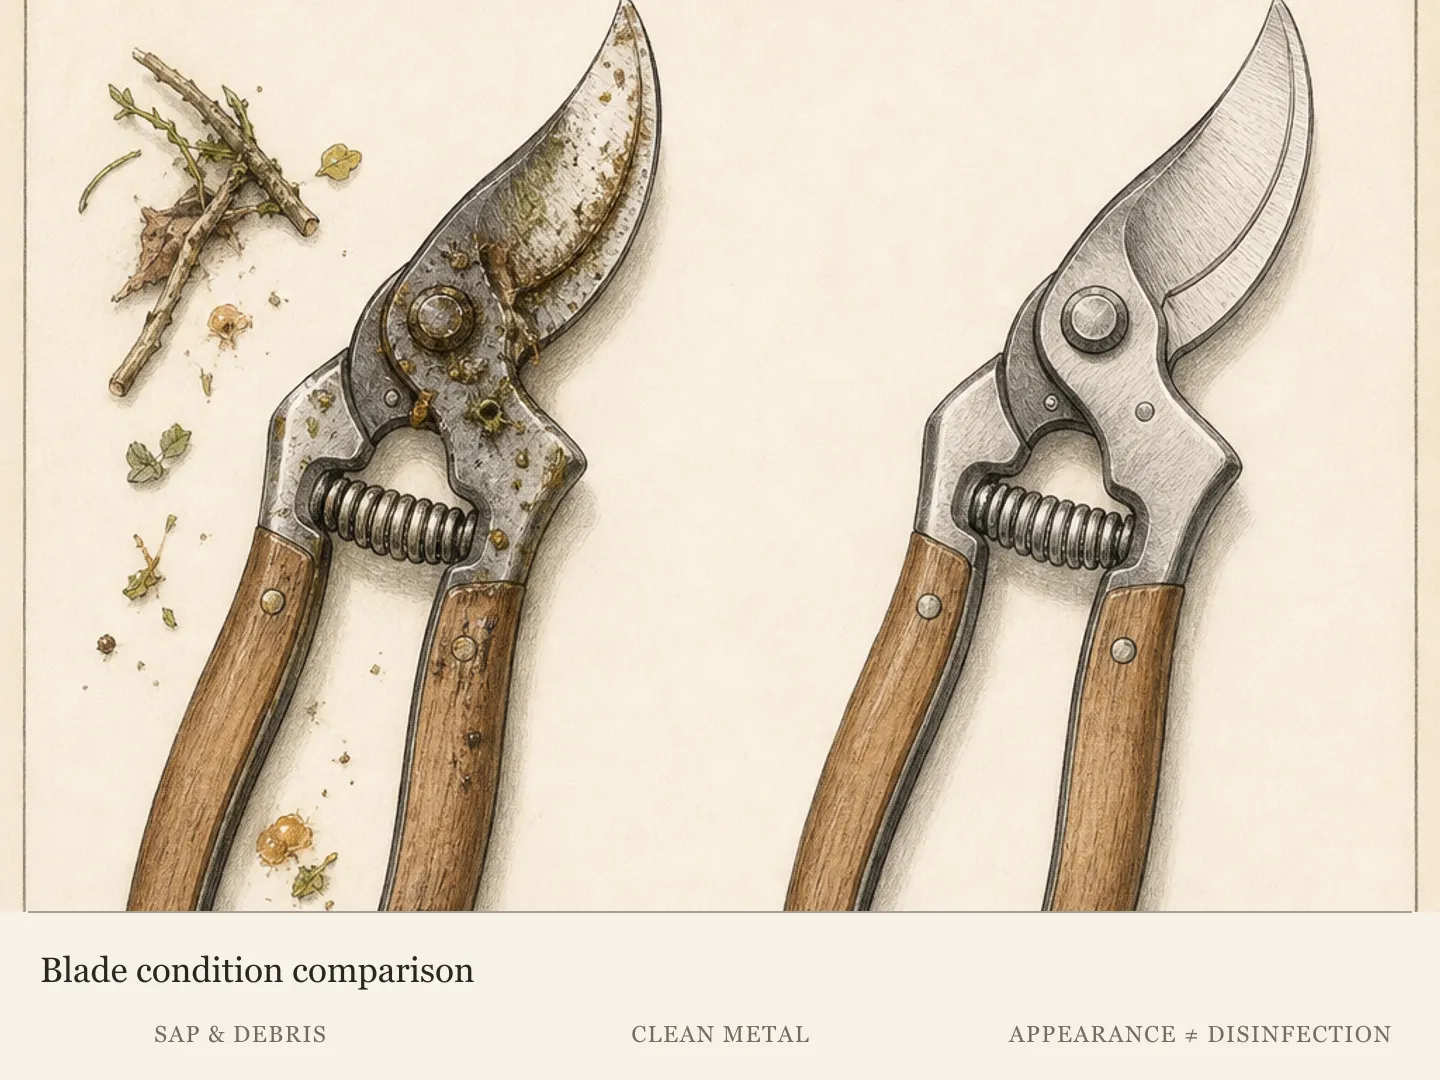
Clean tools after each affected stem and before moving to another plant. Support the remaining healthy vines loosely and restore airflow without stripping foliage. Avoid major reshaping during diagnosis. The plant needs healthy leaves to rebuild and may produce new basal shoots even after one or more stems are lost.
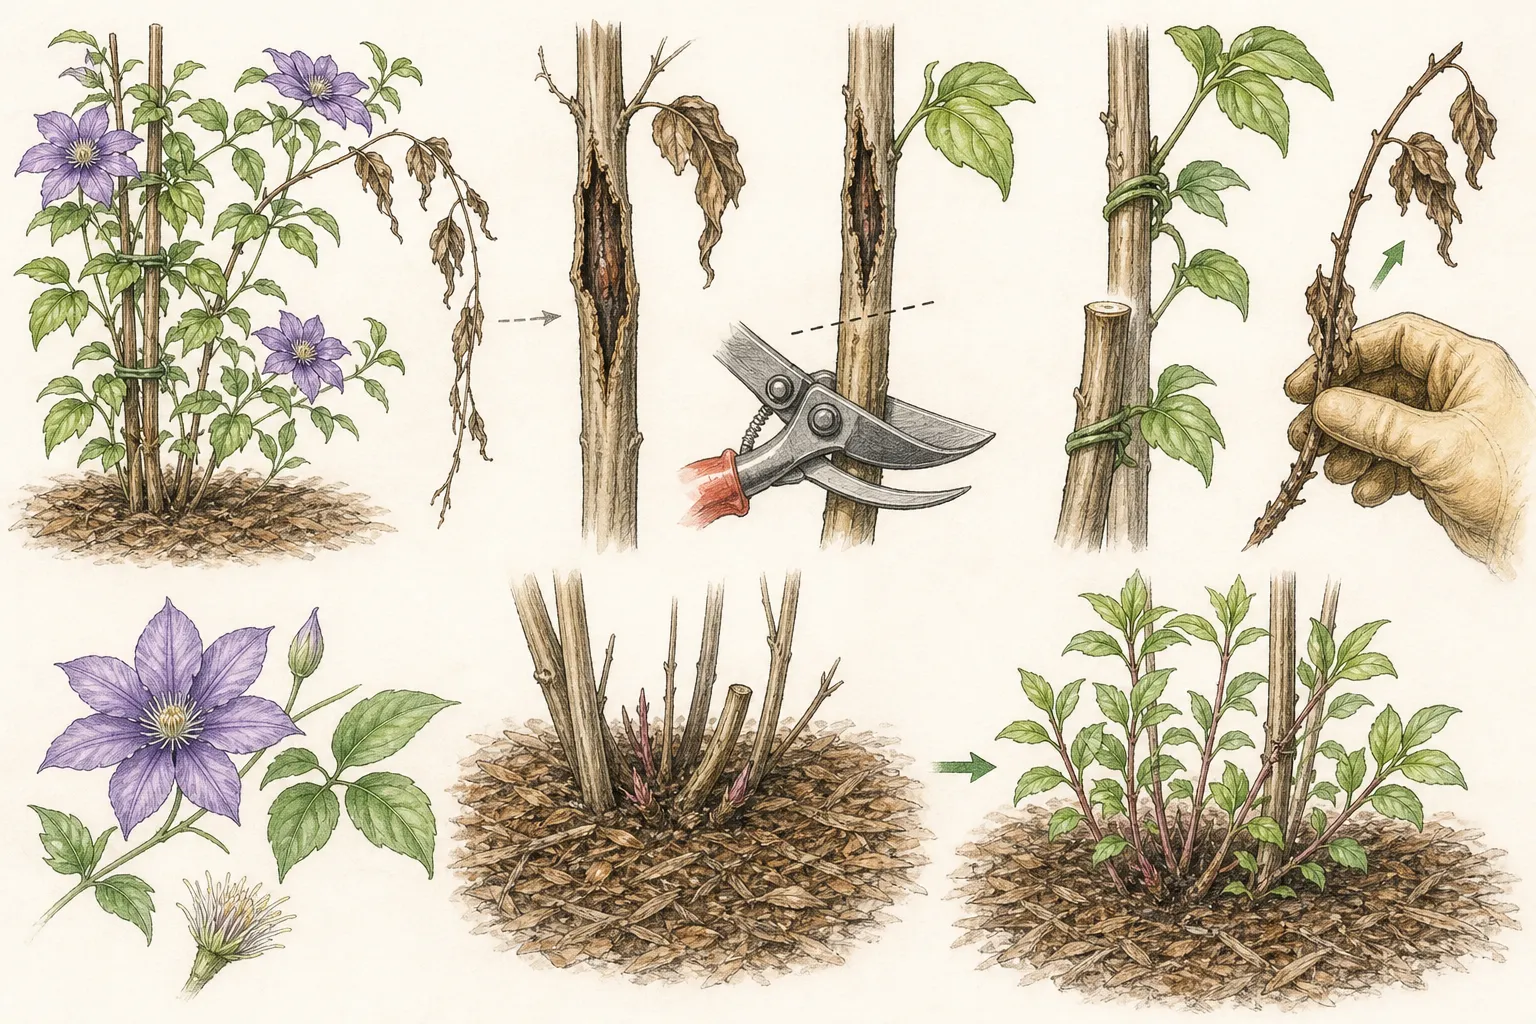
Do not assume cutting every stem to the ground is safer. Clematis groups differ in pruning and flowering wood, and healthy stems may carry the current or next bloom. Remove only the confirmed failed route unless broad crown disease or a local diagnostic recommendation supports more. Label the vine and preserve its pruning-group record.
Stabilize the site while new shoots are observed
Water the root zone when measured soil moisture calls for it, applying slowly and allowing drainage. Keep a moderate mulch layer away from stem bases and protect roots from extreme heat where locally appropriate. Do not keep the crown constantly wet in an effort to force regrowth. Stable conditions let the remaining roots and buds respond.
Hold fertilizer during acute wilt. Rapid soft growth is not the immediate goal, and damaged roots may not manage added salts. Resume only under an established plant-care or soil-test plan after healthy growth appears. Remove competing weeds without deep cultivation around the crown.
Mark every new basal shoot and photograph weekly. Protect it from slugs, breakage, and accidental weeding with an open marker or support. Guide it onto the trellis while flexible. New shoots can rebuild the vine, but their appearance does not prove the original cause; retain the diagnosis record for recurrence.
Treat preventive products as a diagnosis-dependent choice
Fungicides do not repair a collapsed stem. Some preventive measures may be locally recommended for recurring disease, but timing, active ingredient, label, coverage, and clematis safety matter. Obtain current Extension guidance and follow the label exactly. Do not pour a foliar product into the crown or combine products from online anecdotes.
Sanitation, resistant or less susceptible selections, site fit, and careful support are often more durable than repeated reactive spraying. Keep stems from abrasion, preserve airflow, water roots, and remove affected tissue promptly. These practices reduce pressure and improve observation without claiming complete prevention.
Judge any preventive plan on healthy new stems over the next risk period. Old wilted growth will not recover. If collapse continues despite correct timing, reopen the diagnosis, inspect roots and support, and submit a fresh boundary sample. Treatment failure may be an identification failure.
Plan replacement only after recurrence is understood
A clematis that resprouts and flowers in later years may remain worth keeping. Record which stems failed, when, weather, pruning group, and whether collapse recurs from the same crown area. One dramatic episode does not require immediate removal of a vigorous rebuilding plant.
Repeated severe wilt can support choosing a different clematis type or cultivar, improving site drainage and support, or planting the crown where stems are less exposed to damage. Some clematis groups and species may be less susceptible than large-flowered hybrids, but selection should follow local guidance and the desired garden role.
If the crown and roots are broadly decayed, remove material and evaluate soil before replanting. Do not place a new vine into the same saturated or mechanically damaging setup. Clean or replace contaminated support materials as recommended and preserve the plant label history.
Close the route when the next evidence points elsewhere
If every failed stem is crushed at a tight tie, correct the support and close the fungal route for those shoots. If the entire plant wilts in dry soil and recovers after measured watering, follow drought care. If roots remain saturated and basal tissue softens, prioritize root and drainage diagnosis. Keep old wilt photographs without letting them dominate new evidence.
Escalate immediately when a structural support is unsafe, the vine is pulling masonry, or dead stems hang over people. Remove hazards while preserving samples. For plant health, seek local diagnosis when several vines decline, crown decay advances, or symptoms do not fit the traced stem pattern.
The successful outcome is a clear stem-level record, removal of affected growth, protected healthy shoots, and a stable root zone. A clematis may look temporarily sparse after correct pruning. That honest open framework is preferable to a full green tangle whose damaged stems and causes remain hidden.
Protect new basal shoots from a repeat stem failure
Guide each new shoot to a separate section of the support while it remains flexible. Use broad loose ties and preserve space between stems. Do not weave new growth through the same abrasive wire point or tight bundle where collapse began. The recovery architecture should make every stem traceable from crown to flower.
Keep the lower stems shaded only through appropriate mulch or companion planting that does not bury the crown or trap wet foliage. The familiar phrase head in sun, feet in shade is not a license for a deep mound against stems. Match light to the clematis type and maintain a visible, drained crown area.
Inspect new stems after wind, tying, and rapid growth. Loosen loops before they constrict and add support below heavy flowers. Record any fresh lesion away from contact points. Healthy stems surviving on an improved support strengthen the mechanical explanation; independent collapse keeps fungal wilt under review.
Coordinate wilt pruning with the clematis pruning group
Keep the cultivar label and pruning group with the plant. Wilt removal is an immediate sanitary cut to sound tissue; routine group pruning manages flowering wood at another time. After an emergency cut, do not repeat the full seasonal prune merely because the vine now looks uneven.
If the label is lost, record bloom timing, flower form, and where flowers occur before assigning a group. Preserve healthy old and new wood while identity is researched. A misclassified clematis can lose a season of flowers even when the wilted stem was correctly removed.
When all top growth is lost, mark the crown and protect emerging shoots from accidental spring cleanup. Wait for clear plant response before declaring death. Some clematis resprout from below the affected section, but timing varies. Do not excavate the crown repeatedly to look for buds.
Inspect nearby vines without assuming contagion
Check adjacent clematis and other vines for stem lesions, shared ties, root-zone saturation, and similar collapse. The same storm or support design can damage several plants, while a shared wet site can create root problems. Map each stem independently. Proximity alone does not prove spread.
Use separate clean tools and avoid dragging diseased clippings across healthy vines. Preserve samples from different plants in labeled bags. If symptoms match across several vines, a diagnostic service can compare them. If they differ, maintain separate routes instead of merging them into one outbreak.
Review nursery source and planting dates. Simultaneous decline in recent plants may reflect establishment or stock quality. Older vines failing after a support change may point toward abrasion. The shared timeline is part of diagnosis and helps decide whether replacement stock, site correction, or disease management is relevant.
Use the support map as part of recurrence diagnosis
Draw the trellis and assign every main stem a route. Mark lesions, breaks, ties, wall contacts, and the height where collapse began. A pattern clustered at hardware points favors mechanical injury; lesions scattered independently keep disease in view. Update the map after every pruning and new shoot so future collapse can be traced before stems tangle.
Photograph the support when leaves are absent. Repair rough welds, sharp wire, unstable panels, and narrow entry points before spring growth. Provide enough area for mature stems and airflow. A strong support does more than hold flowers; it preserves diagnostic access from crown to upper vine.
Store the map with pruning group and cultivar. If the vine later fails at a different point, compare conditions rather than assuming recurrence. The combined record prevents a repeated mechanical fault from being labeled fungal and prevents true independent lesions from being dismissed as wind.
Keep the final cut visible
Mark the lowest pruning point on the support map and photograph the sound cross-section before the remaining stem dries. This establishes where the lesion ended and lets future growth be compared with a precise boundary. Remove the marker before it can girdle a new shoot, and retain the image with the dated diagnosis record.
Diagnosis
One or more clematis shoots collapse rapidly above a dark, constricted, cracked, or discolored stem lesion while separate shoots from the same crown remain firm and green.
- Check
- Trace each collapsed shoot from tip to crown, photographing all sides of the stem and the boundary between dark and firm tissue. Compare independent shoots and preserve a fresh boundary sample. Map lesions that occur away from support contact and note recurrence after rain or humid weather.
- Cause
- Clematis wilt or a related stem lesion is interrupting transport above the affected point. The exact pathogen may require laboratory confirmation.
- Action
- Prune the affected stem below the lesion into sound tissue, bag debris, clean tools, preserve healthy shoots, and stabilize root-zone moisture and support. Use local diagnostic and preventive guidance for recurrence; old collapsed tissue cannot recover.
A wilted shoot is crushed, snapped, abraded, or tightly girdled exactly where it contacts a tie, wire, wall, or tangled stem, with sound tissue and no independent lesions below.
- Check
- Inspect every tie, bend, wire, wall contact, and crossing stem. Remove constricting ties and look for crushed fibers or abrasion precisely at the collapse point. Support the remaining stem line and observe whether new independent lesions appear before expanding the disease diagnosis.
- Cause
- Mechanical breakage or girdling has interrupted the stem. Wind, handling, abrasive supports, and tight ties can imitate wilt in all tissue above the injury.
- Action
- Remove the broken section with a clean cut, replace abrasive or tight support with broad loose guidance, and distribute stems across the trellis. Do not apply fungicide to a mechanical injury. Monitor new stems for independent lesions.
The whole vine wilts with a very dry root ball or a wall-side rain shadow, then improves after measured slow watering; stems lack a discrete dark transport lesion.
- Check
- Probe the original root ball and surrounding soil, review irrigation and rain, and check the wall-side rain shadow. Apply slow measured water to dry zones and mark canopy response. Persistent local stem collapse after moisture stabilizes requires renewed stem inspection.
- Cause
- Drought or uneven wetting has left roots unable to supply the canopy. Wall-side planting and dense root balls can remain dry despite nearby irrigation.
- Action
- Rewet the root ball slowly in stages, distribute water across the root zone, maintain moderate open mulch, and adjust irrigation from measured moisture. Protect the vine from repeated severe drought while preserving drainage and healthy foliage.
Broad wilt and yellowing occur while soil remains saturated, roots or crown tissue are soft or odorous, and drainage or planting depth is poor.
- Check
- Measure how long soil stays wet, expose the root flare or crown carefully, and inspect limited accessible roots for firmness and odor. Review downspouts, compaction, mulch depth, and planting hole drainage. Seek local diagnosis before broad excavation or amendment.
- Cause
- Root or crown decline from saturation, poor drainage, deep planting, or another root disorder is reducing uptake across the plant.
- Action
- Stop excess irrigation, correct blocked drainage and mulch against stems, and obtain local root or crown diagnosis. Remove only decayed material under guidance. Do not fertilize or add gravel, fungicide, or more water before the site failure is understood.
Leaves show spots, powdery growth, stippling, webbing, or herbicide-like distortion without sudden whole-shoot collapse or a traced stem lesion.
- Check
- Photograph both leaf surfaces, healthy and affected shoots, nearby species, and recent product exposure. Inspect for mites, insects, surface growth, bounded lesions, and distortion. Follow the symptom-specific route and retain stem-level monitoring separately.
- Cause
- A separate foliar pest, disease, or chemical injury is affecting leaves. It may coexist with old wilt damage but needs its own evidence and management.
- Action
- Close the wilt route for the leaf symptom unless a traced stem also collapses. Apply pest, leaf-disease, or chemical-injury management only after identification and label review. Keep sound vines and crowns intact while the separate condition is monitored.
New basal shoots emerge after wilt pruning but repeatedly kink, abrade, or collapse where they enter the same dense support bundle, while stem tissue below those contact points remains sound.
- Check
- Trace every new shoot from crown through its contact points, photograph ties before removal, and inspect fibers at the collapse. Spread replacement shoots across separate support paths and monitor for lesions away from contact. Keep fungal diagnosis open only if independent dark constrictions appear.
- Cause
- The recovery growth is being mechanically damaged by tight ties, rough support surfaces, and concentrated stems. The repeated failure can mimic recurrent wilt without independent lesions.
- Action
- Replace rough or narrow contact points, use broad loose ties, and guide flexible shoots separately. Preserve the crown and healthy foliage, add support below heavy flowers, and inspect after wind and rapid extension. Do not apply preventive fungicide solely to correct a mechanical pattern.
Related reading

Sources
- Clematis Wilt. University of Maryland Extension. Source record · Accessed 2026-08-19.
- Clematis Wilt. Missouri Botanical Garden. Source record · Accessed 2026-08-19.
- Clematis. Clemson Cooperative Extension. Source record · Accessed 2026-08-19.