Grow · clematis spring shoot training
Train New Clematis Shoots Before They Tangle
Read the pruning group, separate fragile spring shoots, and fan them onto a support that keeps growth visible, ventilated, and clear of walls.
Published Last updated
In this guide
- Recover identity and pruning group
- Keep shoot training separate from the pruning-group decision
- Audit the support before the vine loads it
- Separate shoots at their origin
- Fan the framework instead of making one rope
- Tie below a node and leave room to thicken
- Protect the base without burying it
- Return as the vine accelerates
- Steps
Recover identity and pruning group
Recover the clematis name and pruning group before removing or assigning spring shoots. Group 1 flowers on older stems and is normally pruned after flowering; Group 2 carries its first large flowers on overwintered wood and receives only light spring correction; Group 3 flowers on new growth and is cut low in late winter or early spring. Training begins after the correct framework has been preserved.
Use the label, bloom season, and last year's stems together. Early small-flowered species such as C. montana belong to old-wood treatment; many large-flowered hybrids are Group 2; C. viticella selections and other late summer bloomers are commonly Group 3. A color name or one photograph of a flower is not enough to assign the pruning cycle.
If identity remains uncertain, remove only dead or broken tissue and train the living shoots for observation. Penn State and RHS guidance allow an unknown vine to grow until its flowering pattern reveals the group. Mark which stems bloom first and whether later flowers arise on current growth. One patient season protects flower-bearing wood better than guessing and cutting every stem low.
Build the observation around actual stems. Tie a loose label to one retained overwintered cane and another to a new basal shoot, then note the date and location of flowers. Group 2 vines may bloom first on the old cane and later on current growth; Group 3 vines should place their main display on new shoots. Remove labels after the pattern is recorded before woody stems expand.
Keep shoot training separate from the pruning-group decision
Recover the clematis identity before removing shoots, and repair the support before assigning an open fan. Guide flexible growth with loose attachments while preserving the crown. Later, use the recorded flowering stems to check the pruning group. A shoot that does not fit one training route is not automatically disposable flowering wood.
Audit the support before the vine loads it
Inspect the support while shoots are still short and light. Clematis climbs by wrapping leaf stalks, or petioles, around slender objects; University of Maryland notes that the support must be narrow enough for a petiole to encircle it. A broad smooth post by itself is not a trellis. Add narrow wire, mesh, or twiggy material that gives the leaf stalks repeated attachment points.
Test posts, anchors, wall spacers, and wire tension before adding growth. A mature wet vine and its flowers weigh more than a few spring shoots. Keep a gap between support and wall for air, tying, and pruning access. Replace corroded fittings and sharp wire ends now, because later repair will require detaching a fragile, leaf-filled vine.
Choose a support that matches mature height and the pruning group. A compact patio clematis, a twelve-foot large-flowered hybrid, and a vigorous species cannot share one small obelisk plan. The structure should hold the vine within reach of the next seasonal cut and keep growth away from gutters, rooflines, windows, and branches too weak to carry it.
Prepare temporary guidance from the crown to the permanent structure. Short stakes, angled canes, or loose twine can bridge the bare lower gap without forcing a tender shoot around a thick post. Secure the bridge so wind cannot whip it. Remove or loosen temporary material once petioles have attached and the stems can reach the permanent grid.
Give petioles several diameters to grasp. Fine wire or twiggy mesh offers close attachment, while a broad timber post needs a secondary grid. Keep openings large enough to pass leaves without scraping but small enough that shoots cannot fall as one heavy sheet. The best support lets the vine attach itself after brief guidance and still leaves enough clearance for fingers and pruners at the next visit.
Separate shoots at their origin
Begin at the crown and identify where each living shoot originates. Group 2 vines may have several shoots on retained old stems; Group 3 vines may send a fresh cluster from near the base after pruning. Free the outermost stems first. Support the stem below the tangle and release every hidden lower loop first.
Support the stem below the tangle with one hand while the other unwinds leaves and petioles. If two shoots cannot be separated without damage, keep them together temporarily and guide the pair to an open sector. Cutting a healthy spring stem is justified only when it is broken, diseased, surplus to the documented pruning group, or impossible to place safely.
Remove dead remnants cleanly where they meet living wood, using small sharp pruners. Confirm death along the whole section because clematis stems can look dry while buds remain alive. Keep the cut pieces from dragging across soft shoots. A labelled stem retained for bloom observation should stay visible and should not be buried inside the new fan.
Read each shoot by nodes. The leaf stalk and bud emerge at a node, and a bend or tie placed directly across it can damage both attachment and future flowering growth. Support the smooth internode below, leaving the node free. If a shoot has already folded sharply and split, cut back only to a sound node permitted by its pruning group because collapsing tissue cannot support the fan.
Distinguish a mechanical break from wilt before clearing the support. A snapped shoot has a visible crease or tear and usually fails above that point, while wilt may collapse an apparently intact stem and can progress quickly. Mark the affected stem, follow it to the base, and remove only tissue that is dead or professionally diagnosed as diseased. Keep the remaining fan open and watered appropriately. Carry questionable stems clear of healthy foliage and clean the blade before the next vine. If multiple stems fail at the crown, investigate root drainage and crown health with root drainage and crown health checked first. A trained open fan makes this distribution visible; a rope of tangled shoots hides it.
Fan the framework instead of making one rope
Assign shoots across the support before tying any one stem firmly. Lead outer shoots to the edges, central shoots upward, and intermediate shoots through separate lanes. The fan should use the available width and keep leaves from stacking in one rope. More even light and airflow also make wilt, breakage, and missed ties easier to see.
Respect the vine's natural route. Clematis petioles can turn around fine support, but the stem should not be bent sharply at a node or forced through a rigid grid opening smaller than its leaves. Use a broad curve and add an attachment point where the stem wants to leave the plane. A future flower bud is not worth a cracked main shoot.
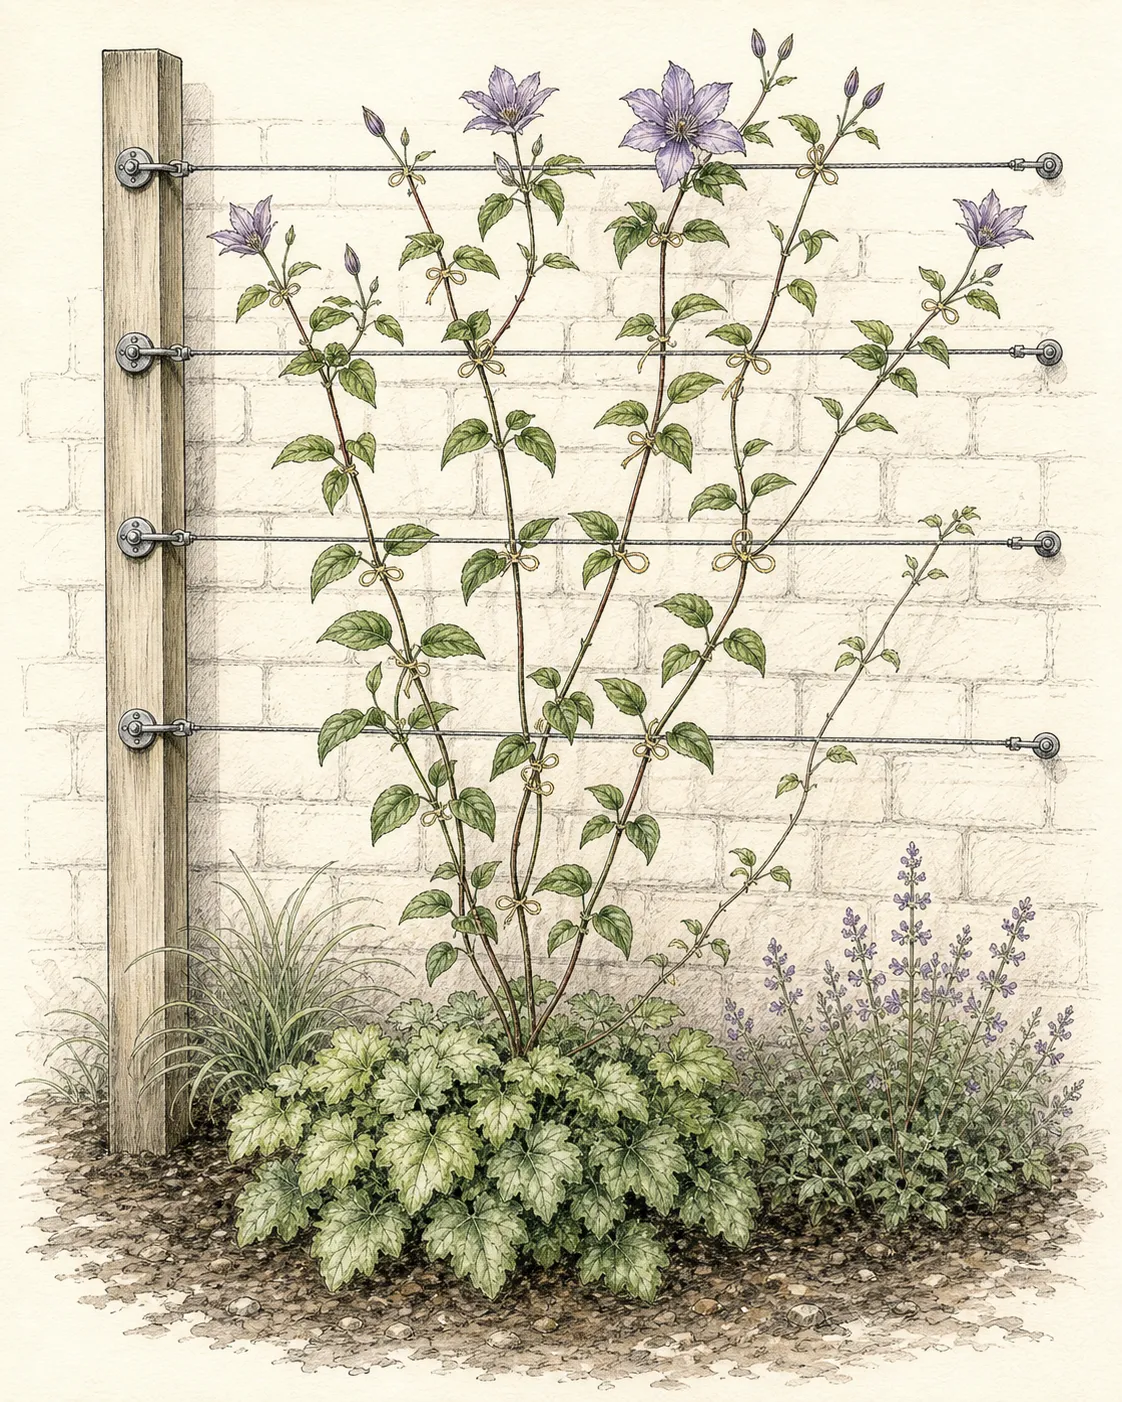
Keep the framework clear of neighboring shrubs until the clematis is attached. Training through a rose or open shrub can be attractive, but the host must be strong enough and its own pruning must remain possible. Distribute new shoots across several independent support routes. Reserve several independent routes so loss of one host stem does not collapse the entire vine.
Leave a deliberate open lane at the fan's center or edge for later access. New shoots will fill visible gaps quickly, but a completely packed grid becomes impossible to untie, diagnose, or prune without tearing leaves. The gap is functional, not failed coverage. As flowering begins, it also separates blooms and reduces the weight concentrated on one wire or small section of a companion shrub.
Tie below a node and leave room to thicken
Use soft ties only where petioles have not yet attached. Place a loose figure-eight or loop below a node so it supports the stem without rubbing the bud or pinching the leaf stalk. Leave room for thickening and movement. Wire, fishing line, and narrow plastic ties can cut soft tissue and become embedded before they are noticed.
Tie the support side more firmly than the plant side. The stem should be guided, not strapped immovably. Check the tie after wind and again as growth accelerates. Once nearby petioles have gripped the structure, remove redundant ties. A permanent forgotten loop can girdle a woody base even though it was loose when the shoot was green.
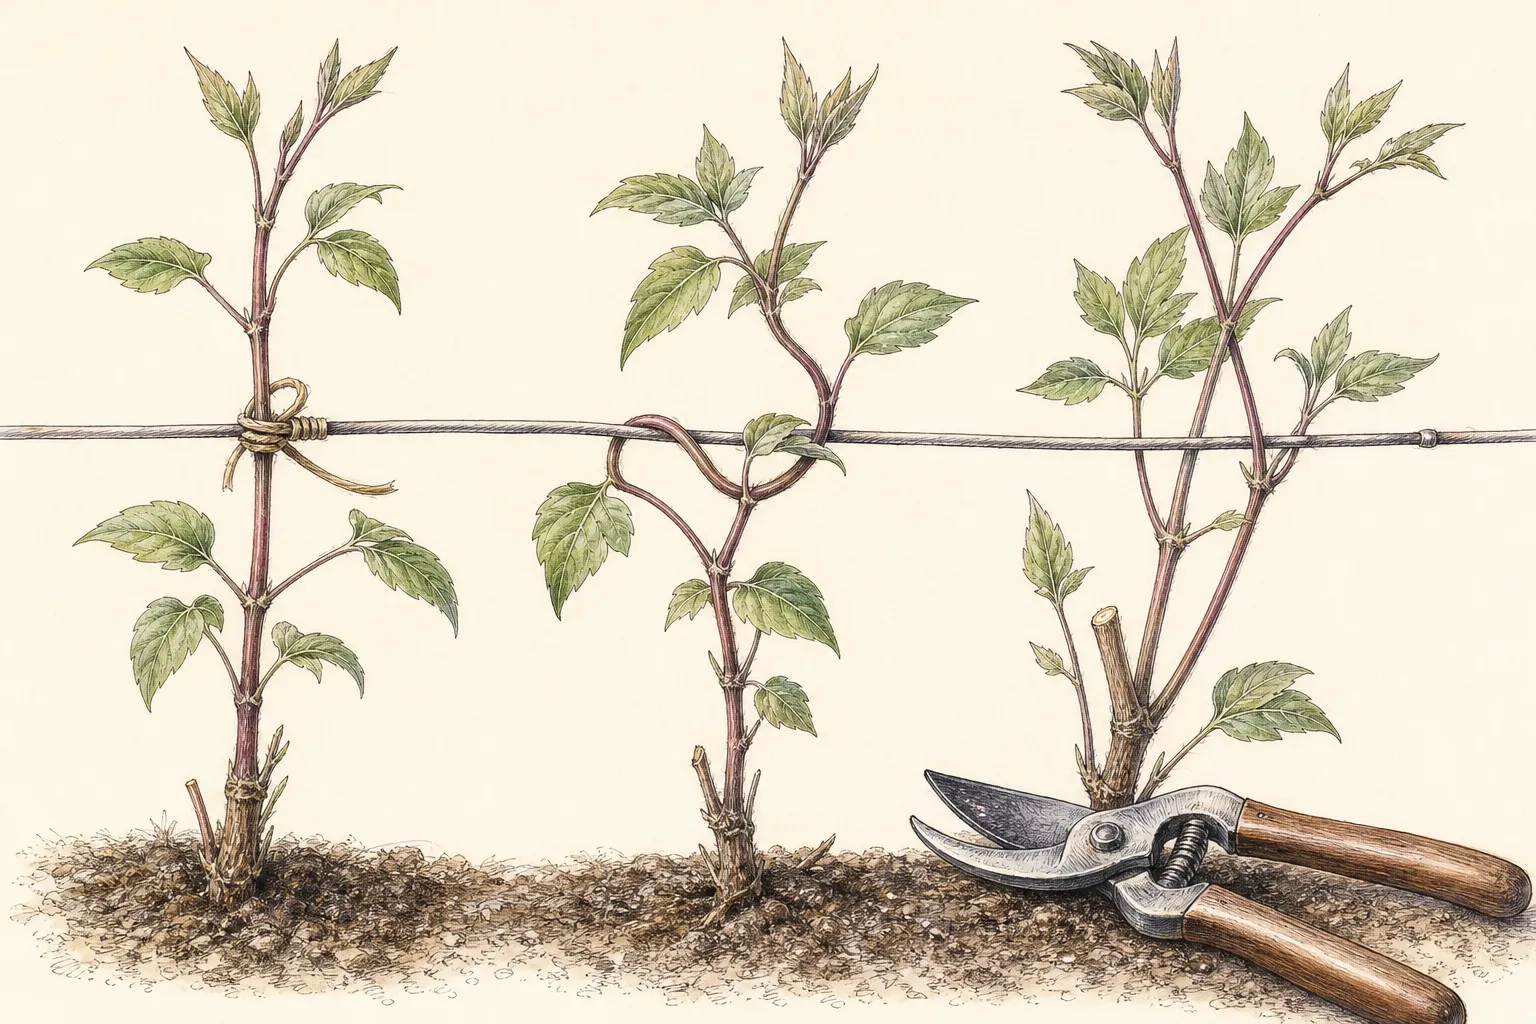
Place ties where they remain reachable. A hidden tie behind overlapping leaves cannot be inspected, and a tie high above safe reach creates a future ladder problem. Add another support wire or redirect the shoot within safe reach. Training is successful when routine release and pruning can be done from a stable position.
Check the first ties after a windy day. A loose loop can slide to a node, while an overlong tail can snag another shoot. Reposition the loop on an internode and trim excess tie material without cutting the stem. Where repeated wind pushes the whole vine away from the wall, strengthen the support or add more attachment points; tightening one tie simply transfers all movement to one fragile place.
Protect the base without burying it
Keep the root zone cool and evenly moist without adding soil over an established crown. Mulch around the base according to the species and local climate, leaving the stem entry visible. A stone or shallow-rooted companion may shade the soil, but it must not compress the crown, compete heavily for water, or hide emerging shoots from inspection.
Water deeply when the root zone is dry, especially while spring stems extend rapidly. Clematis prefers moist but well-drained soil; persistent saturation favors root problems and does not prevent wilt. Direct water to the root-zone soil and keep dense foliage dry. A dry surface alone is not enough—check below mulch before deciding the vine needs more.
Protect low shoots from feet, pets, mower lines, and string trimmers. A small guard can define the base, but it must remain open enough for air and new stems. Keep pots and heavy stones outside the visible crown. The lower few inches are the vine's renewal point and the route that every trained stem must safely cross.
Choose base companions by root competition as well as shade. A shallow, modest perennial can cool the soil without swallowing the clematis crown, but a vigorous groundcover or dense woody root system can compete for water and hide emerging stems. Keep a hand-width inspection space at the base, and use an open mulch layer where every spring shoot must be seen and assigned promptly.
Return as the vine accelerates
Return during rapid spring extension while shoots remain flexible. New petioles can secure themselves within days. Move shoots while they remain flexible, add a loose tie where a gap persists, and free growth heading behind the support. Short visits preserve the fan without repeated cutting.
Watch for a whole shoot that suddenly wilts while others remain healthy. Trace the affected stem before moving it through the crown. Trace the affected stem, cut diagnosed dead material carefully, and keep healthy shoots supported. Large-flowered hybrids are especially associated with clematis wilt, while mechanical breaks can look similar; pattern and stem inspection matter before broad removal.
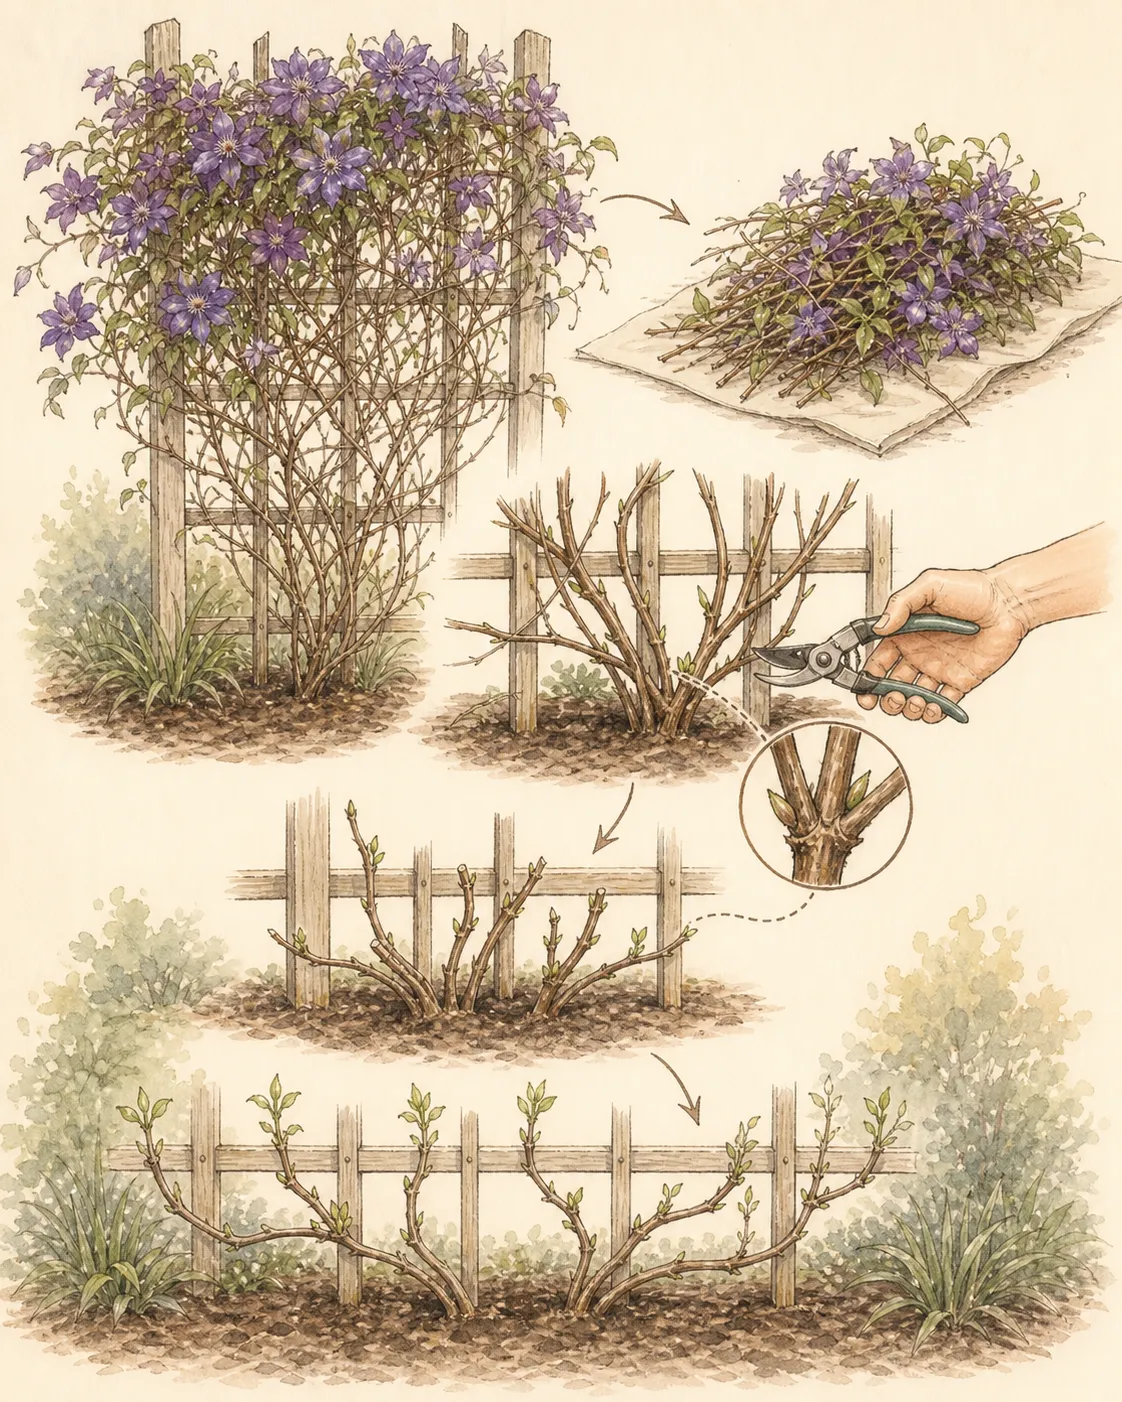
Keep pruning-group timing separate from training. Group 1 gets size control after flowering; Group 2 receives light correction around strong buds and after the first flush; Group 3 can be renewed low before new growth. Let the pruning group, not the ties, determine stem shortening. Record the routes and bloom positions so next year's pruning preserves the best framework.
Set a return interval from actual growth rate. A vigorous vine may need weekly guidance during warm spring weather, while a newly planted or cold-site clematis moves more slowly. Each visit should free one developing tangle, check ties, and extend the fan; it need not include cutting. Stop intensive visits once petioles hold the mature lanes, then inspect after storms and at the pruning window for that group.
After flowering, compare weight and attachment across the fan. A lane that peels from the support needs more slender grip points, while one secured by many petioles may need only obsolete ties removed. Record which shoots flowered and which support gaps remained empty. That evidence guides the next pruning-group cut and prevents spring training from rebuilding the same overloaded rope.
Steps
- Level
- moderate
- Time
- 20–45 minutes per vine
- Tools
- soft ties, small pruners, eye hooks and wire where appropriate
- Materials
- stable support with wall clearance
- 1Identify the vine
Recover the cultivar and pruning group from the label, bloom season, and retained stems. If identity remains uncertain, remove only dead or broken material, mark representative stems, and train them until the flowering pattern reveals old- or new-wood behavior.
- 2Strengthen the support
Test the trellis, posts, anchors, wall clearance, and wire ends before shoots load them. Add slender wire, mesh, or twiggy material that clematis leaf stalks can encircle, and create a secure temporary bridge from the crown to the main support.
- 3Free the shoots
Work from the crown outward. Hold each fragile shoot below a tangle, release leaves and petioles while supporting the shoot below the tangle, and keep inseparable healthy pairs together temporarily until they can be separated without damage.
- 4Assign an open fan
Assign an open fan before tying: outer shoots to the sides, central shoots upward, and intermediate stems through separate lanes. Use broad curves, avoid sharp bends at nodes, and keep routes clear of gutters, weak branches, and inaccessible pruning points.
- 5Tie loosely
Add soft loose ties below nodes only where petioles have not attached. Secure the support side, leave room for stem thickening, and place every tie where it can be checked. Remove redundant loops once the vine grips the structure.
- 6Protect the crown
Maintain a visible, cool, moist but drained root zone. Keep mulch, stones, companions, trimmers, and foot traffic off the crown and emerging stems, and water from actual moisture below the surface from measured moisture below the surface.
- 7Revisit weekly in rapid growth
Revisit during rapid growth, redirect flexible shoots, release hidden ties, and trace any sudden wilt before cutting. Record which trained stems flower and apply future Group 1, 2, or 3 pruning at its own biological time.
Related reading
Sources
- Clematis Pruning Guide. Royal Horticultural Society. Source record · Accessed 2026-08-30.
- How to grow clematis. Royal Horticultural Society. Source record · Accessed 2026-08-30.
- Vines for Maryland Gardens. University of Maryland Extension. Source record · Accessed 2026-08-30.
- How to grow clematis for long-lasting color in Oregon gardens. Oregon State University Extension Service. Source record · Accessed 2026-08-30.