Grow · container vacation care
Prepare a Container Garden for Vacation Without Guessing at Water
Group pots by real water use, test emitters over several days, reduce avoidable stress, and leave a simple written plan that protects roots without keeping every container saturated.
Published Last updated
In this guide
- Start with the length and risk of the absence
- Test the watering plan before the unattended interval
- Group containers by measured dry-down
- Correct drainage and root-zone contact
- Choose a delivery method that fits each group
- Run a full test before departure week
- Reduce avoidable demand without stripping plants
- Write instructions for decisions, not chores
- Prepare for system failure
- Return by inspecting before resuming ordinary care
- Test the plan during a realistic hot interval
- Separate indoor and outdoor vacation plans
- Steps
Start with the length and risk of the absence
A weekend, a week, and several weeks require different plans. Record departure, return, expected weather, sun exposure, container count, and whether a reliable person can visit. A small glazed pot in shade may need little intervention for two days, while a hanging basket in wind can dry rapidly. Do not buy one device before identifying the plants that can actually fail during the interval.
Separate high-consequence plants: new transplants, small pots, hanging baskets, root-bound specimens, and containers already wilting daily. Diagnose drainage, roots, and health now. A system cannot make an undersized pot, blocked hole, or decaying root ball reliable. Repot only with enough time for recovery and when the plant tolerates it; a disruptive move immediately before departure adds risk.
Use seasonal forecasts as context, not certainty. A rain prediction does not water containers under eaves, and a storm can oversaturate cachepots. Build a plan that remains safe if weather is somewhat hotter, cooler, wetter, or windier than expected. The adjustment range belongs in the written instructions.
Test the watering plan before the unattended interval
Group pots from observed drying and the actual absence, then test delivery and drainage under an ordinary demanding cycle before leaving. Give a helper one clear decision page and a response limit for a failed setup. On return, inspect soil before watering and remove or reset temporary automation so an old vacation cycle cannot continue unnoticed.
Group containers by measured dry-down
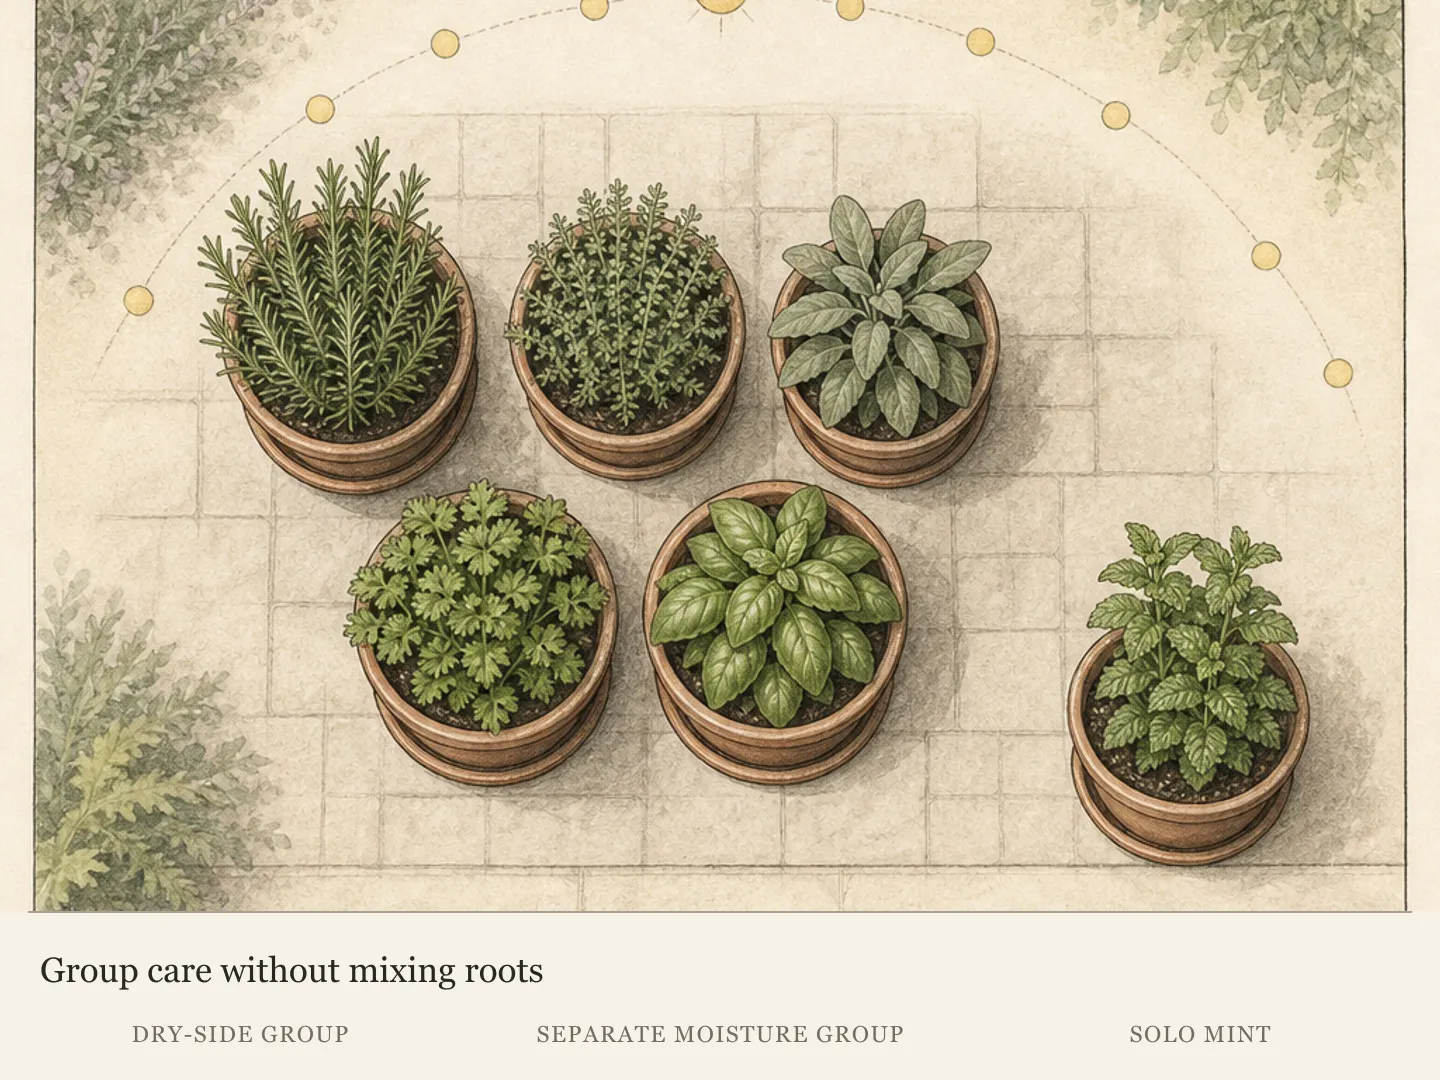
For several normal days, check each pot at the same times and record when it reaches the watering point. Group frequent, moderate, and low water users. Pot size, material, plant canopy, root fill, wind, and light all influence the result. Two pots containing the same species can belong to different groups because one is root-bound and the other has a larger shaded volume.
Move groups only where every plant tolerates the new light and airflow. Clustering can reduce wind and simplify tubing, but deep shade may stretch sun plants and close spacing may reduce circulation. Keep foliage from pressing against hot walls and preserve access to drainage. Hanging baskets lowered to a stable stand can be easier to water, provided their light and trailing stems remain suitable.
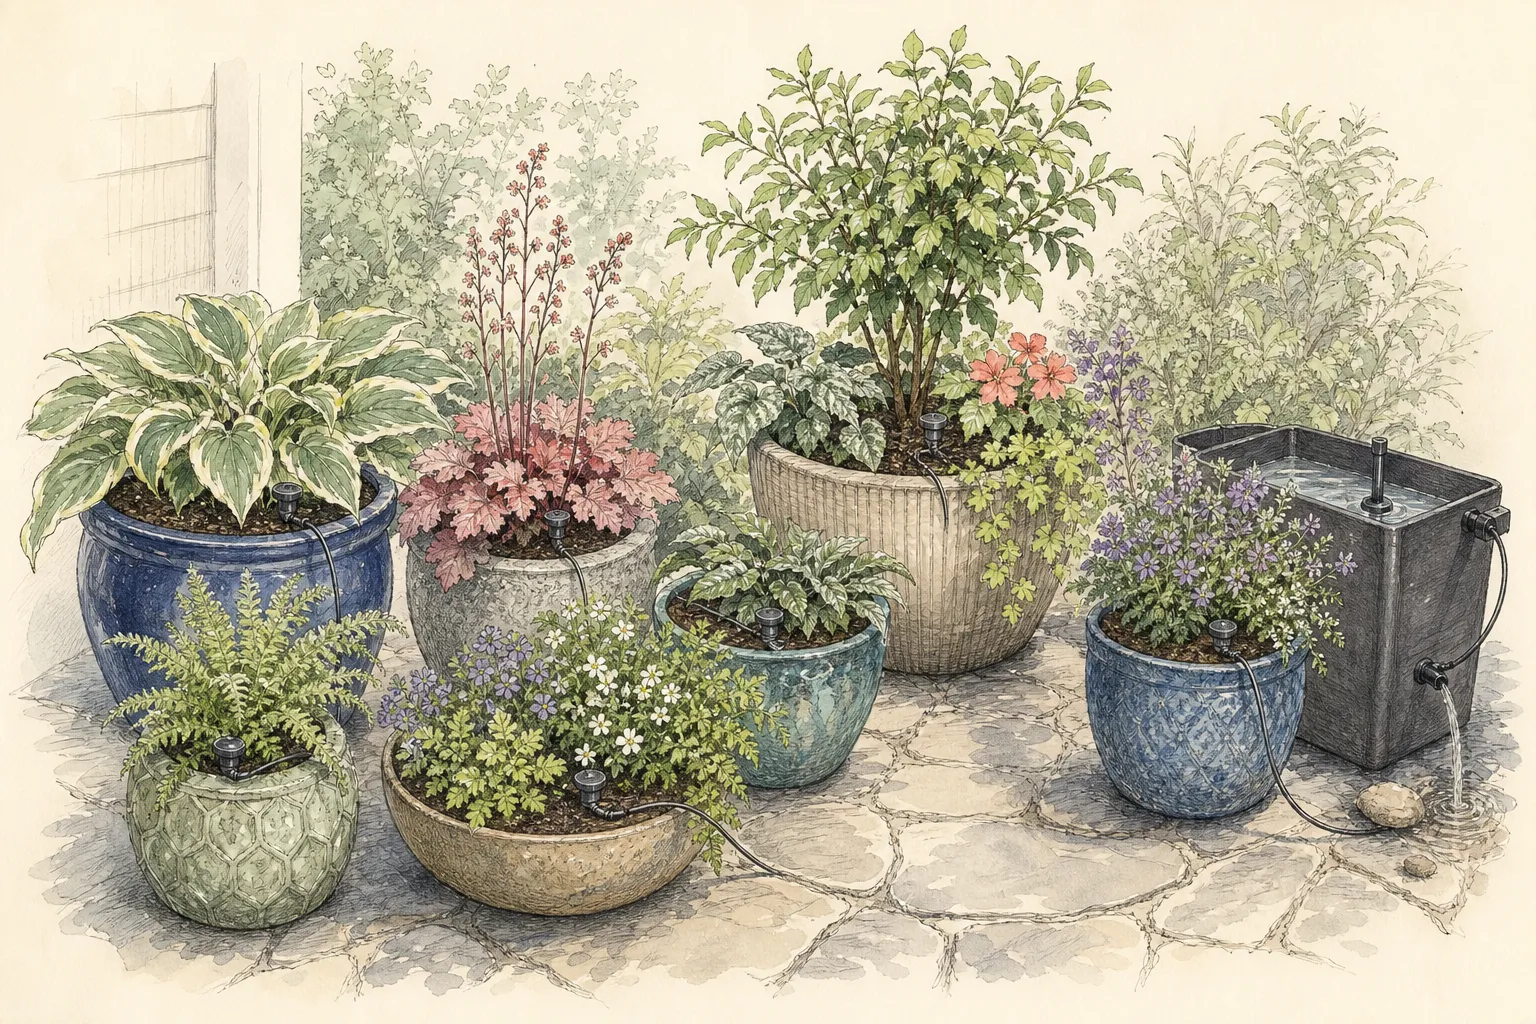
Label each pot or place it on a simple map. Use colored stakes for groups and mark exceptions. A helper should not need to identify cultivars or interpret a crowded patio. The map also exposes forgotten pots on steps, rails, and windowsills that would otherwise remain outside the irrigation zone.
Correct drainage and root-zone contact
Clear drainage holes and empty standing saucers where the plant should not sit in water. Remove decorative cachepots or elevate inner pots so runoff can leave. Probe the center and lower mix. Water can run down a gap at the wall while the root ball remains dry, or a reservoir can appear empty while the lower mix stays saturated.
Rewet hydrophobic mix in stages before testing automation. Apply a small amount, pause, and repeat until the center accepts water. Add a wetting agent only under product and local guidance. Do not solve dry-down by sealing the surface in plastic. Roots need air, and trapped heat can turn a water-saving idea into injury.
Top up settled mix only when crowns and stem bases remain at correct grade. A light surface mulch may slow evaporation in large containers, but keep it away from stems and do not hide emitters or moisture checks. Small pots can become too wet under a deep layer. Test the actual result rather than assuming every mulch conserves the right amount.
Choose a delivery method that fits each group
A trusted person with a measured plan is often the most adaptable option. Provide a watering wand, clear map, and a defined method for checking moisture. Avoid instructions such as water well or keep moist. State where to probe, how long or how much to apply, and which pots must drain before being returned to a cachepot.
Drip emitters can serve many containers when pressure, output, tubing length, and individual pot needs are tested. Use a separate adjustable or selected emitter for each root zone and anchor it where water spreads through the mix. A single line passing over several pots does not guarantee equal delivery. Include a filter and pressure regulation when the system requires them.
Wicks, reservoirs, and capillary mats suit some plants and containers but can keep others too wet. Test for the full absence length before relying on them. A bottle inverted into mix may empty immediately through a channel or remain blocked. No device should enter the plan because a demonstration looked convincing in dry potting mix.
Run a full test before departure week
Install the system early enough to observe several hot and cool cycles. Time each emitter into a measuring cup and record output. Then run it in the pot, allow drainage, and probe moisture later. The cup measures hardware; the soil check measures whether that output matches the root zone. Both are needed.
Watch the farthest and highest emitters for pressure differences, clogged outlets, and siphoning. Secure tubing against pets, birds, wind, and foot traffic. Keep connections shaded where heat degrades them and ensure no line can spray a door, electrical equipment, or building surface. Replace weak parts before the test period, not on departure morning.
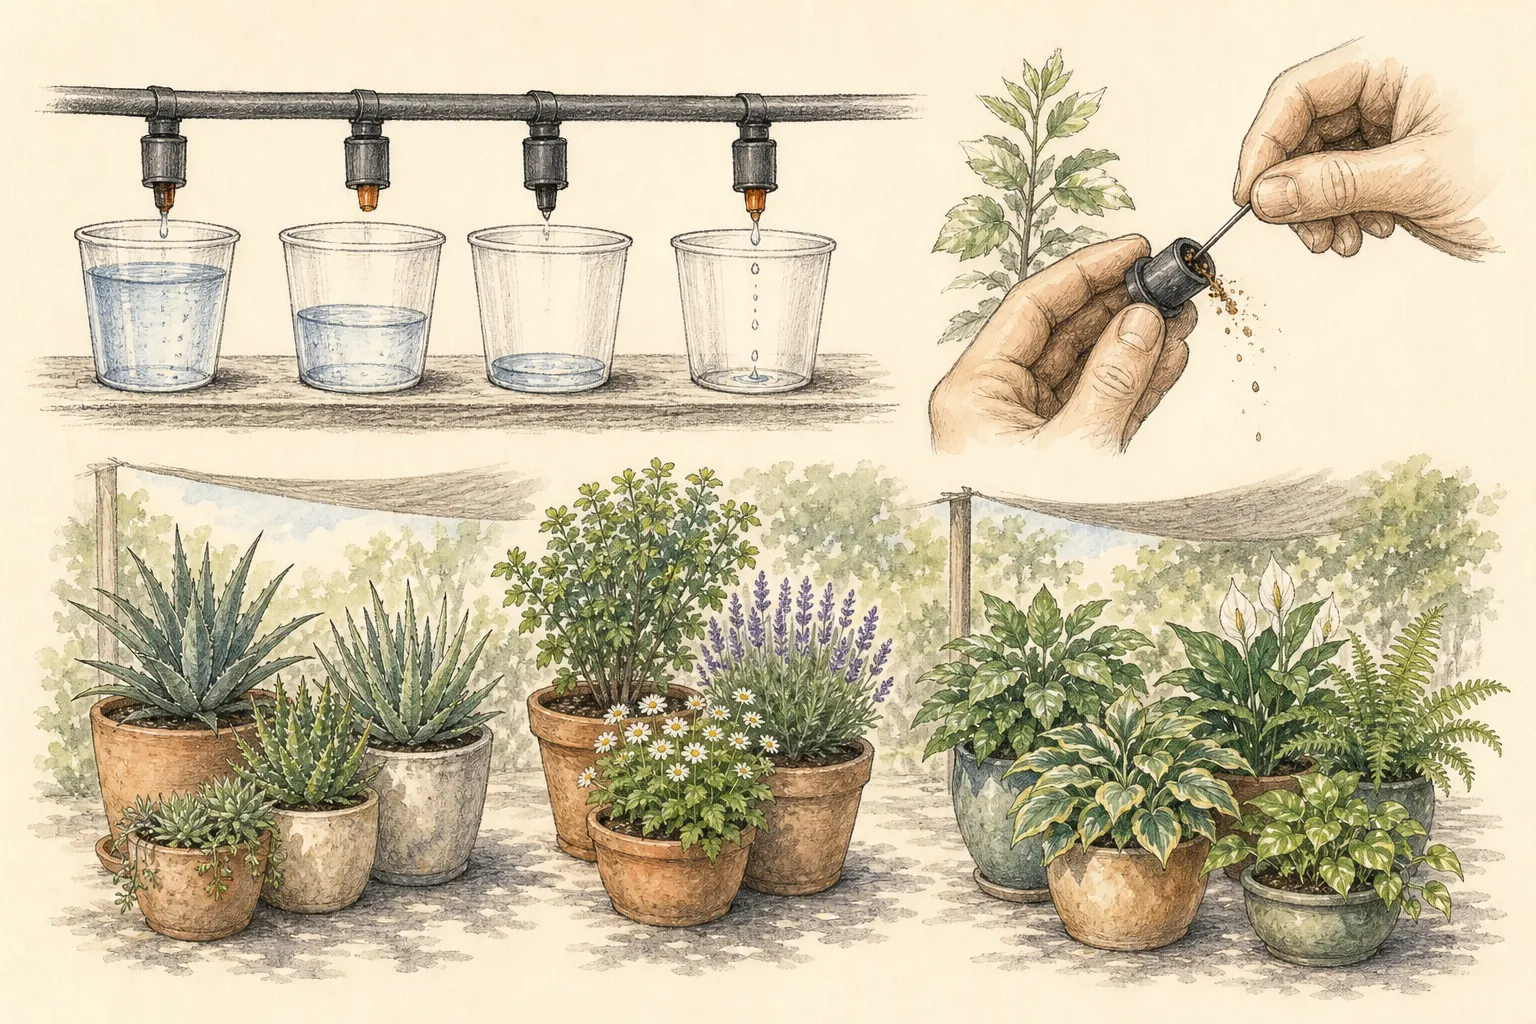
Simulate the complete absence. Follow only the planned schedule for the same number of days if time permits, recording wilt, drainage, and reservoir use. Adjust one group at a time. A system that keeps every pot saturated during the test has not passed merely because no plant wilted.
Reduce avoidable demand without stripping plants
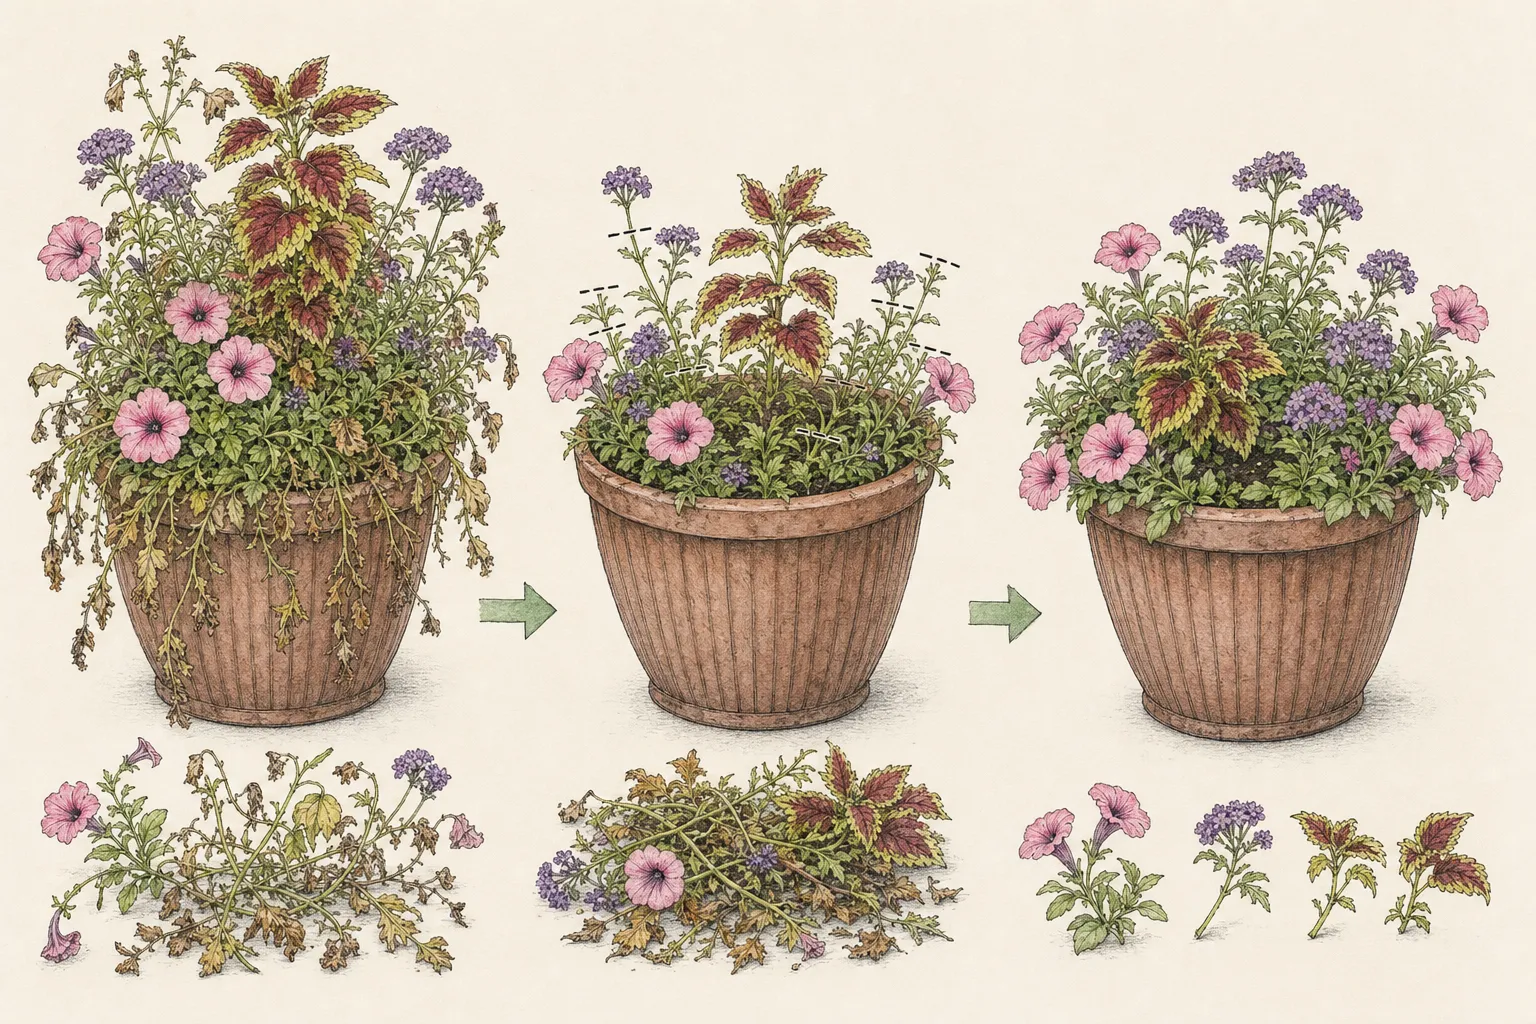
Deadhead spent flowers, remove diseased or broken tissue, and lightly shorten species that respond well to pinching. Do not perform a severe unknown cutback immediately before leaving. Healthy foliage supports roots and shades the container. Large pruning can change water use abruptly and create tender regrowth that the unobserved system must manage.
Move only compatible high-risk pots out of harsh afternoon sun or strong wind. Preserve enough light for their species. Shade pot walls with another container or a breathable screen rather than wrapping them in heat-trapping material. Keep outdoor plants outdoors unless their indoor conditions and pest inspection are fully appropriate.
Stop unneeded fertilizer. Salts and soft growth increase risk, and a timer cannot correct overfeeding. Continue a normal established program only where it remains due and measured. Harvest ripe produce and remove fallen fruit or petals that would decay during the absence.
Write instructions for decisions, not chores
Give the helper one page: map, group colors, check days, probe method, application amount or duration, and signs to call about. Include where the shutoff is, how to bypass the timer, and what to do after significant rain. Avoid a paragraph for every pot. Exceptions should be few and marked physically.
State what not to do: no fertilizer, no pruning, no moving pots, and no extra water merely because the day is hot if the root zone remains wet. Provide contact information and permission boundaries for replacing a broken emitter or moving a pot into temporary shade. The helper’s job is stable care, not garden redesign.
Photograph the setup and healthy plants on departure day. This gives a visual baseline and shows emitter positions. Ask for one photo after the first cycle if the absence is long. A remote photograph cannot replace a moisture check, but it can reveal a collapsed line, tipped pot, or broad wilt that needs a visit.
Prepare for system failure
Keep a manual backup available: filled watering can, spare emitter, tubing connector, and written shutoff instructions. A person who can visit after an alert is more valuable than an app with no responder. If no helper exists, reduce the number of high-risk pots by relocating them to a compatible tested group or arranging professional care.
Do not create a large open reservoir that poses drowning, mosquito, spill, or structural risk. Cover and secure storage according to system instructions and local requirements. Keep electrical timers and pumps protected and rated for their location. Gravity systems need stable supports and must not be placed where failure can flood a building.
Set the timer’s power-loss behavior and test it. Replace batteries where applicable and keep manual settings recorded. Smart devices need a local fallback. The garden should continue a safe conservative schedule when internet access fails instead of defaulting to constant water or none.
Return by inspecting before resuming ordinary care
On return, check each root zone, drainage, and plant condition before watering everything. Some pots may be dry, others saturated. Turn off automation during inspection. Mark wilt, yellowing, salt crust, fallen tubing, and empty reservoirs. Correct hardware before changing fertilizer or pruning.
Restore plants to their normal positions gradually if they were moved, especially when light changes. Remove only dead tissue and allow stressed plants to stabilize. Do not compensate for a dry pot with repeated flooding or for pale growth with immediate feeding. Rewet in stages and follow plant-specific recovery.
Compare actual water use with the test. Record which group needed more, which stayed wet, and which device failed. Keep the successful map and hardware for future trips. A vacation system becomes efficient after evidence, but it should still be retested as plants grow and seasons change.
Test the plan during a realistic hot interval
A cool-week test can conceal inadequate capacity. Use a naturally warm forecast or safely simulate the planned grouping and shade during the hottest ordinary conditions expected before departure. Monitor the highest-demand pots twice daily. Do not increase every emitter from one basket’s response; adjust its group or container specifically.
Measure reservoir depletion and faucet runtime against the full absence. Leave a safety margin that does not depend on an overflowing open container. If supply cannot cover the expected interval, arrange a refill visit or reduce the number of automated high-risk pots. Guessing that rain will close the gap is not a backup.
Repeat one cycle after the adjustment and inspect drainage. The passing condition is an acceptably moist root zone without standing water or chronic saturation. Record the hottest successful interval on the instruction page so the helper understands when an extra check is warranted.
Separate indoor and outdoor vacation plans
Houseplants have lower wind and often lower light, while outdoor pots face rain, heat, and animals. Do not connect them to one schedule through an open door or move outdoor plants indoors by default. Inspect pests and confirm each plant’s light, temperature, and humidity before any relocation.
Indoor cachepots need explicit drainage instructions. A helper should remove the inner pot, water, let it drain, and return it only when safe. Outdoor containers may need saucers removed before storms. Mark these opposing rules visually so one habit does not saturate half the collection.
Keep indoor reservoirs away from furniture, outlets, and floors that cannot tolerate leaks. Test wick and capillary systems on the exact surface with a catch tray. The same standard applies outdoors near doors and foundations: no plant is valuable enough to justify an unobserved flood risk.
Steps
- Level
- moderate
- Time
- Several short setup sessions over one to two weeks
- Tools
- Soil probe, Timer, Measuring cups, Watering wand
- Materials
- Labels and map, Tested emitters or reservoirs, Spare connector, Written instructions
- 1Rank pots by absence risk
Record trip length, exposure, weather range, and available helper. Flag hanging baskets, small pots, new transplants, root-bound plants, and containers already needing daily rescue. Correct blocked drainage or root failure before choosing automation.
- 2Measure and group dry-down
Check pots at consistent times for several days and group frequent, moderate, and low water users. Move only plants with compatible light and airflow, label every group, and map isolated pots that could be forgotten.
- 3Choose a delivery method per group
Use a measured helper plan, individual drip emitters, or tested reservoir methods according to plant and container behavior. Keep each pot as a separate root zone and reject gadgets that have not completed a full wetting and drainage test.
- 4Measure output and root response
Time emitters into cups, then run them in the pots and probe later. Check far lines, pressure, clogging, siphons, tubing security, drainage, and reservoir use. Simulate the absence and adjust only from observed moisture and plant response.
- 5Reduce avoidable stress
Deadhead, remove disease and fallen material, stop unnecessary fertilizer, and give compatible high-risk pots relief from extreme wind or afternoon heat. Avoid severe pruning or unsuitable deep shade immediately before leaving.
- 6Write one decision page
Provide the map, check days, probe point, duration or amount, rain adjustment, shutoff, backup parts, and call signs. State no fertilizer, redesign, or extra watering of already wet pots. Photograph healthy plants and emitter positions.
- 7Inspect on return before watering
Pause automation and check each root zone, drainage, and device. Rewet dry mix in stages, allow saturated pots to drain, and restore moved plants gradually. Record group performance and retest as plants, roots, and weather change.
- 8Prove the hottest ordinary cycle
Test during a realistic warm interval, monitor the highest-demand group twice daily, and measure supply depletion. Adjust individual pots or groups instead of increasing every outlet. Repeat until roots remain suitably moist without standing water.
- 9Separate indoor drainage rules
Create distinct maps for houseplants and outdoor containers. Mark cachepots that must be drained out of their covers, outdoor saucers that should remain empty, and every relocation with suitable light and pest inspection.
- 10Protect buildings and surfaces
Place reservoirs, wicks, pumps, and catch trays where leaks cannot damage floors, electrical equipment, doors, or foundations. Run the exact setup long enough to expose siphons and overflow before leaving.
- 11Set a no-response escalation point
Write the condition that triggers a helper call: broad morning wilt, standing water, an empty reservoir before schedule, a leaking supply, or multiple blocked emitters. Give one safe temporary action for each and keep redesign decisions for the owner. Clear escalation prevents a well-meaning helper from repeatedly watering an already saturated collection.
- 12Remove temporary hardware after return
Once normal care resumes, take out unused wicks, bottles, temporary shade, extra tubing, and reservoir supports. Leaving emergency equipment in place creates hidden wet zones, trip hazards, and an obsolete schedule that may be activated accidentally.
- 13Date the return reset
Record when automation was paused, temporary hardware removed, and ordinary checks resumed. This prevents a timer from restarting an obsolete vacation cycle after weather, plant size, and container positions have changed.
Related reading
Sources
- Vacation Plant Care. University of Florida IFAS Extension. Source record · Accessed 2026-08-19.
- Vacation Care for Landscape and House Plants. University of Georgia Cooperative Extension. Source record · Accessed 2026-08-19.
- Tips for Maintaining Container Plants When on Vacation. Johnson County K-State Research and Extension. Source record · Accessed 2026-08-19.