Grow · container grown flowering shrub planting
Plant a Container-Grown Flowering Shrub at the Root Flare
Inspect the nursery root ball, correct circling roots, set the uppermost roots or root crown at the correct grade, and establish a flowering shrub in compatible site soil.
Published Last updated
In this guide
- Choose the position at mature size
- Set planting depth from the root structure, then check stability
- Read the root ball before digging deeply
- Dig broad and preserve the floor
- Open and correct the nursery root ball
- Set the flare on a firm base
- Mulch and water the root zone
- Stake only for a diagnosed need
- Audit the first growing season
- Steps
Choose the position at mature size
Choose the flowering shrub by mature size, light, soil, hardiness, and bloom habit before preparing a hole. Measure clearance from paths, windows, utilities, and neighboring crowns at the cultivar's mature spread. A nursery container shows shipping size, not the root and branch space the shrub will occupy. Repeated pruning cannot permanently convert a large cultivar into a compact foundation plant.
Read the full seasonal site. Spring sun may become summer shade after trees leaf out, and a sheltered wall can be warmer and drier than an open border. Match the shrub's flowering wood and heat tolerance to that exposure. Planting technique cannot compensate for an azalea in alkaline soil, a moisture-loving shrub on a dry bank, or a cold-tender cultivar beyond its range.
Choose a planting window that lets the shrub establish without avoidable heat, drought, frozen soil, or saturation. Clemson's South Carolina guidance favors fall root growth, while colder regions use their own seasonal recommendations. Container-grown stock can be planted across a broad season, but roots still need workable soil and attentive moisture before extreme weather.
A shrub sold in full bloom may require extra care even when the calendar is acceptable. Flowers and soft shoots increase water demand while roots remain confined to nursery medium. Keep the root ball shaded and moist during preparation, plant promptly, and remove only broken tissue. The immediate objective is root establishment; preserving every fading display flower is secondary to preventing desiccation and root damage.
Set planting depth from the root structure, then check stability
Expose the true flare and inspect container-shaped roots before finalizing the hole. Correct the root arrangement using the method appropriate to the stock, then seat the ball and backfill without burying the flare. Stake only when the correctly planted ball still needs support, and recheck grade, drainage and moisture after weather before making cosmetic pruning changes.
Read the root ball before digging deeply
Slide the shrub from its container before finalizing hole depth. Support the root ball and stems; never lift by one branch. Check whether roots hold the nursery medium together, whether the ball is wet, dry, or sour-smelling, and whether a rigid pot shape has been preserved by dense roots. A collapsing dry ball and a waterlogged anaerobic ball need correction before planting.
Find the uppermost structural roots or root crown by removing excess potting medium from the top. A single-stem shrub may show a clear trunk flare; a multi-stem shrub may present several stem bases and top roots without one tree-like flare. The correct grade follows those top roots and the species' crown, not the unverified top surface of nursery mix.
Inspect all sides and the bottom for circling, kinked, descending, or matted roots. Penn State explains that container roots turn at pot walls and can later girdle stems, while the soilless nursery medium may dry rapidly after planting. Fine outward roots can be teased free; heavy woody circles need clean correction or, when damage is extreme, replacement stock.
Reject a shrub whose trunk or crown is deeply buried beyond practical correction, whose major roots are permanently girdled, or whose root ball smells of rot and collapses in the hand. A flowering top can be temporarily attractive while the root system is structurally poor. Inspect at purchase when possible and exchange compromised stock before a permanent bed is built around it.
Resolve the apparent source conflict by plant form. Minnesota's consumer article says a shrub may be placed at root-ball depth without locating a tree flare, while Clemson asks gardeners to find uppermost roots and any discernible flare. The shared safe decision is to verify the upper root or root-crown position. Use a visible flare on a single-stem form, and avoid inventing one on a naturally multi-stemmed crown.
Dig broad and preserve the floor
Measure depth from the topmost structural roots to the firm bottom of the root ball after excess medium and defects are addressed. Dig no deeper than that distance. Clemson places upper roots level with or slightly above final grade and leaves the hole floor undisturbed. Loose soil beneath the ball settles after watering and buries the crown.
Make the hole broad enough for corrected roots to enter loosened site soil. Clemson recommends two to five times the root-ball width in its regional protocol; the practical extent depends on soil, bed, and nearby structures. Widening improves lateral access. Extra depth does not. Roughen glazed clay sidewalls and remove construction debris without creating a polished bowl.
Correct drainage across the site before planting. In poorly drained or compacted soil, Clemson raises the ball about 2–4 inches and grades site soil up to the exposed sides; this is a regional technique, not permission to perch roots dry in every climate. A persistent wet low point may require a raised bed, designed drainage, or a different shrub.
Keep width and depth as separate measurements. Clemson's two-to-five-times width describes loosened lateral soil, not an equal enlargement downward. The firm center remains at the corrected root-ball height while sides flare outward. Where paving or established roots limit that width, choose a smaller plant or different site and keep corrected roots extended.
Open and correct the nursery root ball
Start with moderate root defects. Loosen fine roots around the outside and spread them radially. Cut individual woody roots where they begin circling, using clean sharp pruners and preserving as many outward-oriented roots as possible. Do not tear the root mat into ragged strips; clean cuts regenerate more predictably and keep the crown connected to a useful root system.
For a severely pot-bound shrub, Clemson advises shaving the outer 1–2 inches of the ball and then teasing or pruning remaining circles; Penn State likewise supports slicing or shaving container-grown root systems. Apply that intervention to a vigorous root-bound ball, not automatically to every soft young root system. Replace stock when correction would remove most functional roots.
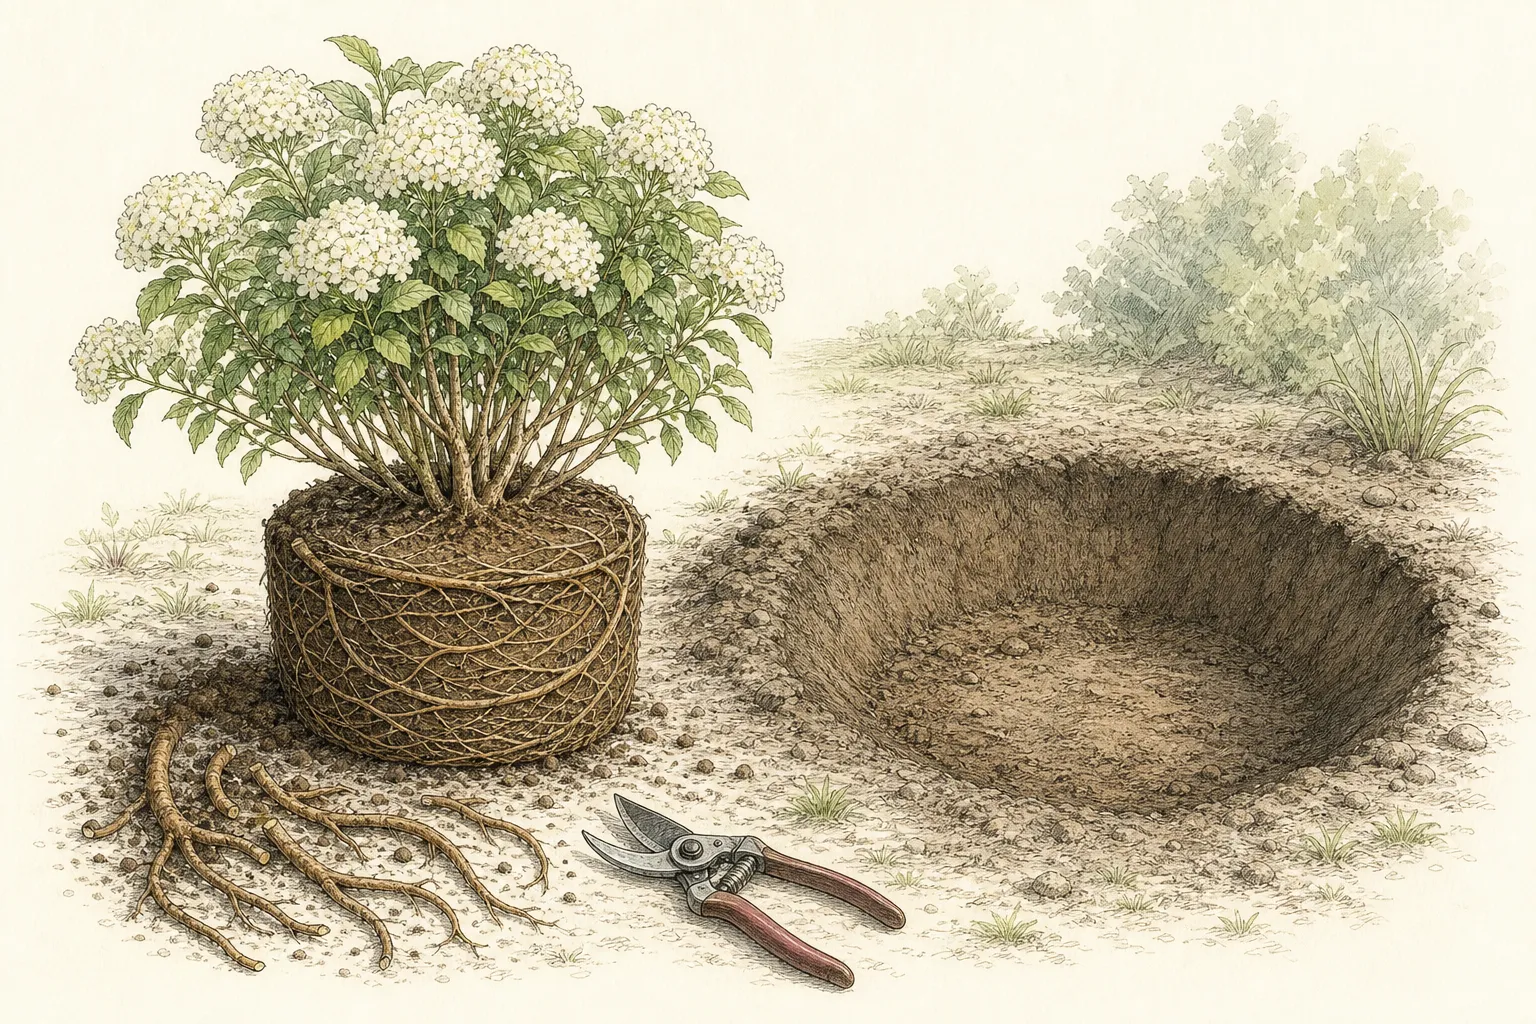
Root washing can expose hidden kinks and buried roots in suitable shrubs, but Clemson limits the method with fall planting and close water management. It is a deliberate alternative, not a universal extra step. Keep roots wet and shaded during the procedure, arrange them radially in the hole, and recognize that removing all nursery medium increases immediate moisture responsibility.
Recheck root-ball height after correction. Removing buried medium or shaving roots changes the dimension used to dig the hole. Set the corrected ball in place and verify top roots before backfill. A hole dug to the original container height may now be too deep, and pulling the shrub upward after filling creates voids beneath the root mass.
Keep corrected roots damp and shaded while the hole is adjusted. Root shaving exposes new surfaces and root washing removes the moisture buffer of potting mix, so the preparation sequence matters. Complete site work first, perform the chosen correction once, and plant directly. Leaving a corrected ball on a sunny tarp creates the desiccation stress the intervention was meant to prevent.
Set the flare on a firm base
Place the corrected root ball on the firm floor with upper structural roots at or slightly above surrounding grade. Center the mature crown in its reserved space and orient the best framework without twisting roots. A multi-stem shrub can be naturally asymmetric; correct grade and root distribution matter more than making every stem appear vertical.
Backfill with compatible excavated soil unless a broad bed amendment supported by soil testing was prepared in advance. Clemson warns that heavily amended individual holes can keep roots inside a contrasting pocket. Break clods, fill in lifts, and firm gently by hand. Keep soil off top roots and stem bases throughout the operation.
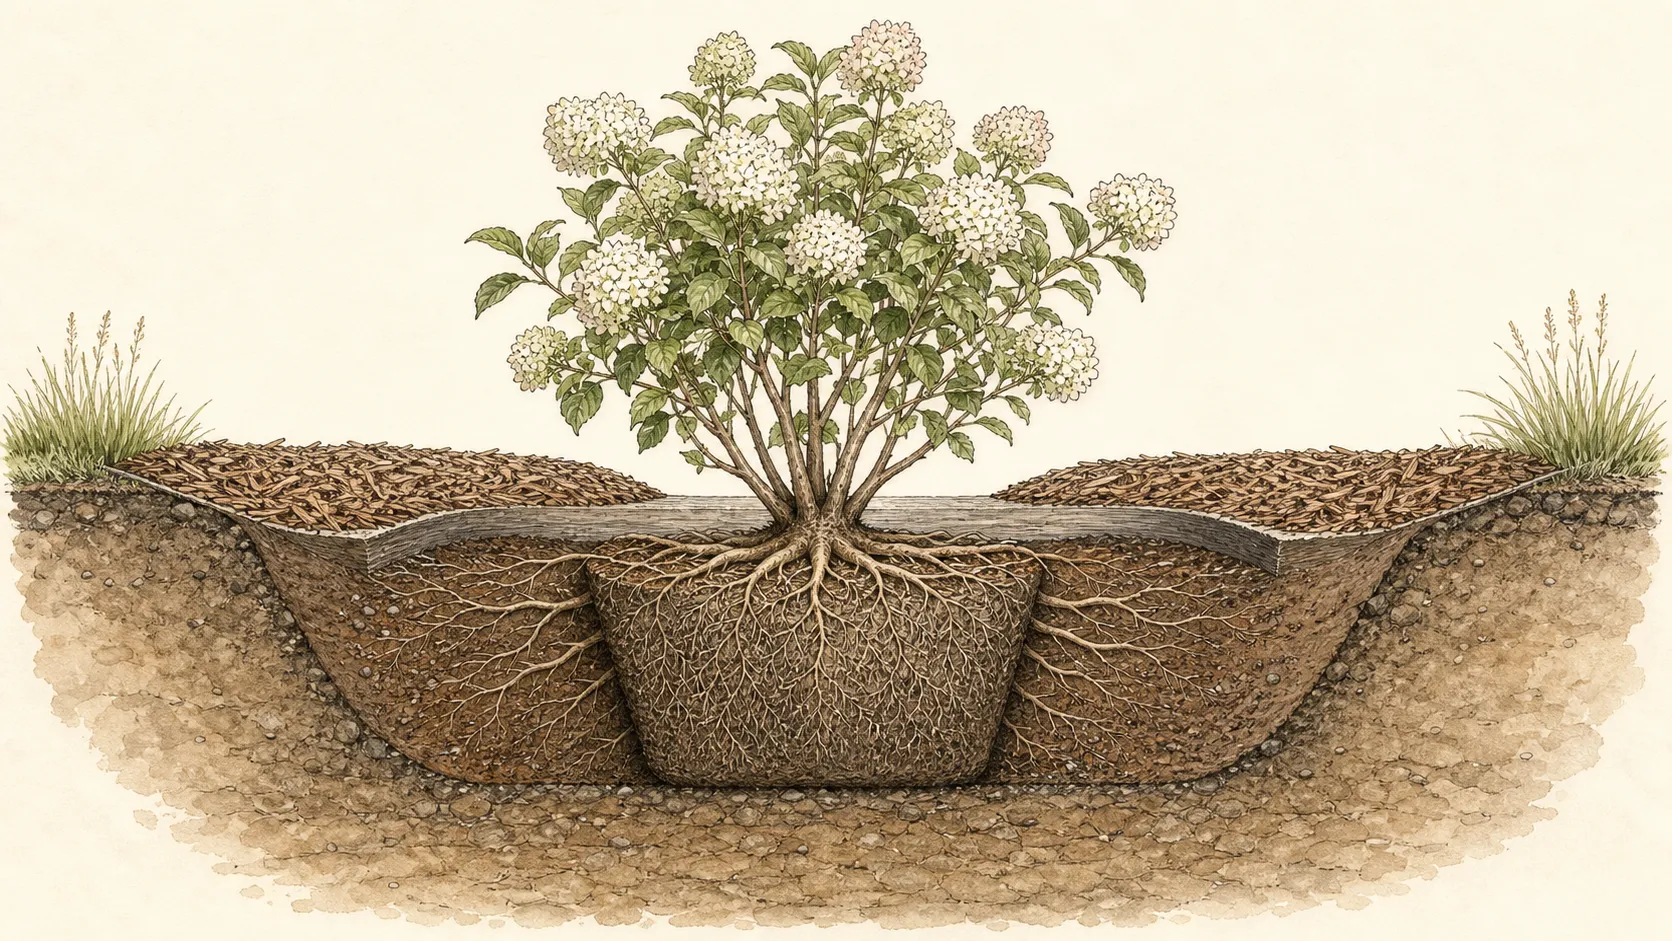
Water once to settle soil and expose voids, then recheck grade from several sides. If the ball sinks, lift and rebuild the firm base; adding soil over the top only buries the crown. Shape a continuous draining surface to the original bed. On a slope, support the lower side without constructing a basin that holds water against stems.
Check that no adventitious roots or residual nursery mix have been mistaken for the true upper root system. Clemson notes that deeply potted shrubs can form roots along buried stems; those do not automatically define correct grade. Expose the structural transition before measuring. When uncertainty remains on valuable stock, seek local Extension or arboricultural help before committing the crown to a permanent depth.
Mulch and water the root zone
Apply a broad 2–3 inch organic mulch layer over disturbed soil, leaving several inches clear around stems and crown. Mulch reduces weeds and moderates moisture; contact against bark raises stem-rot risk and hides settling. Extend a low layer toward the outer root zone. Keep turf roots outside the immediate establishment zone.
Monitor the original root ball and surrounding soil separately. Penn State notes that soilless nursery medium can dry rapidly after planting even when landscape soil looks damp. Push a finger or probe into both zones. Water slowly across the root ball when it is drying, then allow drainage; saturation and drought can produce similar wilt.
Use a soil-test recommendation before fertilizing. Newly cut roots and an establishing shrub need oxygen, moisture, and contact more than concentrated nutrients. Avoid fertilizer in the planting hole. If the species later requires feeding for flowering, apply it at the regional time and rate after establishment, keeping the product off stems and following its label.
Expect the nursery core and site soil to converge slowly. During the first months, probe just inside the old ball and just outside it. A wet landscape bed can surround a dry bark-based core, while a dense wet core can sit inside drier loam. Apply water where roots are active and let both zones drain; surface color alone cannot describe this interface.
Stake only for a diagnosed need
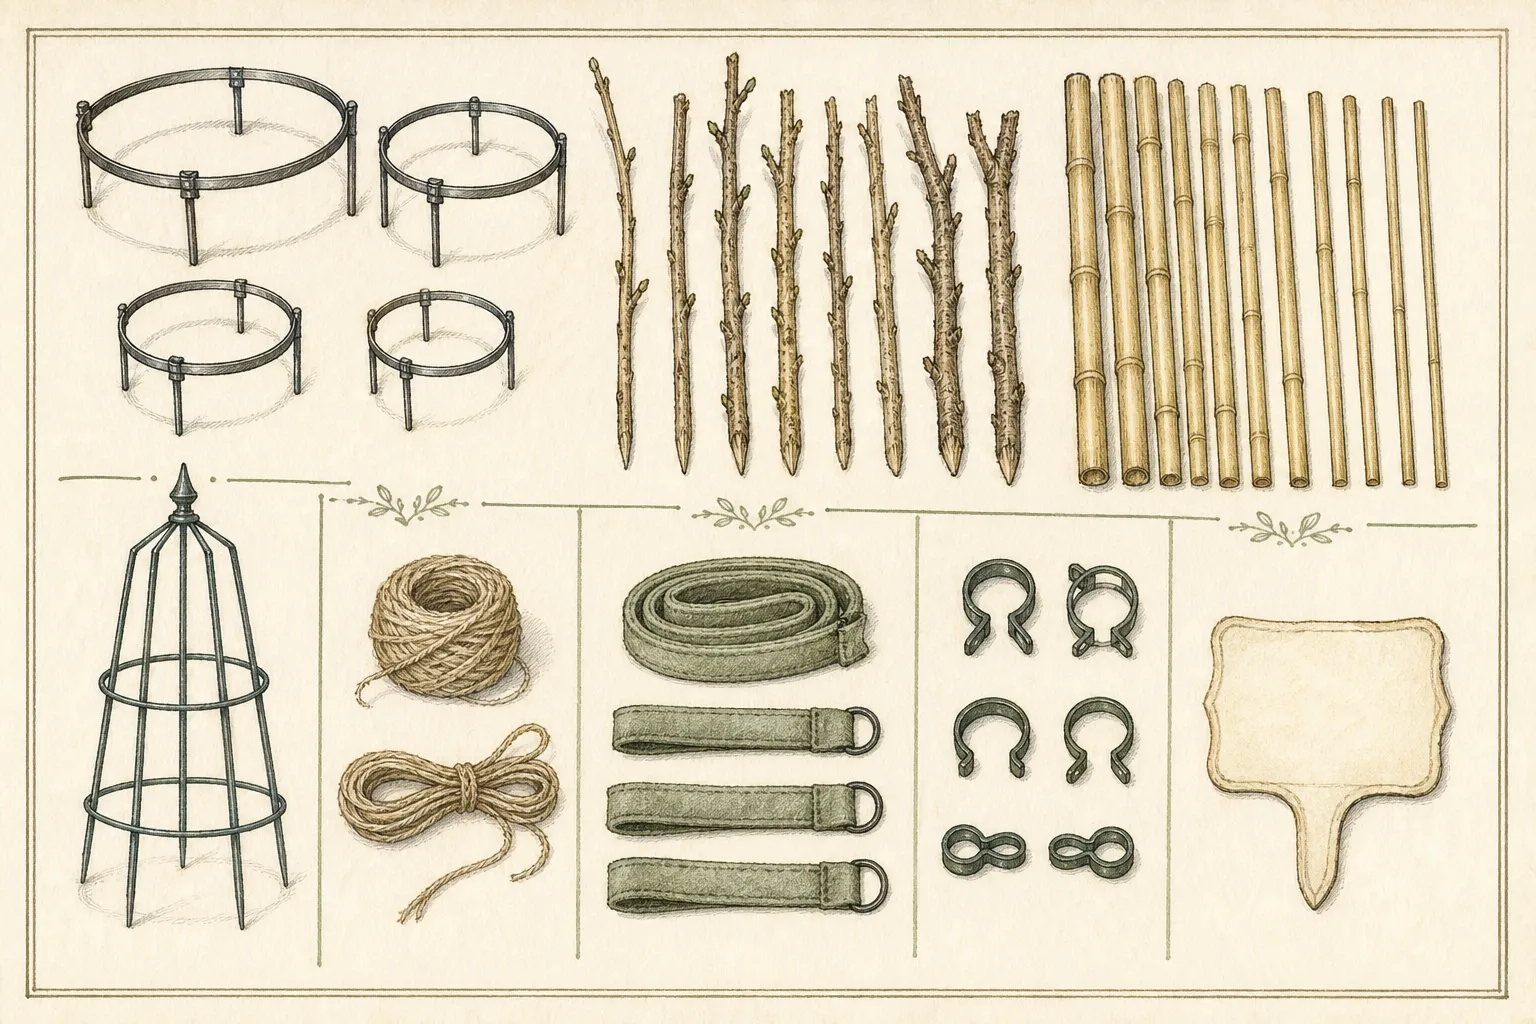
Most correctly planted shrubs stand without stakes. Test the root ball after backfill and watering. If it rocks because of wind exposure, top-heavy nursery growth, or a small corrected root system, install a minimal temporary support that stabilizes the ball while allowing some stem movement. A stake cannot compensate for a loose deep base or a hole that was dug too far.
Use broad flexible ties on sturdy stems and place stakes outside major roots. Keep ties below branches and away from buds, inspect them after wind, and loosen them as stems thicken. Record a removal date within the establishment period. Multi-stem shrubs can be damaged by tying every cane into one rigid bundle.
Protect stem bases from mower, trimmer, pet, or wildlife injury according to actual risk. A guard should remain ventilated, visible, and loose enough for growth. Keep it out of mulch and remove it when no longer needed. Temporary supports and guards belong on the maintenance list because forgotten hardware can girdle the flowering framework.
Test stability at the root ball, not by pulling the top back to a preferred pose. If the whole ball moves, one or two low flexible supports may help temporarily. If only a branch leans, correct or prune that branch under the species' rules after establishment. Bundling all flowering stems upright changes natural form and transfers wind force to the crown.
Audit the first growing season
Reinspect after the first soaking rain for settling, exposed roots, tilt, erosion, and ponding. Restore the crown to correct grade while soil is still workable. A root ball that remains too wet while surrounding soil drains may contain dense nursery medium; a ball that dries first needs wider, slower irrigation until roots move into the bed.
Track leaf color, shoot extension, flowering, and moisture through the first growing season. Transplant stress can reduce bloom without indicating a pruning problem. Diagnose persistent wilt, dieback, or discoloration from roots and site before cutting the crown. Keep species and cultivar expectations in view, especially when flowering depends on older stems retained at planting.
Limit pruning at installation to broken, dead, rubbing, or hazardous branches. Delay routine size and flowering-wood pruning until the shrub is established and the correct species schedule applies. Remove spent blooms only when deadheading is appropriate for that shrub. Container planting does not create one pruning rule for lilacs, hydrangeas, viburnums, azaleas, or roses.
Record the corrected root treatment with the flowering response. A shrub whose outer roots were shaved may show a conservative first season while roots regenerate; a shrub that settles deep may decline gradually. Note planting grade, correction method, water checks, and bloom timing. Future pruning decisions should start only after those establishment variables are separated from the cultivar's normal flower cycle.
Steps
- Level
- moderate
- Time
- 60–120 minutes
- Tools
- shovel, hand cultivator, bypass pruners, hose or watering can
- Materials
- site soil, mulch, temporary stake only if required
- 1Measure the site
Measure the cultivar's mature spread, light, soil, drainage, hardiness, bloom habit, and access before digging. Locate utilities, use mature dimensions for site planning, and choose a workable regional planting window.
- 2Expose the flare
Slide out and support the root ball. Remove excess top medium to locate upper structural roots or root crown; use a visible flare only where the shrub form has one. Inspect moisture, odor, stability, and every side for circling or girdling roots.
- 3Prepare the hole
Measure the corrected root ball and dig a firm-bottomed hole no deeper than upper roots to base. Widen into surrounding soil, roughen glazed walls, and resolve persistent drainage across the bed or by choosing a compatible plant.
- 4Correct circling roots
Tease fine roots outward and cut individual circles cleanly. For a vigorous severely pot-bound ball, use the source-supported outer shaving method; reserve root washing for suitable shrubs, fall conditions, and careful moisture management. Exchange irrecoverably defective stock.
- 5Backfill and settle
Set upper roots level with or slightly above grade on the firm floor, orient the crown, and backfill in lifts with compatible site soil. Water to reveal voids, correct any sinking from beneath, and keep all added soil off crown and stems.
- 6Mulch and establish
Spread shallow mulch with a clear stem ring and monitor both nursery medium and surrounding soil. Water the original ball slowly when it is drying, allow drainage, and postpone fertilizer until a soil test and species-specific establishment program support it.
- 7Reinspect after weather
Stake only a root ball that rocks after correct seating, using minimal flexible support and a removal date. Recheck after rain and through the first season; correct grade and moisture, then defer routine flowering-wood pruning to the shrub's own schedule.
Related reading
Sources
- Planting and transplanting trees and shrubs. University of Minnesota Extension. Source record · Accessed 2026-08-30.
- Planting trees and shrubs. University of Minnesota Extension. Source record · Accessed 2026-08-30.
- Planting Shrubs Correctly. Clemson Cooperative Extension. Source record · Accessed 2026-08-30.
- Container Grown Trees and Shrubs: Fix Those Roots Before You Plant. Penn State Extension. Source record · Accessed 2026-08-30.