Grow · summer vegetable mulch
Mulch a Summer Vegetable Bed Without Hiding Wet Soil
Choose and place organic mulch after the soil warms, keep stems and crowns visible, and check beneath the layer so water and air still reach active roots.
Published Last updated
In this guide
- Make sure mulch is the right next job
- Keep the mulch decision tied to warmth, water and crop bases
- Choose material by behavior, not appearance
- Prepare a clean, evenly moist surface
- Place a loose layer and preserve plant architecture
- Inspect beneath the layer before every correction
- Water through the mulch deliberately
- Maintain the layer through harvest
- Judge success by soil and plant response
- Adjust the surface when a crop changes
- Steps
Make sure mulch is the right next job
Mulch is most useful after the bed is planted, the soil has warmed for heat-loving crops, irrigation reaches the intended root zone, and existing weeds are removed. Spreading a layer over cold spring soil can delay warming. Covering a dry root ball or a bed that sheds water can preserve the wrong condition. Treat mulch as the final surface treatment after the soil and water path have been checked, not as a cure placed over uncertainty.
Walk the bed and identify each plant base, direct-sown row, emitter, and low area. Tiny seedlings can be buried by a material that is harmless around an established tomato. A depression that remains wet should not receive the same depth as a raised edge that dries quickly. Mark areas where irrigation must be repaired or weeds must be removed so the finished surface does not conceal those jobs.
Check local pest and disease considerations. Thick organic cover can shelter slugs in damp gardens, keep foliage wet when piled against stems, or provide habitat for rodents where pressure is already high. Those risks do not make mulch inherently harmful. They determine material, depth, timing, and inspection frequency. Begin with a thinner trial around vulnerable plants and expand only after observing how the bed responds.
Keep the mulch decision tied to warmth, water and crop bases
Apply useful cover only after the crop's soil conditions, weed control and irrigation route are ready. Keep crowns, seed rows and inspection points readable. Probe below the mulch before watering, and correct matting or saturation when it appears. A renewed sowing row may need the layer opened, so inspect it before spreading another addition across the bed.
Choose material by behavior, not appearance
Clean straw is light, relatively open, and useful around larger vegetables, but it can blow before settling and may contain grain seed if poorly sourced. Hay usually carries more seed and green material. Shredded dry leaves can make a good home resource when chopped enough to resist matting. Whole wet leaves can form a dense sheet. Know what the material does after rain, not only how it looks when first spread.
Finished compost can cover soil and contribute organic matter, but a thin compost layer behaves differently from a deeper coarse mulch. It may not suppress established weeds and can dry at the surface. Coarse untreated plant residues can preserve pore space, while fine material can crust. Avoid fresh grass clippings in thick wet layers, diseased residues, and material exposed to persistent herbicides or unknown contaminants.
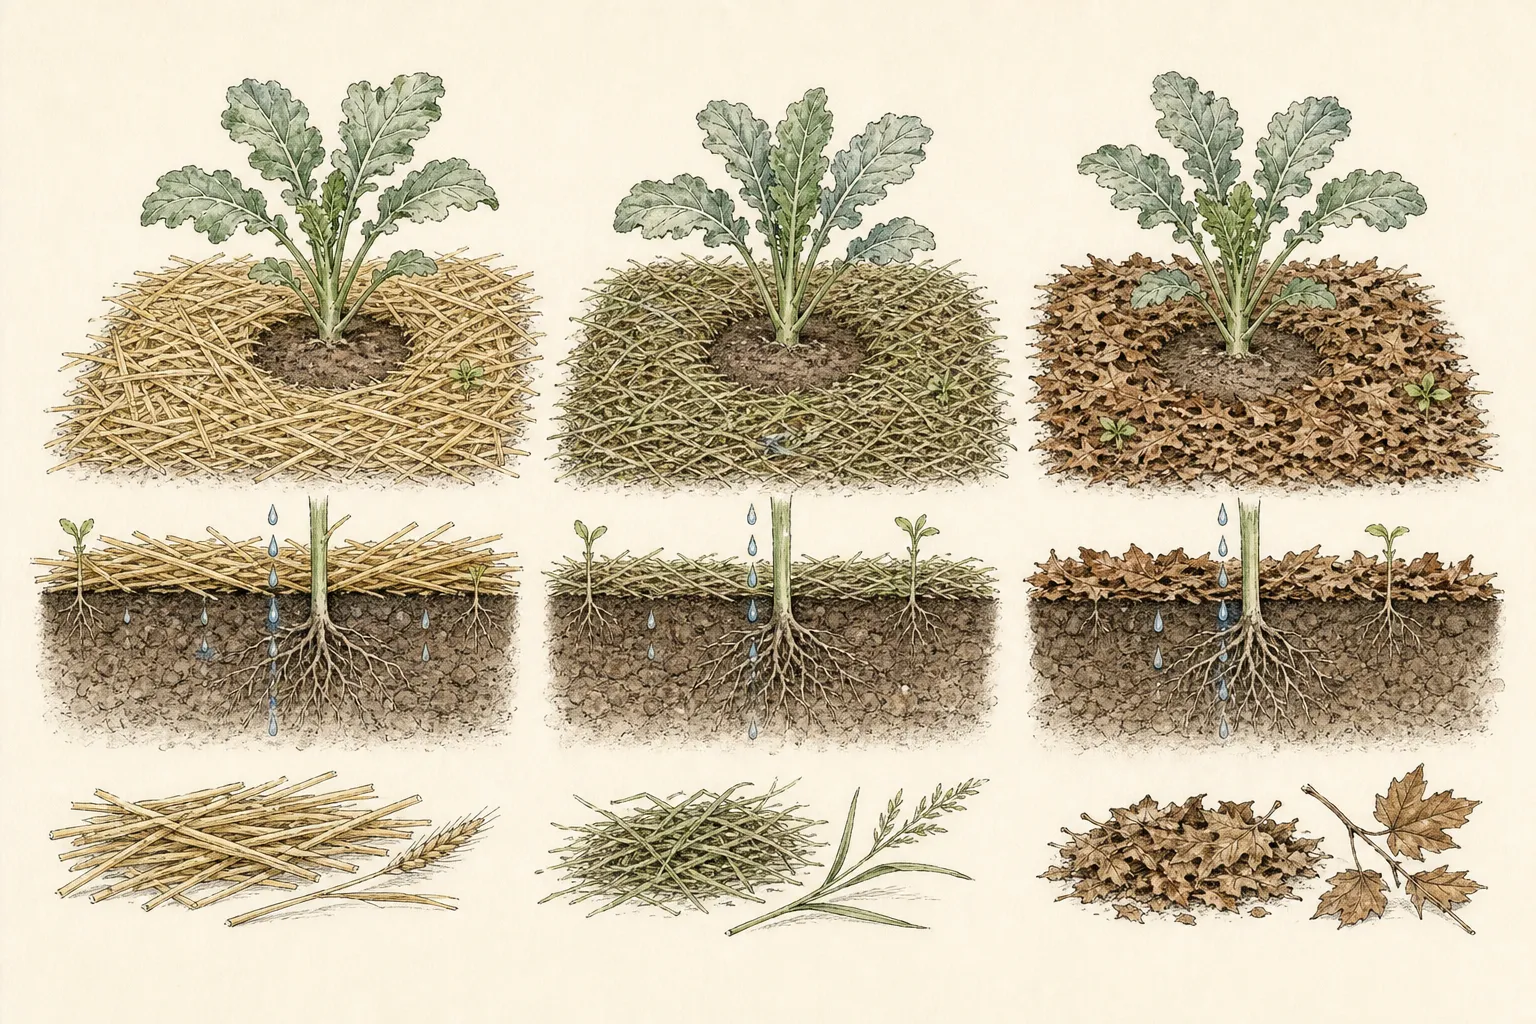
Wood chips are generally better suited to paths and perennial areas than incorporation into an annual vegetable root zone. If used on the surface, keep them out of future seed furrows and do not till them into the soil at season end. Plastic and landscape fabrics follow different heat, water, disposal, and installation rules from organic mulch. This guide addresses breathable organic surface layers, not a universal substitution among all products.
Prepare a clean, evenly moist surface
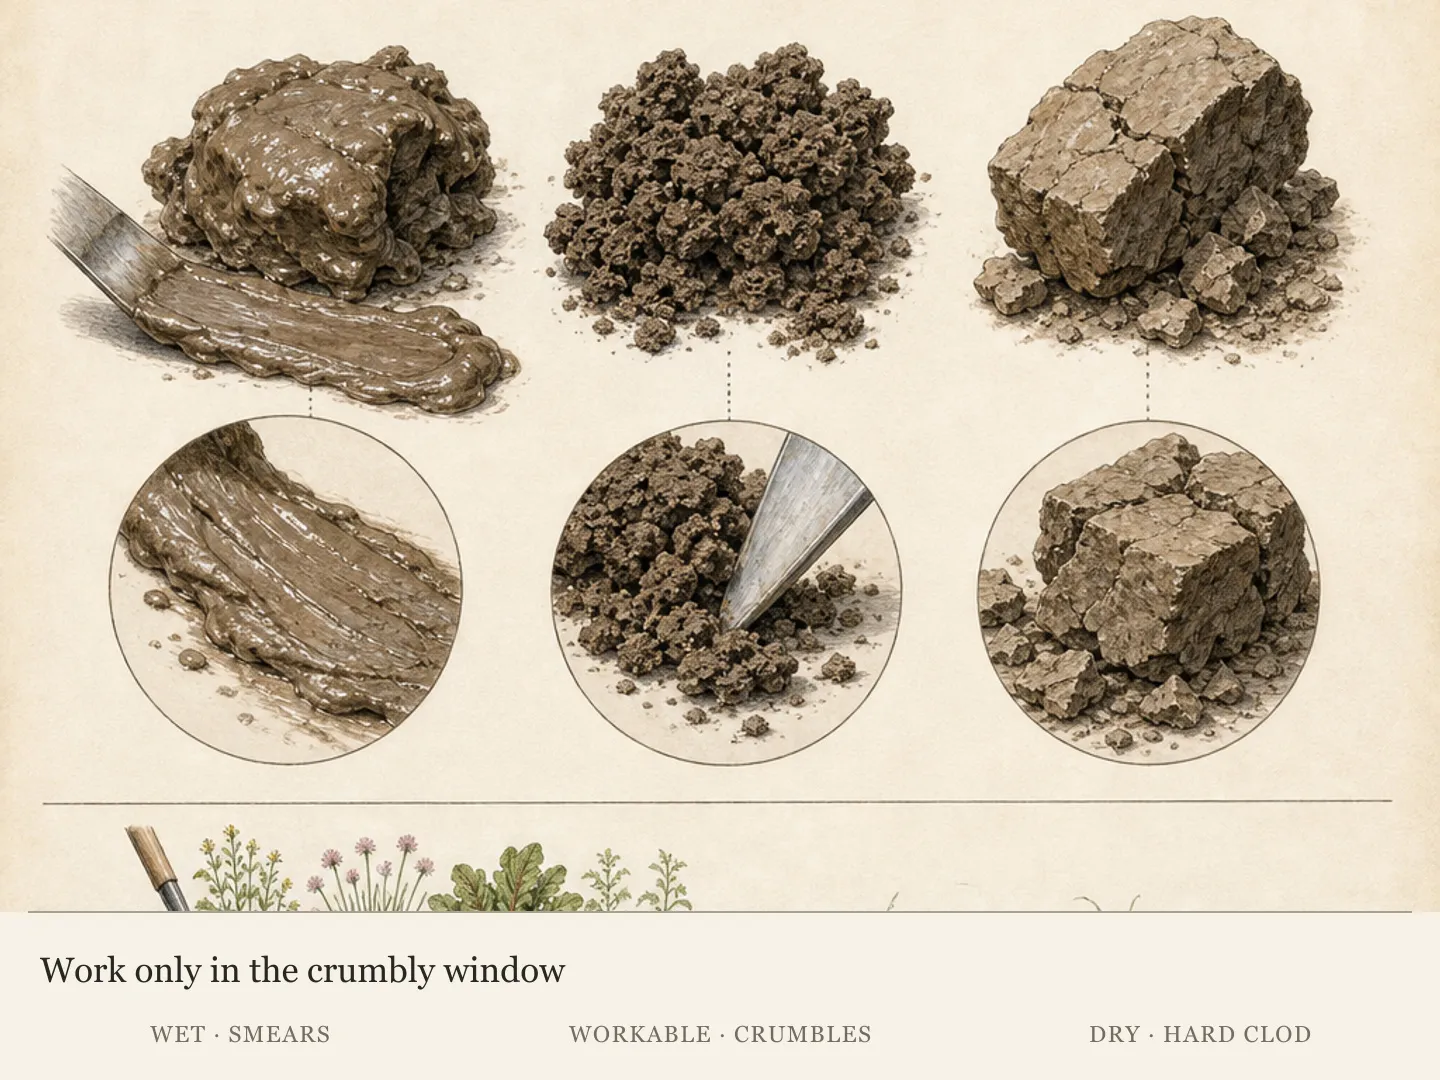
Remove weeds with their crowns or roots before spreading mulch. A layer can suppress new germination, but it does not reliably kill robust perennial weeds or a large annual already rooted through the bed. Pull when soil is workable, collect seed-bearing tops, and level only major depressions. Avoid deep cultivation beside established crops, where cutting roots creates stress under the surface that will soon be hidden.
Water the bed if the active root zone is dry, then allow the surface to drain before mulching. Delivering water first confirms that emitters, hoses, or a watering wand reach the soil rather than striking foliage and paths. In a newly planted bed, check the original transplant root balls separately. Potting mix can remain dry inside moist garden soil, and a mulch layer can make that mismatch less visible.
Measure the existing organic layer. Last season’s partially decomposed mulch counts toward the total; it is not a blank surface that automatically needs another full application. Pull it aside at several points, distinguish it from dark mineral soil, and restore only enough material to make a loose continuous cover. Annual additions without inspection can create a deep, wet layer and gradually bury stems, crowns, and bed edges.
Place a loose layer and preserve plant architecture
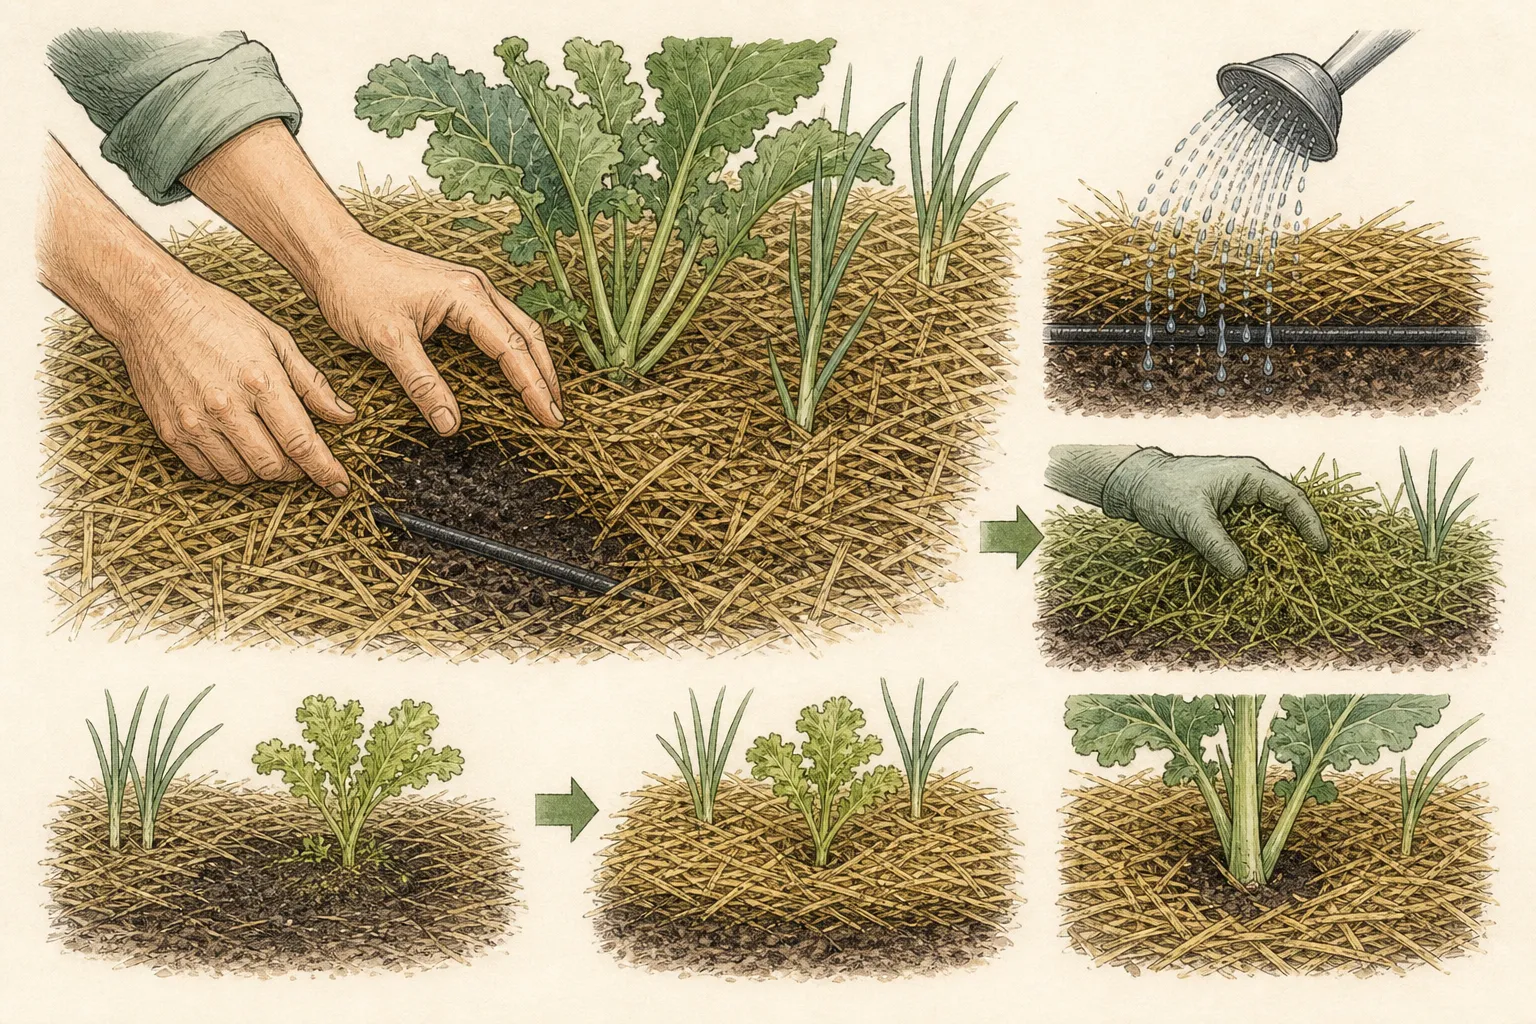
Spread mulch by hand around established plants so it settles loosely rather than being packed. A useful depth depends on material, climate, crop size, and weed pressure; local Extension guidance should set the range. Begin conservatively with fine or mat-forming materials. The functional endpoint is shaded soil with air and water paths, not a prescribed number achieved by compressing a fluffy material.
Leave visible space around stems, crowns, and the leaf bases of low vegetables. A mulch collar piled against tomato, pepper, squash, or bean stems holds moisture and hides rot, boring, and mechanical injury. Keep cotyledons and first true leaves above the surface. Around direct-sown rows, wait until seedlings are clearly established, then use a fine controlled layer between rows instead of pouring material across the crop line.
Maintain access to emitters and inspection points. Dripline is often best placed under mulch where water reaches soil directly, but its path and connections should remain traceable. Do not bury a leaking fitting or kink. Where hand watering is used, leave small visual windows until the gardener knows how quickly water penetrates the chosen material and spreads beneath it.
Inspect beneath the layer before every correction
Mulch changes the appearance of the surface, so color is no longer a watering signal. Push the material aside and probe soil at root depth in more than one location. Check near the plant, between emitters, and at the bed edge. Moisture can be uneven beneath an even-looking layer. Water only when the crop and root-zone evidence call for it, then replace the mulch loosely after the check.
Look for pale fungal threads in decomposing mulch without assuming the crop is diseased. Many decomposers live in organic material. The concern begins when plant tissue is soft, discolored, girdled, or collapsing, or when the root zone remains saturated. Pull mulch back, improve airflow, and diagnose the plant tissue separately. A harmless decomposer on straw and a stem rot at the crown are not the same observation.
Watch for slugs, sowbugs, rodents, and seedlings pushing through the layer. Remove weeds while small and before seed set, because roots that knit through mulch make later pulling disruptive. Reduce depth around persistent damp pockets and vulnerable stems. Management is easier when the layer remains movable; a compacted mat that cannot be lifted cleanly is evidence that the material or application was too fine or wet.
Water through the mulch deliberately
Apply water slowly enough to pass through the layer and enter the soil. A light spray can wet straw and evaporate before the root zone changes. Check after the first irrigation by moving mulch aside and probing. If water channels to a few points, redistribute the material and adjust the emitter or application rate. The goal is a wetted root zone, not a visibly damp mulch surface.
Expect irrigation frequency to decrease as evaporation slows, but do not reduce it by a fixed percentage. Plant size, heat, wind, soil texture, rainfall, and root depth still control demand. Keep the same decision process and let observations show the new interval. Automatic schedules should be reviewed after mulching because a program written for bare soil can keep a covered bed too wet.
After heavy rain, inspect low areas before resuming irrigation. Mulch can hide puddled soil and delay drying where drainage is poor. Pull the layer back temporarily if the crown area remains wet, and correct the drainage problem rather than using more mulch to disguise splashed or compacted soil. Restore a thinner cover only after air has returned to the root zone.
Maintain the layer through harvest
Top up only where decomposition, wind, or foot traffic has exposed soil. Rake material back from paths rather than adding new mulch over a displaced ridge. Keep harvest residue, dropped fruit, and diseased leaves out of the layer when local sanitation guidance calls for removal. Mulch is not a place to hide spoiled produce; decay beside stems invites pests and makes routine inspection unpleasant.
As vines spread, keep crowns and main stems locatable. Train or lift foliage gently before adding material beneath it, and do not drag coarse mulch across tender stems. Around sprawling squash or cucumbers, mark the crown with a small stake so watering and disease checks remain possible after the canopy closes. A beautiful continuous surface is less valuable than a readable plant base.
At season end, remove synthetic ties and diseased debris. Sound organic mulch can often remain on the surface or be managed according to the next crop and local practice, but do not automatically dig a coarse layer into the bed. Pull material aside for early spring warming or direct sowing when needed. The surface treatment should remain reversible as the garden changes seasons.
Judge success by soil and plant response
A useful mulch layer reduces surface crusting, slows moisture loss, moderates soil temperature, and suppresses some new weeds while keeping plant bases healthy. It does not eliminate watering, weeding, or diagnosis. Compare mulched and lightly covered observation points for soil moisture, weed emergence, and crown condition. Do not use a single cool touch at the surface as proof that the entire root zone improved.
Record material, approximate loose depth, application date, weather, and the first maintenance change. Note where stems stayed dry, where slugs increased, and how irrigation frequency actually changed. This brief record helps choose material for the same bed next year. It also separates a material problem from a placement problem; clean straw can work well in one climate and remain too damp in another position.
Remove or revise the layer when evidence turns against it. Persistent saturation, buried stems, matting, rodent nesting, or repeated slug damage warrants a thinner layer, different material, or a seasonal pause. Mulch is successful only while it improves the living root environment. It is not a permanent design finish that must be defended after the plants show a different need.
Adjust the surface when a crop changes
A summer bed rarely holds the same plant architecture for the entire season. Lettuce may be cleared while tomatoes expand, a bean row may finish, or a fall sowing may need open warm soil. Pull mulch aside before seeding and create a clean band wide enough for accurate depth, contact, and early weeding. Do not sow through a deep coarse layer and assume irrigation will find every seed uniformly.
When a plant is removed, inspect the newly exposed soil and roots before smoothing the surface. A persistently dry root ball, sour saturated pocket, vole tunnel, or dense weed crown explains more than the top layer alone. Correct that condition and return only clean mulch. Keeping the opening visible for a few days can confirm that drainage and irrigation behave normally before the bed is covered again.
For fall transitions, decide whether the next crop benefits from retained cooling or renewed warmth. Move or thin the layer according to local planting guidance and soil temperature, then label where perennial herbs or volunteer seedlings remain. A reversible surface lets the bed change roles without digging half-decomposed material into every new seed zone.
Steps
- Level
- easy
- Time
- 45 to 90 minutes for a small home bed, plus brief moisture checks
- Tools
- Hand weeder, Garden fork or soil probe, Watering wand or irrigation system, Rake
- Materials
- Clean locally suitable organic mulch, Plant markers
- 1Map plants, water paths, and wet pockets
Locate every stem, crown, direct-sown row, emitter, fitting, and low area. Confirm that the bed has warmed for the crop and that irrigation reaches the root zone. Mark drainage or weed problems for correction before the surface is covered.
- 2Choose a clean breathable material
Match straw, shredded dry leaves, finished compost, or another locally recommended material to the crop and climate. Reject seed-laden hay, thick fresh clippings, diseased residues, and material with unknown contamination. Keep coarse wood products out of future seed furrows and do not incorporate them casually.
- 3Weed and water first
Remove rooted weeds and seed-bearing tops without deep cultivation beside crop roots. If soil is dry, water the active root zone and verify transplant root balls separately. Let the surface drain, then measure any old mulch because it counts toward the final layer.
- 4Spread loosely and keep bases clear
Apply a conservative loose layer that shades the soil without being packed. Leave visible space around stems, crowns, cotyledons, and low leaves. Place mulch between established direct-sown rows only after seedlings are easy to identify, and preserve access to irrigation fittings.
- 5Probe below before watering
Move mulch aside at several root-zone points and inspect moisture below the surface. Water slowly enough to penetrate the material, then check the soil again. Adjust emitters or the layer if water channels, and revise automatic schedules after evaporation changes.
- 6Correct matting, pests, and saturation
Lift and loosen compacted material, pull weeds before they root through the layer, and reduce depth near damp crowns. Distinguish harmless decomposer growth in mulch from soft or discolored plant tissue. Pull the layer back after heavy rain where soil remains saturated.
- 7Maintain only the useful cover
Restore displaced mulch instead of repeatedly adding new material. Remove dropped fruit and diseased debris, keep crowns visible as canopies close, and record how the layer changed water use and weed pressure. Thin, change, or remove it when plant and soil evidence no longer support it.
- 8Open the layer for new sowings
Pull mulch away to expose a clean seed band, prepare the soil at the required depth, and water the seed zone directly. Keep coarse material out until seedlings are established and identifiable. Replace only a fine controlled cover between rows, preserving light and air at the stems. Mark the reopened band so later maintenance does not rake coarse mulch back over emerging seedlings.
- 9Inspect every cleared plant station
Before covering a harvested space, check the old root ball and surrounding soil for dryness, saturation, tunneling, compaction, or rooted weeds. Correct the condition and leave it visible long enough to verify water movement. Restore only clean mulch suited to the next crop and season.
- 10Keep the final surface readable
Leave every crop crown, seed row, emitter connection, and inspection point visible enough for ordinary care.
Related reading

Sources
- Mulching Your Vegetable Garden. University of Florida IFAS Extension. Source record · Accessed 2026-08-19.
- Using Mulch in the Garden. Iowa State University Extension and Outreach. Source record · Accessed 2026-08-19.
- Mulches for the Home Vegetable Garden. Rutgers New Jersey Agricultural Experiment Station. Source record · Accessed 2026-08-19.