Gardens · design white spring border
Design a White Spring Border with Shape, Shadow, and Succession
Combine white flowers of different forms with silver foliage, green structure, and overlapping bloom so the border remains dimensional.
Published Last updated
In this guide
- Make white legible through form and shade
- Put permanent structure ahead of seasonal color
- Build the site map in layers
- Fit the worked composition to mature circles
- Use contrast to separate neighboring layers
- Carry spring into foliage and early summer
- Judge the border in changing light
- Keep substitutions inside the design envelope
- Design ideas
Make white legible through form and shade
A white border needs dark edges, varied flower shapes, and a timed handoff between plants. White alone supplies little depth. Build the composition from rounded, spiked, upright, and carpeting forms, then place green, silver, or burgundy foliage between pale groups. The eye reads those boundaries first, especially under cloud when several whites approach the same value.
The reference composition uses a sunny 6-by-20-foot streetside bed in Colorado, matching the dimensions of a planting plan published by Colorado State University Extension. It can be reached from the walk and the lawn side. A dark fence or existing green shrub mass forms the rear field, while the long public view runs parallel to the front edge.
White changes with context. Cream flowers warm beside blue-green leaves, green-white blooms recede into fresh foliage, and blue-white petals sharpen against a dark wall. Put labeled pots or cut stems at the principal viewing point during both direct sun and overcast light. Record which groups merge, glow, or acquire a strong undertone before ordering the full quantity.
Limit the display to three spring flower silhouettes and two foliage contrasts. A low mat, an upright blade or spike, and one rounded flower carry enough variation across 20 feet. Silver leaves mark selected pauses, and darker stems define the later handoff. Empty green space gives each white mass a visible perimeter.
Make a value sketch with only dark, middle, and light marks. Assign the fence or shrub background to dark, most living foliage to middle, and flower masses to light. Silver belongs between middle and light, so it occupies less area than green. This quick drawing exposes a border that is bright everywhere and therefore lacks a focal event. It also shows where one dark interval can separate two pale flowering periods.
Put permanent structure ahead of seasonal color
Measure the bed, path, fence, windows, utilities, drainage outlets, and every established woody plant. The RHS recommends plotting fixed objects and sunlight on a scale drawing; Colorado State suggests 1 inch equals 4 feet for a perennial plan. At that scale, the sample bed becomes a clear 1.5-by-5-inch rectangle with room for mature circles and access marks.
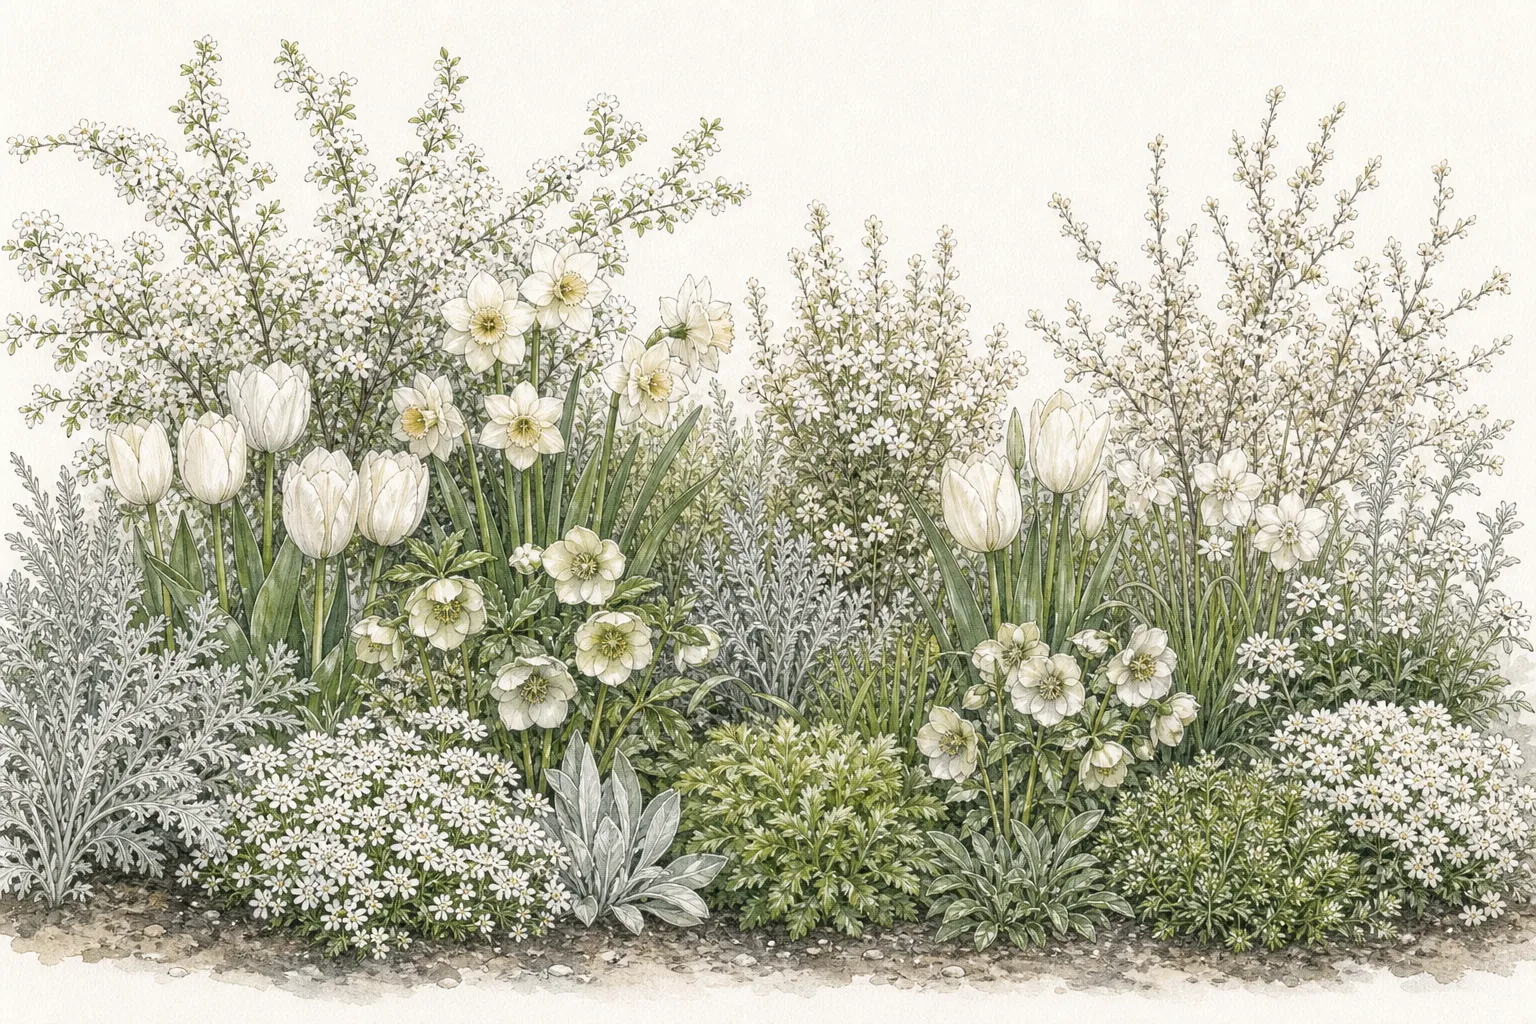
Keep the background visually quiet. Existing evergreen foliage, a stained fence, or shadowed masonry can outline pale petals, but its roots, drip line, and eventual spread still govern usable soil. Draw woody plants at full size. A pale shrub that expands into the middle band can erase the dark seam that gives nearby flowers their definition.
Mark one 18-inch maintenance opening near each third of the bed. These narrow entries permit watering checks, division, and deadheading from firm footing. Colorado State notes that stepping stones improve access and reduce compaction in larger beds. Keep the openings aligned with green foliage, so they read as deliberate intervals from the street.
Draw the public sight line from both ends of the sidewalk and from a window used inside the house. Street-facing plants must preserve any required visibility at drives and crossings. Colorado State includes view lines and safety obstructions among front-lot design concerns. Keep the tallest spring circles behind those view cones, then test their flowering stems as well as their leaf mounds on the elevation drawing.
Build the site map in layers
Trace sunlight during the growing day and label the hours on a separate overlay. University of Georgia Extension defines full sun as 6–8 hours, partial sun or shade as 4–6 hours, and shade as less than 4 hours of direct light. The Colorado composition reserves its main area for plants whose labels accept the recorded sunny exposure.
Map water movement during irrigation and a substantial rain. Downspouts, a compacted path edge, and a slight swale can create three moisture conditions inside one narrow border. Give each area its own notation. Colorado State advises grouping perennials by water requirement, so one irrigation zone should contain plants with compatible needs and should remain separate from turf watering.
Add wind direction, snow storage, reflected heat, and the winter shadow of nearby structures. A sunny summer outline may contain a cold pocket or a dry strip beside pavement. University of Georgia Extension treats these small differences as microclimates worth recording. The plant list follows the observed pocket, even when the color plan would place a favorite selection elsewhere.
Inventory the plants that already thrive on the site. Established crowns can reveal the practical light and moisture range more clearly than a single measurement. Retain useful dark foliage and sound shrubs as framing material. Remove or move a plant only after its mature outline, roots, health, and effect on the public sight line have been considered.
Fit the worked composition to mature circles
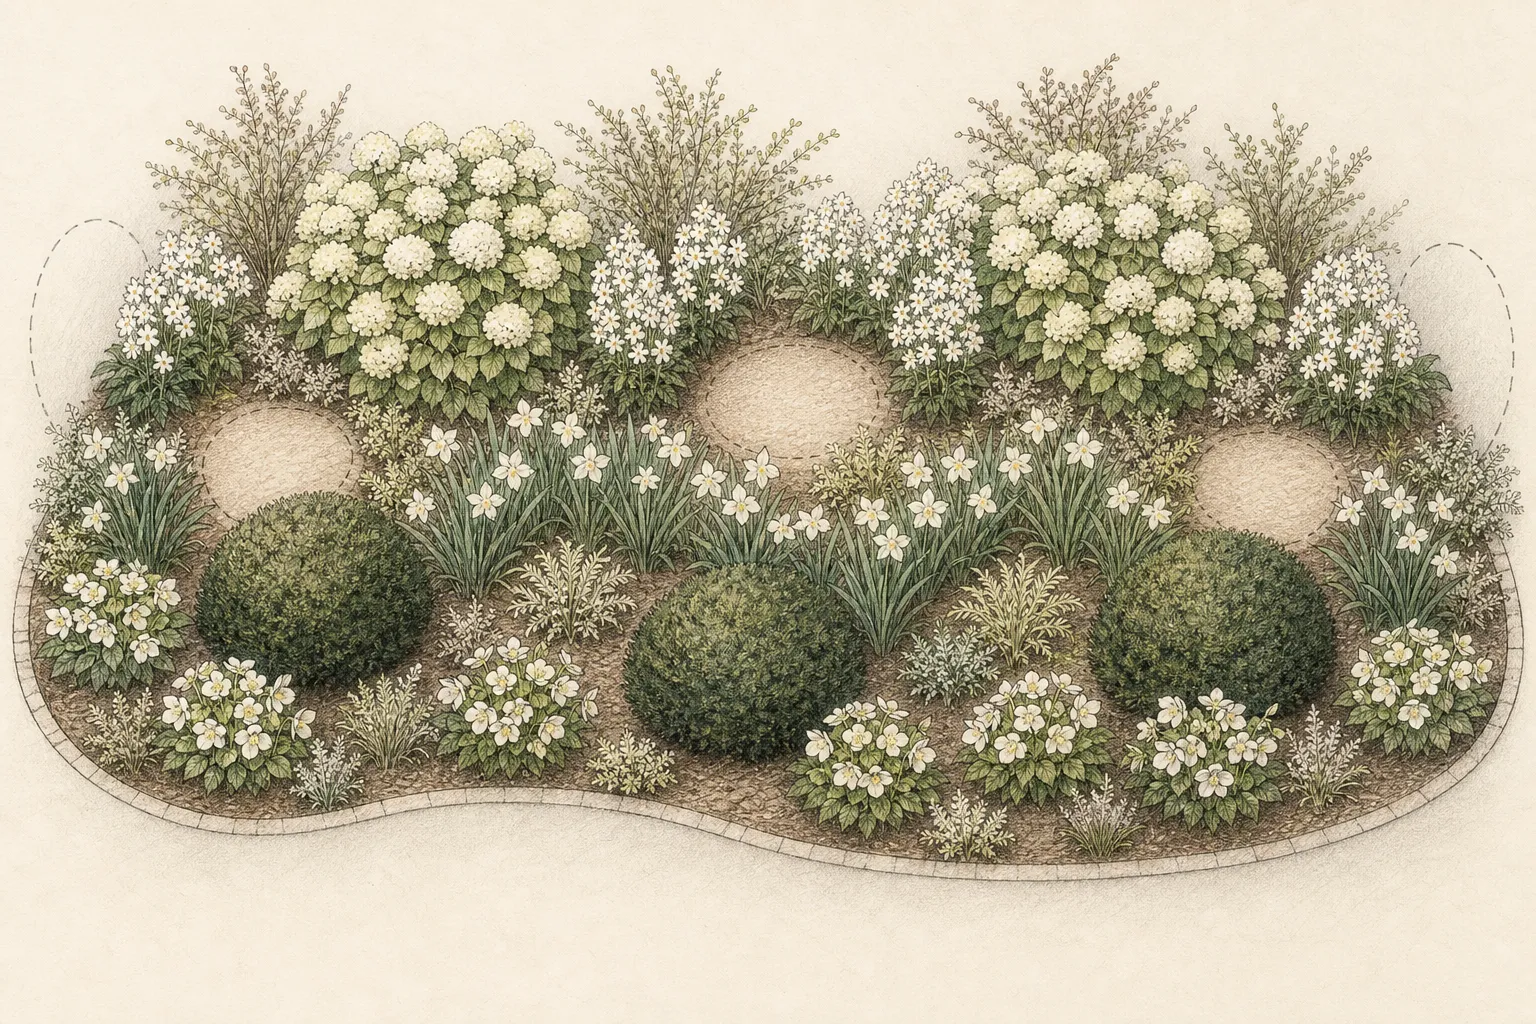
Set five Iberis sempervirens along the front in two linked groups, then repeat seven Artemisia schmidtiana as small silver mounds between green intervals. Behind them, use eight Heuchera sanguinea ‘Snow Angel’ for patterned foliage. Add six white-flowered Aquilegia selections, three white Iris hybrids, and three white Paeonia hybrids through the middle and rear.
Reserve the early-summer relay for three Penstemon ‘Husker Red’ and five Leucanthemum × superbum ‘Alaska’. These named plants come from the retained Colorado planting lists. Their jobs are distinct: dark stems hold the middle after spring petals drop, while the daisies continue the pale flower signal beyond the peony and iris interval.
Treat mature dimensions as procurement gates. Allocate about 12 by 18 inches for each candytuft, 12 by 18 for artemisia, 15 by 18 for ‘Snow Angel’, 24 by 18 for columbine, 30 by 18 for iris, and 36 by 36 for peony. Use 36-by-18-inch penstemon slots and 36-by-24-inch daisy slots. These are plan limits; stock labels must fit them.
Arrange the three peony circles as rear anchors near the quarter points and center, leaving the maintenance openings offset from them. Thread iris groups between those anchors and draw columbine as looser middle masses. Heuchera repeats below the peonies, while candytuft and artemisia divide the long edge into unequal light and silver intervals. This placement keeps every named taxon visible from the sidewalk and leaves room for the later penstemon and daisy stems.
Use contrast to separate neighboring layers
Place the candytuft mats against dark soil or a green edge, where their broad white surface has a crisp boundary. Keep silver artemisia several inches away from the palest flowers. Silver works as an interval because its fine foliage absorbs shadow. A continuous silver ribbon would reduce the value difference that makes the white edge visible.
Use iris blades as vertical green separators between rounded peonies and airy columbines. Repeat that blade shape near both ends of the bed so the long composition stays connected. The flowers may overlap in late spring, yet each group retains a recognizable outline after petals fall. That post-bloom geometry is part of the mature drawing.
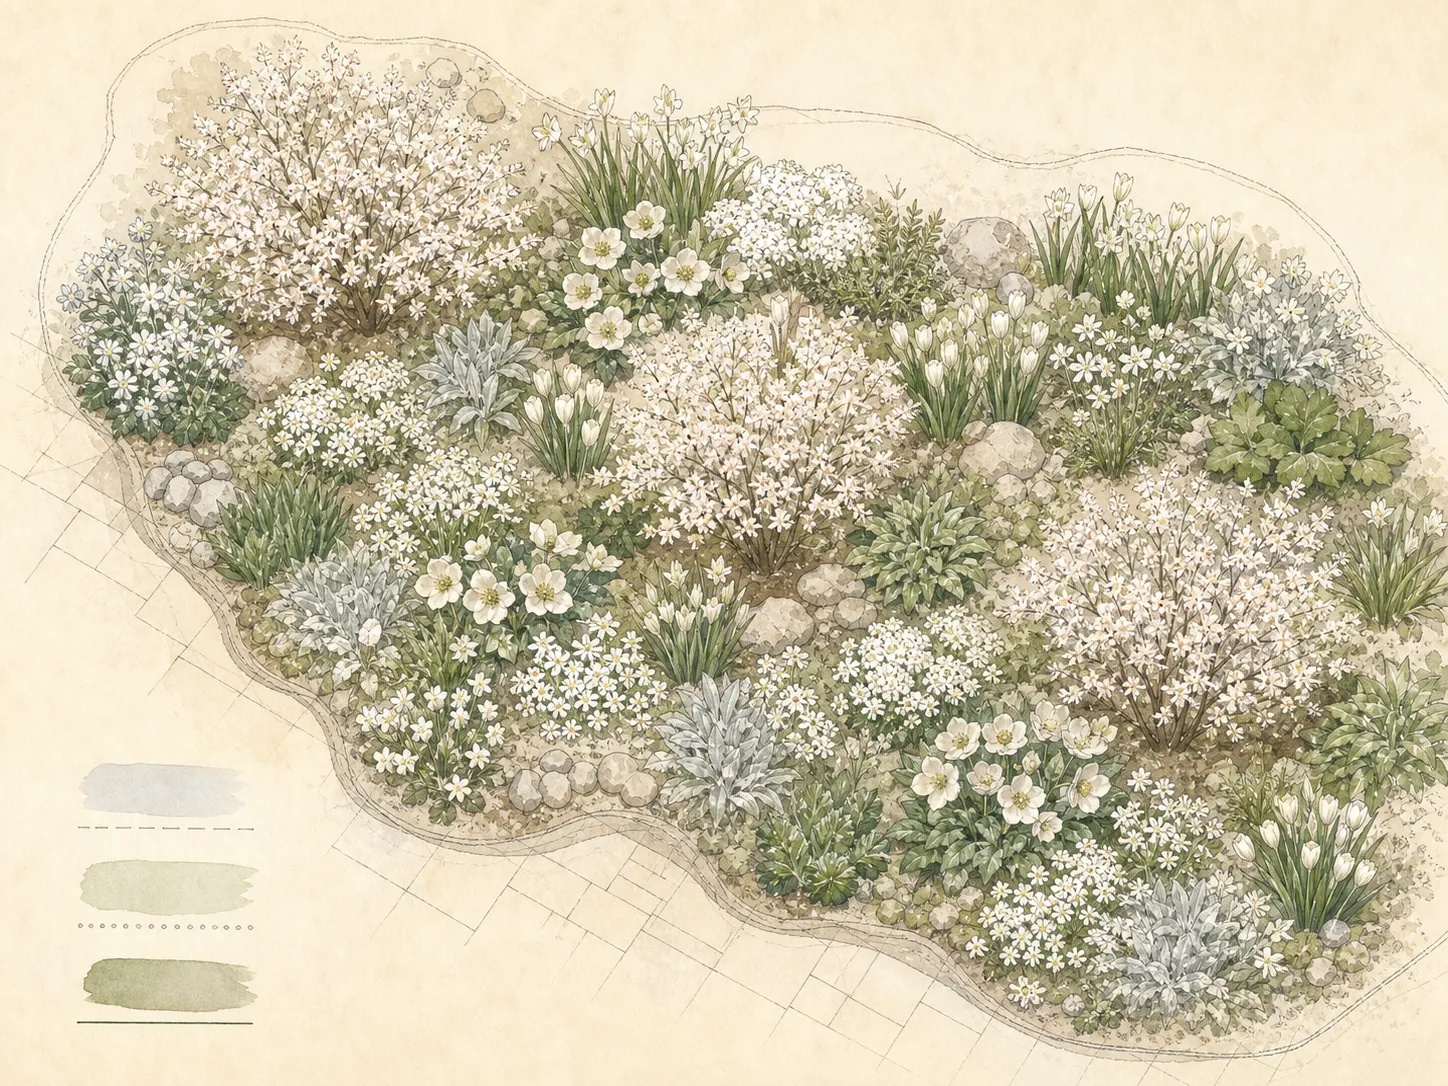
Give white bulbs and hellebores two low drifts in the remaining spring pockets, using locally hardy labeled selections. Plot their leaves as well as their flowers. The bulbs may occupy gaps before perennial foliage expands, while hellebore leaves can hold a darker plane near the ground. Keep both additions inside the irrigation and crown-clearance limits already mapped.
Set the pale peonies against the rear field and bring one columbine group forward to interrupt a rigid height staircase. Colorado State supports placing most tall plants toward the back while bringing selected taller forms forward for variation. The forward accent needs a clear sight line and a mature footprint that stays inside its assigned circle.
Keep the bulb and hellebore drifts subordinate to the measured perennial framework. One drift can run beneath the iris blades, and the other can open beside a peony before its stems expand. Label each selection's foliage period and mature spread. If either addition closes an access gap or shares an incompatible water requirement, reduce its area on paper before planting.
Carry spring into foliage and early summer
After candytuft, columbine, iris, and peony finish, the border should still show three leaf scales. Fine artemisia, broader heuchera, and upright iris leaves make separate surfaces under the same light. Penstemon stems then introduce a dark vertical line, and ‘Alaska’ daisies restore white flowers later. The handoff works through foliage before it works through bloom.
Water new plants according to weather, soil, exposure, and their shared irrigation group. Colorado State notes that new sunny plantings may need water every few days during the first month, followed by longer intervals that encourage roots to expand. Check the actual root zone and settling after irrigation. Keep perennial watering independent from the lawn schedule.
Deadhead according to the role assigned on the plan. Remove marked or collapsing flowers when they blur a clean mass, and retain sound foliage that still defines a boundary. Division becomes relevant when mature groups merge and flowering weakens. The source advises dividing many overcrowded perennials outside their bloom period, with timing based on the season of flower.
Judge the border in changing light
Photograph the same 20-foot view in morning sun, midday brightness, overcast weather, and evening shade. Include the dark background and the whole edge. A close flower portrait cannot show whether neighboring whites have merged. Mark the group that loses its outline and name the missing contrast: edge, shadow, scale, texture, or height.
Inspect again after rain and wind. Pale petals may spot or collapse while leaf masses remain sound, and tall stems may lean across a lower group. A plant that reads well only during perfect bloom needs a stronger foliage role. A windy exposure may also require a shorter cultivar, since Colorado State flags staking needs for tall perennials on windy sites.
Use the first complete season to test undertones and timing. Elevation, weather, and soil can shift perennial bloom, according to Colorado State. Record actual opening and finish dates beside the named selection. Move only the group whose relationship fails; preserve successful spacing so the next comparison has a stable frame.
Review the bed after flowers are gone. Count the visible green, silver, and dark masses from the street. Each access opening should remain reachable, and every perennial should stay inside its mature circle. If the late view becomes a continuous pale-gray strip, reduce a silver group and restore a darker interval at the next suitable planting time.
Place two discreet photo markers at the sidewalk edge so camera position and angle stay consistent. On each image, outline the actual mature width reached by the named groups. A circle that closes early may need division or a smaller neighbor, while an unfilled slot may need another season. The measured outline separates a spacing problem from a temporary shortage of flowers.
Keep substitutions inside the design envelope
A replacement must match five conditions: the site's light band, its water group, the allocated mature height and width, the seasonal role, and the intended foliage value. Flower color is the sixth check. A white label cannot compensate for a plant that needs wetter soil, casts a larger shadow, or leaves the assigned interval bare.
For the front edge, accept only a low white-flowering or green mat whose listed spread fits the 18-inch slot. A silver substitute belongs in the artemisia role only if its leaf texture stays fine and its mature footprint leaves visible dark gaps. Coarse pale foliage changes the edge into a broad bright band.
Middle-layer changes must preserve separate shapes. A replacement for white iris needs upright foliage and a circle no wider than 18 inches. A peony alternative must fit the 36-inch rear allocation and provide a rounded spring mass. If a supplier label exceeds either envelope, redraw the quantity and spacing before purchase.
A site with fewer than six hours of direct sun falls outside the sunny model. Ferns, bleeding heart, and hostas are among the shade plants named by Colorado State, but using them creates a different composition with different bloom and foliage behavior. A windy open site also needs shorter selections or planned support for tall forms.
Colorado's dry winter conditions shape the establishment plan. The source identifies low soil moisture and dry air as winter concerns, especially for young roots. A region with persistent winter wet needs a locally tested palette and drainage response. Carry over the scale drawing, contrast roles, and mature-circle discipline while rebuilding the horticultural list for that climate.
Design ideas
- Style
- Layered botanical garden with restrained seasonal color
- Space
- a white spring ornamental border
- Climate
- The worked composition belongs to a sunny, irrigated 6-by-20-foot Colorado streetside bed with access from two sides, well-drained soil, dry winter air, and low winter soil moisture. Its principal perennial zone receives at least the light stated on each plant label, with the sun map distinguishing 6–8-hour, 4–6-hour, and under-4-hour pockets. Higher elevation or unusual weather may delay bloom. Standing winter water, deep shade, salt-laden wind, or a planting label that exceeds its mature circle disqualifies a direct substitution. Gardeners elsewhere can retain the scale, value contrasts, and seasonal roles only after replacing the plant list with locally adapted selections.
- 1Scale and access layer
Draw the 6-by-20-foot rectangle at 1 inch to 4 feet and plot the fence, walk, turf edge, utilities, downspouts, and woody roots. Mark three 18-inch maintenance openings from firm ground. Add separate tracing overlays for direct-sun hours and water movement. This sheet controls the usable planting area before any white-flowered selection receives a circle.
- 2Low spring edge
Place five Iberis sempervirens in two broad groups across the front band. Give each plant an 18-inch-wide procurement circle and accept stock whose listed mature size remains inside it. Break the white mats with green soil-facing gaps and seven compact Artemisia schmidtiana circles. The silver foliage serves as a pause, so no two silver groups join into one ribbon.
- 3Patterned foliage middle
Use eight Heuchera sanguinea ‘Snow Angel’ as a repeated foliage rhythm, assigning an 18-inch-wide circle to each. Split them into three groups that echo the candytuft positions. Keep their irrigation requirement aligned with neighboring plants. Their mottled leaf surface carries interest between flower intervals and creates a measured transition from the dark background to brighter petals.
- 4White spring flower tier
Choose six white-flowered Aquilegia selections, three white Iris hybrids, and three white Paeonia hybrids. Require mature envelopes no larger than 24 by 18 inches, 30 by 18 inches, and 36 by 36 inches respectively. Place peonies at the rear, iris blades through the middle, and one columbine group forward. The named label and dimensions remain attached to every circle.
- 5Dark-stemmed relay
Set three Penstemon ‘Husker Red’ in 36-by-18-inch rear or middle slots where darker stems can outline fading pale groups. Their task begins as the main spring flowers close. Keep the three plants together as one readable vertical event. A substitute needs the same sunny water zone, comparable mature footprint, and a dark structural line through early summer.
- 6Later white return
Use five Leucanthemum × superbum ‘Alaska’ in two rear groups, each plant limited to a 36-by-24-inch plan slot. These daisies restore a clear pale flower after the iris and peony interval. Their quantity comes after access and mature spread are resolved. In a region where this selection is unsuitable, choose a local perennial that matches the later timing and footprint.
- 7Bulb and hellebore pockets
Reserve two irregular low pockets after every perennial circle and access opening is fixed. Fill them only with locally hardy white bulb and hellebore selections whose labels match the mapped sun, moisture, mature spread, and foliage period. Keep one pocket beneath the future iris line and one beside a peony anchor. Record bulb leaves separately, since their ripening space remains occupied after the white flowers finish.
Related reading
Sources
- Perennial Gardening. Colorado State University Extension. Source record · Accessed 2026-08-30.
- Drawing a Landscape Plan - Site Analysis. University of Georgia Extension. Source record · Accessed 2026-08-30.
- Creating your garden plan. Royal Horticultural Society. Source record · Accessed 2026-08-30.