Grow · spring ornamental grass cutback
Cut Back Deciduous Ornamental Grasses Before New Growth
Separate deciduous grasses from evergreen look-alikes, read the crown, and remove last year’s stems before fresh shoots are caught in the cut.
Published Last updated
In this guide
- Decide whether the clump is truly deciduous
- Choose combing or cutting from living tissue
- Choose the spring window from growth, not the month
- Read the crown before choosing a height
- Make the cut without catching new blades
- Clear the crown and inspect what winter concealed
- Handle the cut material as garden material
- Watch the first flush before declaring success
- Steps
Decide whether the clump is truly deciduous
A straw-brown fountain that collapsed or remained dry through winter is a strong deciduous cue, but color alone is incomplete evidence. Pull gently at several leaves and inspect the center for live green tissue before treating the entire plant as dead top growth. Carex, Luzula, blue fescues and some Stipa can hold living leaves and need combing or selective trimming, not a uniform low cut. Schedule the work when deciduous stems are still dry and new blades are only beginning to move. Confirm the choice by inspecting the color and attachment of the old foliage, plus the position of new shoots at the crown. The safe finish is reached when dead stems are removed without clipping the fresh green growth or scalping the crown.
Recover the plant name from a label, plan, photograph or flowering habit whenever the crown is ambiguous. Calamagrostis, Miscanthus, Panicum and many Pennisetum cultivars are commonly managed as deciduous clumps, yet their emergence dates differ. A misidentified evergreen grass can be disfigured for a season, while a late-emerging deciduous grass can tolerate waiting a little longer.
Use the decide whether the clump is truly deciduous stage to compare the color and attachment of the old foliage, plus the position of new shoots at the crown across the whole planting, including one unaffected reference point. Continue only where that evidence agrees with dead stems are removed without clipping the fresh green growth or scalping the crown.
The first decision is physiological, not visual. A straw-brown clump with no living blades is normally handled as a deciduous grass, while Carex, Luzula, blue fescue, and other evergreen or semi-evergreen plants may carry useful foliage through winter. The RHS recommends combing dead leaves from most small evergreen grasses and sedges, not cutting the whole crown. Stipa tenuissima can behave as evergreen in mild regions even though it is often classed as deciduous, so the same named plant may need a lighter cleanup after a warm winter.
Choose combing or cutting from living tissue
Use the foliage check to choose the operation: living attached blades call for selective cleanup, while a confirmed deciduous clump can lose its dry stems. New green shoots hidden among old stems limit the cut. If those shoots cannot be kept clear of the blade, stop broad shearing and work in smaller visible sections.
Choose the spring window from growth, not the month
Old seedheads can remain through winter for structure, then lose their value as wind breaks the stems and the crown begins active growth. Schedule the work before new leaves rise far enough to mingle with last year’s stems. In mild districts that window may arrive in late winter; colder gardens may still have a frozen or saturated crown when a calendar says spring. In this case, success means dead stems are removed without clipping the fresh green growth or scalping the crown. Let the next inspection test whether dead stems are removed without clipping the fresh green growth or scalping the crown; the workday shows only the starting condition.
Some warm-season grasses remain dormant well after cool-season grasses have started. Wait for the species-appropriate cue if old stems still shield a tender crown and no fresh growth is visible. Delay also makes sense when wet soil would be compacted by kneeling, hauling or repeated foot traffic around the clump.
A late cut is possible, but it demands slower hand work around every green shoot. Separate live blades from the dry bundle and use pruners in small sections, and keep shears within visible dry sections. Fresh blades cut at half height will carry squared brown tips until later growth disguises the mistake. Compare attachment and color of old foliage with new-shoot positions across the entire crown. Keep living evergreen foliage and late-emerging crowns intact.
Early to mid-spring is the broad window because old stems have completed their winter role and new shoots have not yet risen far. Species and climate narrow it. The RHS notes that Miscanthus is commonly left until mid-March or April and that late Pennisetum can wait until late April because old stems shelter the crown. A warm wall, slope, or urban bed may advance shoots well ahead of the local calendar. Inspect the center and outer ring of every clump before setting a blade height.
Read the crown before choosing a height
Move the skirt of dry foliage aside and locate the highest new green points around the whole circumference. Set the first cut above those shoots, then lower individual dry stems only where the crown is clearly dormant. Uneven crowns are normal, so a slightly varied finish can protect growth better than forcing a flat mechanical plane. The finished work must allow dead stems are removed without clipping the fresh green growth or scalping the crown. Weather and new growth can clarify the color and attachment of the old foliage, plus the position of new shoots at the crown during a measured pause.
The old stem bases also reveal crown health. Firm basal tissue and evenly distributed buds indicate a stable clump; a hollow center, loose divisions or sour wet tissue call for diagnosis before cosmetic cutting. Cutback will expose decline but cannot correct chronic waterlogging, buried crowns or a plant that has outgrown the site. Separate seasonal timing from cosmetic urgency. The useful window is when deciduous stems are still dry and new blades are only beginning to move.
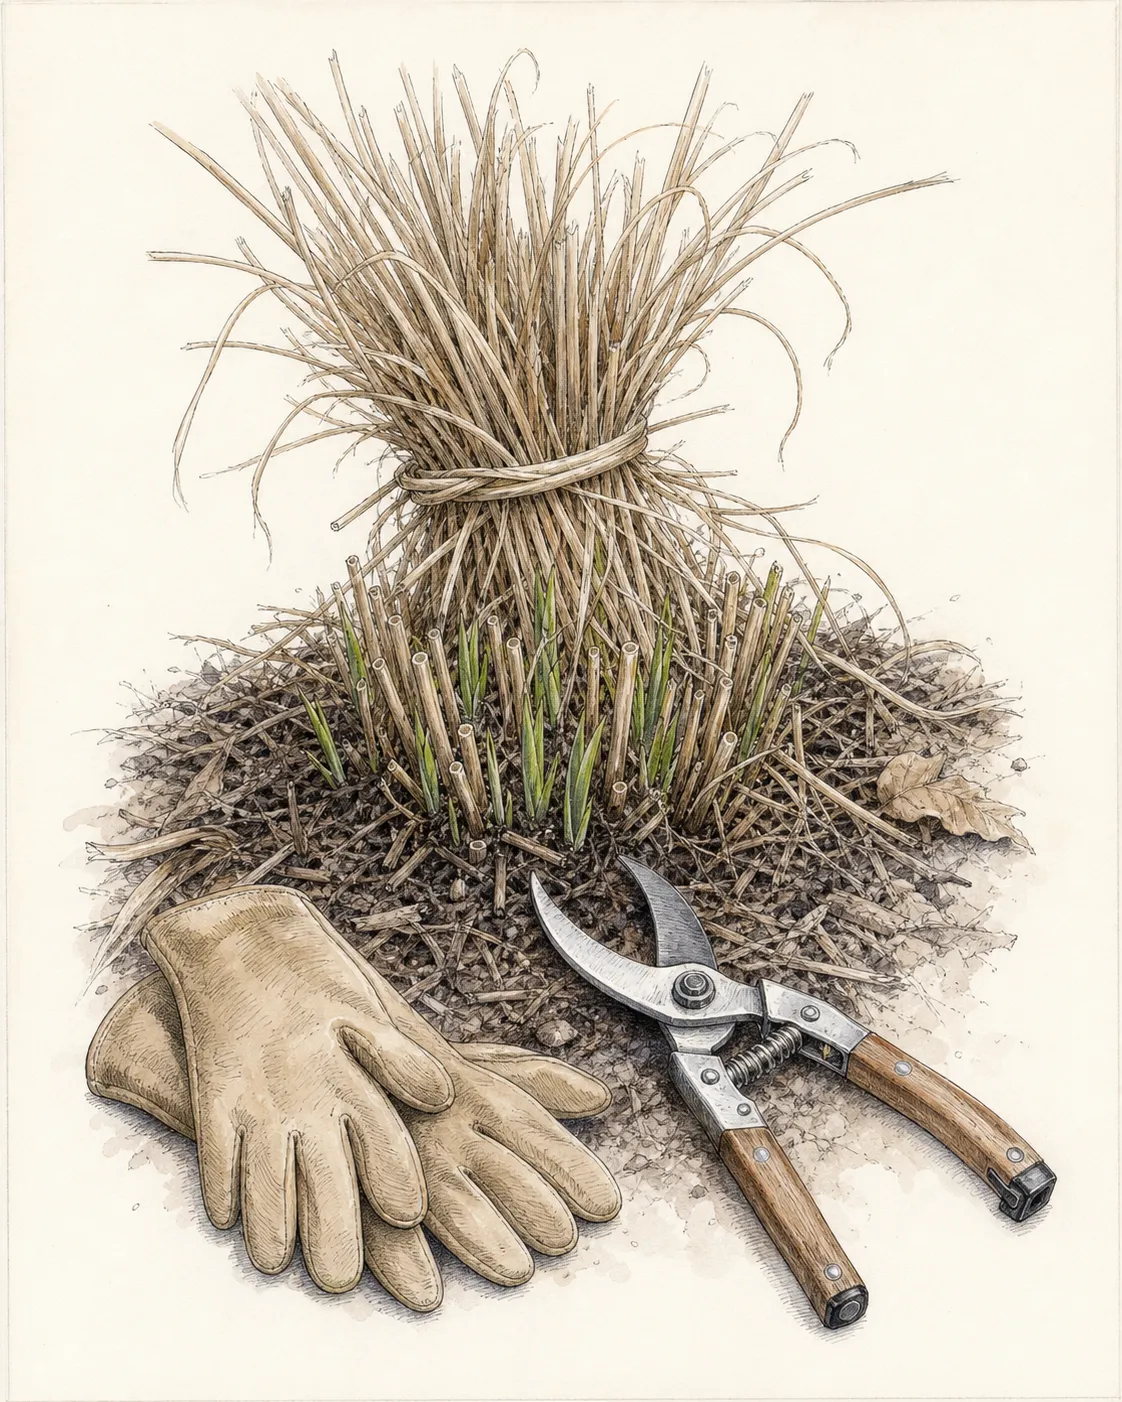
Iowa State advises cutting many dormant ornamental grasses to about 2–4 inches, but that range assumes new growth remains below the cut. Once green blades have entered the old stems, a taller, uneven first pass protects them better than a low uniform cut. Crown shape also varies: a broad old Miscanthus may expose buds at different levels, while a smaller grass can be handled with hand shears close to the base. Remove only dry material whose attachment and color make dormancy clear.
Make the cut without catching new blades
Wrap tall dry stems loosely with twine before cutting so the bundle lifts as one manageable sheaf. Work around the clump in sections, keeping the cutting edge visible and angled away from the crown. Large stems may need loppers, while fine grasses can be handled with sharp shears if green growth is not mixed through them. Compare that setting with the color and attachment of the old foliage, plus the position of new shoots at the crown.
Wear eye protection and sleeves when stems are rigid or leaf margins are sharp. Stand to the side of the bundle, cut with controlled strokes, and move the removed material before reaching into the center. Burning the crown is unsafe and can injure living buds; cutting and removing the stems gives more control. Stop once dead stems are removed without clipping the fresh green growth or scalping the crown.
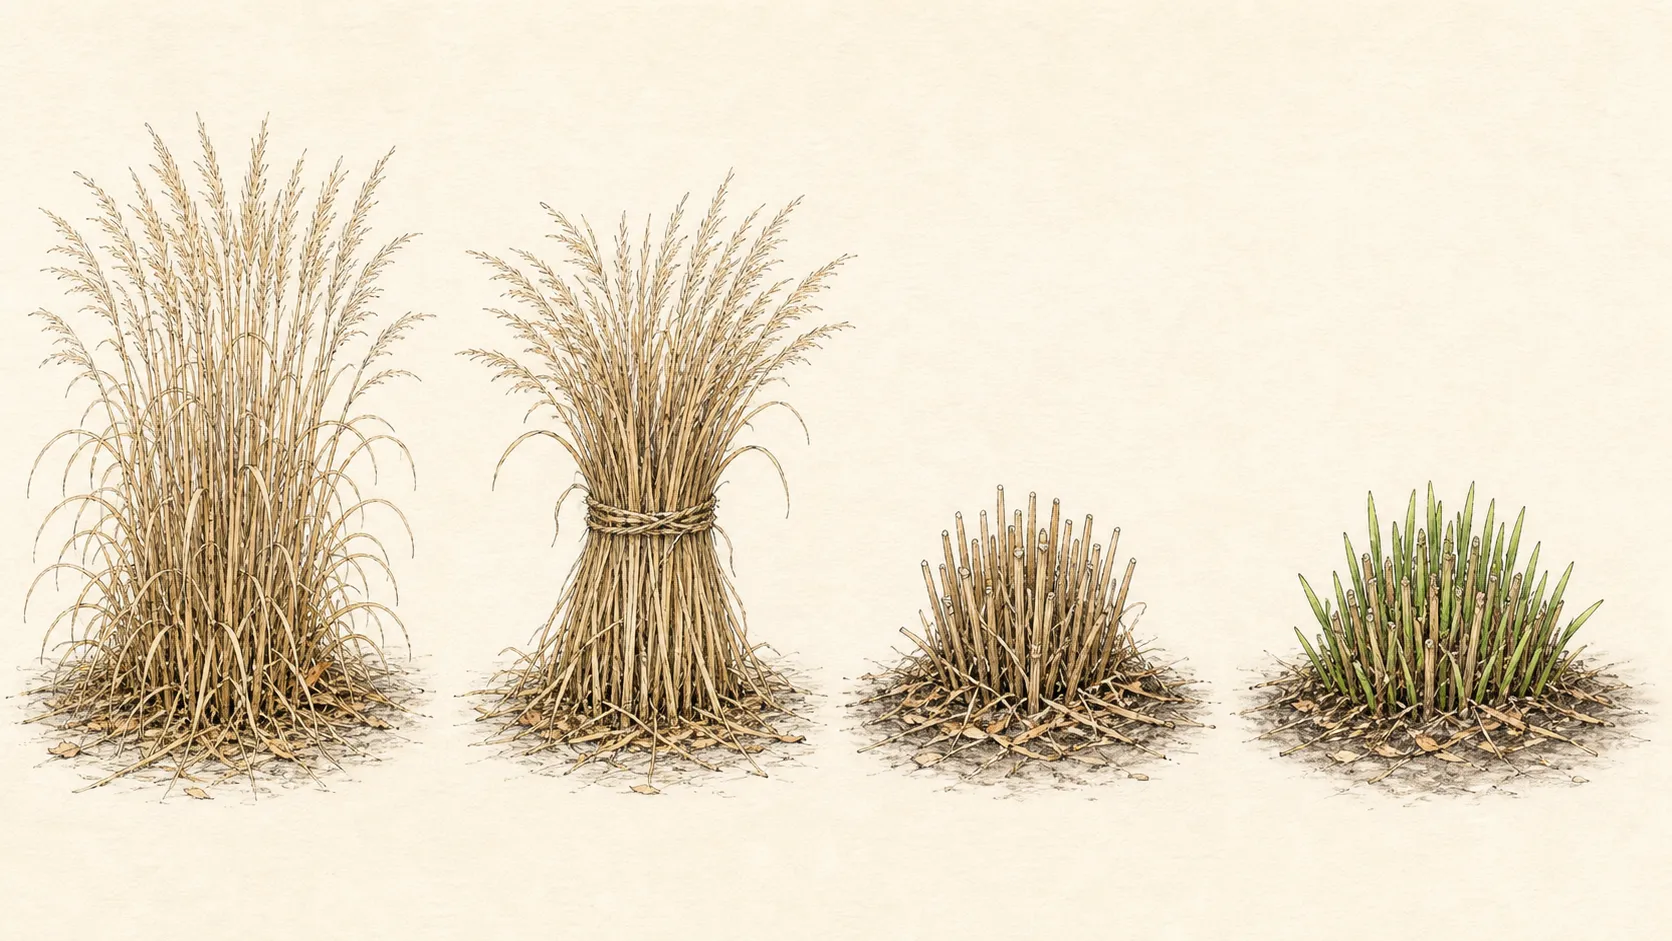
Leave short sound stubble where lowering the cut would nick buds or bury the tool in accumulated debris. Loose dry leaves can then be teased out by hand or with a small rake held almost parallel to the ground. Pulling hard across the crown can uproot young divisions and tear new shoots even when the cutting itself was careful. Let the first visible shoots set the lower limit of the cut. Evergreen sedges and grasses need loose brown foliage combed out or dead stems removed individually, not the full cut used for dormant deciduous clumps.
Bundling tall stems before cutting limits litter and keeps stiff leaves away from the face, and a loose tie keeps the crown upright. Work around the perimeter in small sections so the blade path remains visible. Hand pruners or shears suit thin stems; loppers may be safer on coarse, rigid culms. Powered hedge trimmers save time on a large dormant clump only when stones, wires, emerging bulbs, and green grass shoots are outside the cutting plane. Stop whenever the tool begins to drag living tissue.
Clear the crown and inspect what winter concealed
Remove matted leaves, broken stems and windblown litter that seal moisture against the center, while retaining ordinary soil cover beyond the crown. Look for waterlogged pockets, rodent tunnels, heaved roots and stems that have detached from the base. A clean view allows selective correction without turning the bed into bare cultivated soil. Record the color and attachment of the old foliage, plus the position of new shoots at the crown before the work begins.
Established ornamental grasses on ordinary garden soil seldom need an automatic spring feed. Use soil evidence and species requirements before adding fertilizer, since high nitrogen can produce soft growth and lodging. A modest surface mulch may support soil structure, but piling compost into the crown traps moisture and obscures emerging shoots. Account for exposure, grass type, local spring temperature, and the amount of winter debris all differ.
Winter debris can conceal vole runs, soft crown tissue, standing water, perennial weeds, or a dead center. A firm, evenly budding crown needs no corrective treatment after cutting. A hollow center in an otherwise vigorous clump can be marked for division at the species-appropriate time, while softness or odor calls for drainage and disease assessment. Established grasses rarely need routine fertilizer; the RHS and Iowa State both caution that ordinary garden soils often supply enough, and excess growth can become pale or floppy.
Handle the cut material as garden material
Dry stems free of persistent disease can be chopped for an appropriate compost system or used in a managed habitat pile where local practice allows. Seedheads should be assessed separately if the grass self-sows beyond its allotted space. Bag or dispose of diseased material according to local guidance, not distributing it through the garden. After cleanup, the crown should be open enough for new blades to rise without being buried in chopped stems. Preserve the clump's natural outline and a firm route for next year's work, not shaving adjacent plants into one level surface.
The removed bundle is also a record of timing. Note whether green blades were already trapped inside, whether stems shattered cleanly, and whether the center stayed wet after surrounding soil drained. Those observations refine next year’s date more accurately than repeating the same weekend by habit. Use the color and attachment of the old foliage, plus the position of new shoots at the crown to decide whether the task is corrective, preventive, or unnecessary. That distinction controls timing and scale.
Healthy dry stems can enter a home compost system if they are chopped to a size that mixes and breaks down, or they can be used in a managed habitat pile where local practice permits. Seedheads deserve a separate decision because viable seed from an aggressive or unwanted grass should not be distributed through mulch or compost. Material with persistent leaf spots, rust, or unexplained dieback should follow local sanitation advice. Rake lightly around the crown and carry bundles out along the planned route, not trampling moist spring soil.
Watch the first flush before declaring success
New growth should emerge through an open crown without a roof of old foliage. Check after one or two warm periods for clipped tips, dead sectors or shoots diverted sideways by stubble. A sector that remains empty may mark crown loss or division need, not simply slow spring growth. Warm-season grasses can remain dormant after nearby cool-season plants have started. Use the plant label, attached green tissue, and crown firmness before deciding that an apparently empty sector is dead.
Resist shearing a second time merely to make every clump match. Different cultivars and microclimates will rise at different speeds, and a clean low silhouette lasts only briefly. The lasting objective is an intact renewal of foliage and a crown that remains visible, draining and accessible.
Fresh blades should rise upright through the opened crown during the next warm period. Brown clipped tips show that the cut intersected new growth, while a single empty sector may reflect winter crown loss, not late emergence. Compare the named grass with the same clump's past timing before digging or replacing it. Photographing shoot height at cutting and again two weeks later creates a useful local schedule. Water only when soil conditions and the species require it; cleanup itself is not a reason to saturate the root zone.
Steps
- Level
- easy
- Time
- 20–60 minutes per clump
- Tools
- bypass pruners or hedge shears, sturdy gloves, eye protection, soft garden twine, leaf rake
- Materials
- tarp or reusable garden sack, mulch only where the bed needs it
- 1Identify the growth habit
Confirm that the clump is deciduous by checking its name, dry attached foliage, and absence of living green leaves through the skirt. Comb or selectively trim evergreen grasses, and reserve this sequence for confirmed deciduous clumps. The RHS separates evergreen from deciduous grasses because hard cutting living foliage can leave lasting damage. If green blades remain attached, remove loose dead material by hand and clip only stems that are clearly dead.
- 2Wait for workable soil
Choose a day when the crown is not frozen and the bed will not compact underfoot. Inspect for new shoots and postpone broad shearing if green blades already extend high into the dead stems. The usual window is early to mid-spring before new shoots rise through the old stems. Miscanthus and a few late-emerging grasses can be cut later, so use the named grass and visible shoot height together.
- 3Bundle the old stems
Tie tall dry growth loosely above the intended cutting zone. Divide very large clumps into several bundles so each section can be controlled without bending or tearing the crown. Place each tie well above the intended cut and carry the bundle away as a unit. Multiple smaller bundles reduce leverage on a broad crown and keep dry stems from whipping across neighboring bulbs or faces.
- 4Cut in visible sections
Use sharp pruners, shears or loppers appropriate to stem thickness. Keep the blade above emerging growth and work around the circumference, not reaching blindly through the center. Iowa State gives 2–4 inches as a common height for dormant deciduous grasses, but exposed green shoots take priority over that nominal target. Raise the blade wherever new growth has already entered the old canopy.
- 5Comb and inspect
Lift away loose leaves and debris with gloved fingers or a light rake. Check crown firmness, drainage, empty centers and accidental damage before applying mulch or leaving the bed. A firm crown with evenly distributed buds needs only cleanup. A persistent dead center can be marked for later division; soft tissue, standing water, or unexplained dieback warrants diagnosis before mulch is returned.
- 6Record emergence
Return as new shoots extend and photograph the clump. Note cut timing, shoot height and any dead sector so the next spring cut can be scheduled from this plant’s actual response. Record the species, date, remaining stubble height, and whether shoots were already visible. That small record is more useful next spring than a fixed calendar date because emergence moves with species and weather.
Sources
- Ornamental Grasses: Cutting Back. Royal Horticultural Society. Source record · Accessed 2026-08-30.
- Ornamental Grasses for the Home Landscape. Iowa State University Extension and Outreach. Source record · Accessed 2026-08-30.
- Ornamental Grasses. Colorado State University Extension. Source record · Accessed 2026-08-30.